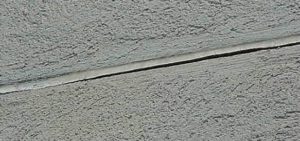
Concrete expansion joints allow expansion with temperature & humidity changes. This is important to prevent water/ice from shortening the life of your concrete driveway or walkway. If you are selling, this is important for curbside appeal.
This will prevent moisture from getting under your concrete sections: this is basic erosion.
The list of everything you need appears at the bottom. To seal asphalt, read this.
How to replace driveway joint sealant:
1. Remove what is loose from the old joint.
Use a utility knife to remove old material and clean any residue that you can. You may need to use a chisel or go nuclear with a variable speed angle grinder with a cutting/masonry disc. Don’t use high-speed grinders: they will melt the old sealant. Be sure to use the safety guard and cut-resistant gloves (linked below). More fingers are lost with these cutting wheels than with saws.
You may need to dig down an inch to the foam backer foam ‘rod’ or whatever is in there. Acetone may help dissolve synthetics if there are any. Usually, it’s just old wood.
For the bits of old seal that will not come out, leave it. If it is still tight against the slab, that is what you want. Use a shop vac with a small crevice tool to get maximum suction and get all the loose bits out. Water pressure works too, but then you have to let it totally dry which could take several summer days.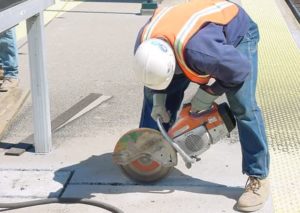
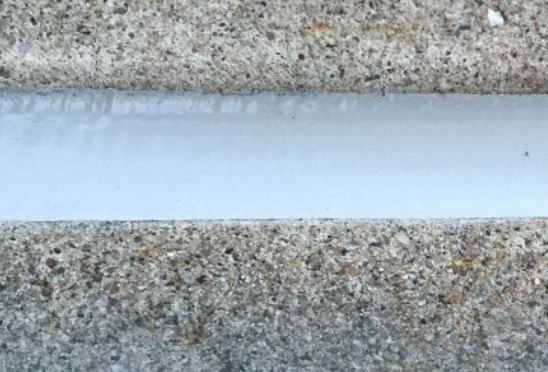
2. Insert backing rod’
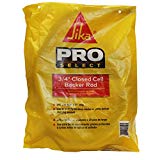 Before you shoot in the sealant, insert a closed-cell foam backer rod in between the joints. Avoid plywood: it’s not nearly as good as foam. This product is ¾ inch but you can get them in any size. This is also very inexpensive. This is made from low-density polyethylene foam that will fill most of the joint, and you’ll use less sealant. Get the size that is about 1/8 inch larger than your joint. If the joint is too big, braid 3 smaller rods together.
Push it down below the level of your driveway surface about ¼ inch. This gives you plenty of room for a good sealant layer. You don’t want it too thick or too thin.
3. Watch the weather forecast.
The sealer cannot be applied below 40°F (4°C). Pick a moderate day for best results, with no rain expected for another full day. Don’t drive on it for 5 days because it takes that long to cure, and that is for a moderate summer day.
4. Optional: sealant primer
I recommend highly the Silka products and really nothing else. Silka is the construction standard and they make products for all types of building materials from homes to high-rises.
Silka tells me that a primer is not absolutely necessary, but will always improve the bond between the concrete and the sealant. It’s the only product on this page that could be described as ‘expensive’, but a pint will last you a lifetime of sealant changes. You’ll need a small brush as well.
5. Prepare the tube of sealant
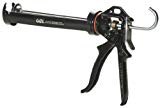
 For the Silka sealant, I recommend buying several smaller size tubes of sealant: unless you have a larger size caulk gun. Most homeowners don’t need a gun bigger than the 10-11 oz. size. This size tube is much more commonly used in other projects: glue, caulk, etc. I’m a professional painter and I never have owned a large gun.
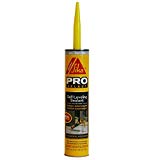
Go with the best: Sikaflex Pro. It stays flexible and is really sticky.
Cut the nozzle at an angle and use a long skinny poker to break the seal. I explained all this in my post about how to load caulk guns. Experiment with the size of the opening: you don’t want it too small. Have some disposable rags handy. Acetone is the solvent for what you get on your hands. Gloves are smart.
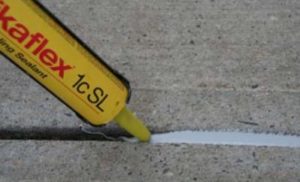
6. Let the goodness flow
Shoot in the Sikaflex sealant. Remember, it’s self-levelling, so no need to smoosh as you do with caulk. When it dries, it’s watertight and you’re ready to apply whatever driveway paint or sealant you like on your concrete.
Below is the full list of materials you’ll need to do this job.
For other concrete treatments start with these posts (they lead to all my posts on concrete):
If you have an old sealant (e.g. clear waterproofing), have a look at concrete prep for stain or sealant/paint.
The other post is if you plan to prep for stain or paint concrete in any condition.
The Applachian Mountians were once as big as the Rockies today. Erosion at work.
List of all materials you could need
- Utility knife and spare blades
- Rags and acetone (in most nail polish remover)
- Cut-resistant gloves
- Variable speed angle grinder with a high-quality cutting disc
- Sikaflex self-levelling sealant
- Sikaflex foam backing rod
- Caulking gun for 10-11 ounce tubes
Any comments? Please feel free below.
I’m in the process of pressure washing ( again in Fl) a very very large concrete area- like tennis court size. I’m sick of pressurewashing such a large area but my question is the concrete seems to be wearing and shows little shells. I would like to protected the surface by painting,I think and make pressure washing less work if possible. I did paint with some very thick paint/stain a patio that the squares were getting stained and pitted looking and it seems to be holding up well and had a grit and color to it. I of course want the driveway to look gray and natural. I’m wondering about a sealer or paint that might leave the surface slick which wouldn’t be good. What would be my best choice?
Any driveway paint, then you put silica into the wet paint and roll/brush it slightly…then it’s very gritty. It’s done for decks, but should be fine for a driveway…just do a test spot and let it age a bit before you decide. That’s the best I can do without seeing it. Good luck!
Wow! Thank you SO much!
I have questions, Please:
(Disclaimer: I am not a good painter nor great w/ tools, yet… my husband use to do it but can’t anymore & things are starting to fall apart.)
Okay:
1) for the Driveway here in StAug FL, they used WOOD as ‘joints’(?) between the sections of concrete. They are broken and look bad. What should I use to replace? Our temps run 30 degrees – 100 degrees. And we are near the marsh area, on a lake if that matters – & it rains a lot.
2) for the small square covered ‘porch’ area in front of door, I’d love to do a different color, like a super light gray, almost white. Should I paint it yo match the driveway? (Don’t know a color yet but it’s almost a white color now.)
Also, Will a light color make it hard to maintain?
3) OK, So I’m great at pressure washing & using hand sanders. For sanding The small front door area, do I want it smooth or a little gritty? If smooth, what grit should I use on the sander for concrete?
4) I have more questions but maybe I won’t exhaust you & see what you think of the 1st 3.
Also, just reading your article makes me want to run out and start now – and it’s perfect weather now & all week. I just need to make sure I have the right ‘stuff’.
(Also, some of the links don’t work to your recommendations.) Do you have an email? Thank you!
Hello. Thanks for the nice words. If you have further questions after this please put your request on the website not email.
Taking your questions in reverse order, since I cannot tell what you’re painting, I can’t really give advice on how much sanding you should do. But really, the only thing that matters is that you sand every little bit at least somewhat. Scratch every little square millimeter. This ensures bonding of the next coat of paint. For something like that I would probably use 50 grit or 80 to knock off the heavy stuff and then 120. Scratch the old paint up.
For the second question I can’t really advise on color, but I can tell you the same answer to the last question, which was be sure to prep it very well. No a light colour will not make it harder to maintain, as everything outside gets dirty anyway. If you want your front area to look nice just wash it once in a while. I would not use much pressure though at that point
On the first question that wood separator divider is used very pervasively. They are many options of what you can stick back in there. I personally would pull it out, clean out the grooves, and then buy a narrow piece of treated lumber. That’s pressure treatment. Get a piece that you do not have to cut to make it more narrow. That way all the sides get the pressure treatment. That will last at least 20 years. And it will look nice. The trick will be to make it stay in the slot and there are some types of caulk and glue that you can use for that. Obviously it would need to be very clean where you glue. I hope this helps. Good luck.
Question –
I just ground off many layers of old paint from our sidewalk… do I caulk before or after I lay down penetrating sealer?
Thank you!
Paint on sidewalk? I cannot visualize that. Caulking will not take stain or sealer so I cannot say what it will look like. The concrete will look wet after the sealer. Darker.
Don’t know what else to say. Good luck.