
All painters and paint store reps agree: DIY jobs go bad mostly because of inadequate concrete prep (and moisture). The final look and durability rest on your prep, literally. How to prepare concrete for painting is very straightforward. Done right and your paint will never peel.
Concrete paint peeling problem: probably poor prep. I’m funny too. Funny lookin’. We don’t laugh at preparing concrete floor for paint.
Important points for preparing concrete floor for paint
- Think it through: we ask important questions below.
- Make a list of supplies you will need (including the painting phase later). Here is a starter list of basic painting tools to consider such as scrapers, rollers, brushes, etc. No tray/pan needed. More below.
- Concrete tools for prep and paint, stain are also all on one page. They are described below.
- Don’t think clean up yet: we’ll link you below to some tips. Cleaning is not a drag.
- Start by moving out all the furniture etc.
How to Prepare Concrete for Painting: Essentials
- Profile? The roughness of the slab is only one key. Too smooth and nothing will stick. I explain the 2 ways to etch: etching or grinding (but you may not have to).
- Got moisture? Two tests you really need to do: An easy test for moisture content (all concrete is always wet somewhat), and an easier one for moisture absorption. Moisture is a real enemy.
- Alkalinity? Another test you might consider: new floors may be too alkaline to take any coating as is, and could require a primer. It depends on the concrete recipe used and age.
- Other tasks to handle (cracks? mold? need primer?)
- Prepainted floors need love too: Johnny get your scraper.
- Cleanliness prevents most failures: You have to rinse, rinse, rinse, before painting cement.
- Be gentle with me, it’s my first month (of curing).
Painting previously painted concrete? Jump to preparing concrete for painting if you have a painted floor.
Just poured concrete must age a month to allow all the calcium to come to the surface. If you don’t wait, this process will PUSH your coating off the surface.
Steps to Prepare Concrete for Painting
1. Profile
Too smooth on purpose: Many builders will finish the concrete for a garage to be very smooth. This decreases the porosity of the concrete, and your coating/paint will not bond well.
If you need to acid-etch (you likely won’t), and if you don’t clean it off very well, you leave calcium dust in the concrete pores. Uber bad. This is why we rinse over and over. And over again.
At the bottom of this post is a short section on etching with the link to the full page: it’s essential knowledge but we separated it out for clarity.
If you are not sure about the roughness or profile, you need to have an expert check it. She/he will tell you that the “concrete surface profile” (CSP) needs to be between a CSP-1 and a CSP-2 level and how your slab ranks. High-build coatings may require different profiles.
Remember: acid etching will not remove oil. Cleansers/degreasers do that part of preparing concrete floor for paint.
2. Moisture
Testing is key: The water tests are easy. You need to test for penetration of water and the wetness of your old or new slab. How it’s done:
Water-drop test: A small amount of water (the size of a coin or so) should absorb within a minute into a floor that is ‘open’ to accept the epoxy coating. Non-profiled, non-sealed concrete will bead up the water somewhat before slowly sinking in and evaporating and will remain wet for some minutes.
There are other moisture tests you should know about: it’s all written in our short post on how to test concrete before painting. These simple tests are all most people do unless they suspect a specific problem.
Did you fail your moisture test?
If water won’t absorb well you have a sealant and you have need to choose the right way to remove it based on your plans. If you plan to acid-stain, do not grind the top layer off, and do not acid etch it off. The stain needs that layer and acid will make the stain fail. You’ll use a chemical. Read these two articles: how to prepare old, sealed concrete and a post on concrete etching and skip the parts about acid washing.
If you will later paint the concrete, it’s fine to grind or acid wash.
If you have moisture coming up, there’s a cure for that. Painting cement is fine as long as it is not too wet for painting (ask a pro to help you and/or read the post on testing concrete).
What’s the cure? Depending on the primer, it can act as a moisture barrier for floors that are built on wet soil. This can lower the humidity inside also. There’s more on primers just below.
Single component (“1K”) epoxy paints (not necessarily the 2K), are good at blocking moisture too. If you think you have a moisture problem, definitely call an experienced concrete pro. They can advise and also prepare concrete for paint.
We wrote about concrete paint here.
3. Alkalinity
Most floors, even new ones don’t have an alkalinity problem, but new concrete is questionable.
For brand new pours, never paint in the first month, and know the alkalinity of the slab: too high and you need a primer (unless your paint is formulated for that). When preparing concrete floors for painting, most people skip this aspect, which is probably fine if the slab has aged.
For this test, we send you to the concrete testing post (the same one as the moisture tests) that explains how you can do the testing yourself. Here is the concrete testing we do before painting.
An alkalinity test is shown in this video.
 4. Other Considerations on How to Prepare Concrete for Painting
• Got cracks?
It doesn’t matter whether you treat them before or after you prime. But if your filler does require a primer… ’nuff said.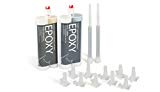
- Large gaps should not be caulked but filled with special water-tight concrete crack filler: see this good filler (photo link).
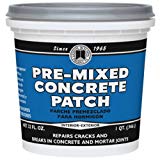
- There is one other large crack filler we like: This product from DAP is for all intents and purposes, concrete and could be primed but does not require it.
- For small-ish cracks, use cement caulk like this one we recommend.
- Caulk does not need a primer. Here is our article on caulk guns.
• Got mold?
Mold must be killed with mold killer, NOT bleach! These days a better choice to kill mold is the EPA approved Mold Control, a safe bleach alternative that leaves a mold preventative film you can paint. No respirator needed.
Remember that bleach is a deadly poison, and protective gloves, a quality respirator with the appropriate filters, must be worn if you use it.
But bleach will leave some mold spores to reproduce stronger and faster: use the Mold Control linked just above!
We have simplified the complex world of respirator filters.
• Prime or not to prime?
-
 Most concrete paints generally need no concrete primer. But new concrete may be very high in alkalinity which is unpaintable without a primer. Old slabs are different: they have had time to react with the air and the alkalinity has come down. (Always wait at least 30 days for new concrete before preparing concrete floors for painting in any case). For new concrete (less than a year old), test the alkalinity (see that section just above).
- If you need it or if you did not test but don’t want to risk it, use a concrete primer that can handle the high alkalinity. But first, check your paint’s label: it may be formulated for high alkalinity so you won’t need to prime.
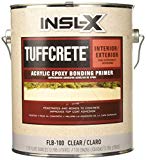
- Our choice for a masonry primer. Our go-to concrete primer is TuffCrete from Benjamin Moore and is intended for garage concrete floors and concrete priming.
Obviously, if you prime, do the cleaning, etc., below before priming!
• Finally…
- Before starting any etching or cleaning, obviously, clear stuff out if you can.
- Mask small things with green painter’s tape: it can stay on for days and not leave a glue mark (unlike the old tan stuff).
- Mask the baseboards and walls up a foot or more with paper or plastic (we use this 3M masker that comes with blade) and some green painter’s tape. Leave your masking up for the painting phase. We like the 1-inch green tape linked above to use on the masker.
- We also use the masking paper with that unit, not just the plastic it comes with. One roll of this paper goes a long way.
5. Was your floor ever sealed or painted?
No? Skip down cleaning (next section).
How to paint over an already painted concrete floor is like painting any floor: there is no shortcut in the scraping work, sad to say. Waterproofers or sealers are the same as paint. Acid etching will not help. You will have to chemically or mechanically remove or ‘open’ the old coatings: it’s the only way, sorry. Again, here is the full concrete prep link, but the short answer is:
-
-
- Clear sealants need to come off and that means that you have to remove the top layer of the concrete if you will paint, or chemically remove the sealer if you will acid-stain (or paint for that matter). See the bottom of this post about grinding: it will link you to the full how-to post.
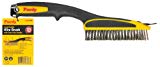
- Remove loose paint with a scraper and/or this quality wire brush. Don’t try to save money here because the bristles fall right out of the crappy ones.
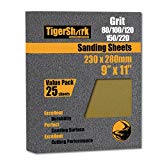
- Feather sand the edges of paint/bare concrete using sandpaper of assorted grits. You’ll need 80 and 100, but it’s good to have a few extra grits.
- Get all the paint sanded: every square inch.
- Wash the bare spots well (see cleaning below).
- Clear sealants need to come off and that means that you have to remove the top layer of the concrete if you will paint, or chemically remove the sealer if you will acid-stain (or paint for that matter). See the bottom of this post about grinding: it will link you to the full how-to post.
-
6. Cleaning is where many DIY’ers fail in the concrete prep
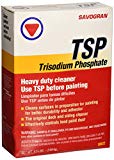
A general cleaning method would be to sweep the floor and then scrub it with the cleaners we discuss just below. We stopped using TSP because it’s too rough on the skin.
Pressure washing is fine if you did not just acid-etch or grind. Before doing any pressure washing, you do not want tiny particles on the floor. The pressure can drive them into your floor only to work loose later. If you want the best value in pressure washers, this Sun Joe will never die. Ever.
Key point before painting/coating: Let it dry totally. A fan and space heater is very helpful here, especially if you want to do the work then next day. Again, getting it as dry as possible is key in preparing concrete floors for painting.
Particles of concrete will not be all washed away so use a wet/dry vac and soak up water. You can hose more water as you vacuum to help you get it all the stubborn bits.
 While you are at it, clean the first few inches of your driveway because the dirt on that will keep your masking tape from sticking later on.
Do your cleaning in this order:
- Get a large part of impurities with just water: Hose or use a bucket, then vacuum, then mop, or wet-vac again. We do this twice before applying the cleansers below.
- We always prefer to flood the floor with a hose and squeegee the water down a drain if there is one. Be sure the drain isn’t clogged first!
- We suck up water with wet/dry vac. We like this wet/dry vac for power and portability. Cleans carpets too.
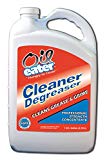
- A must: clean the concrete with the degreasing solution shown here. This removes all the oil and grease etc that will prevent the bonding of your paint/coating on the concrete. We really like the non-toxic Oil Eater degreaser because we can use it in different strengths all over the house. Use full strength to prepare concrete for painting or staining, but dilute for general cleaning.
- We also really like GP66 Green Miracle Cleaner: a real American success story, “Since 1966”. Comes in big buckets too.
- How to apply the cleansers is in a post on our 3 top concrete degreasers/cleaners. Each is about the same, but it’s a quick read.
- We use a stiff brush to push around the cleanser: the brush is linked just below.
- Try to get 99.99% of the rinse water each time you rinse because the rinse water contains loose concrete particles. If you leave on them on the floor, they will get into the paint. This makes that spot easier to chip, especially in the traffic lanes.

- Rinse several times until you are sure it cannot be cleaner. Not doing this can make the paint bubble or delaminate, and become a monster that keeps you up at night.
7. It’s drying time again, you’re gonna cure me
Let the slab dry totally: this is trickier than it sounds. Moisture is the most common cause of coating failure. If it is not totally dry, you very well may have bubbles or delamination later.
A wet/dry shop vac is very useful when rinsing your floor, not to mention the many other uses you will find for it. Mopping cannot get all the little bits.
-
- A wet/dry shop vac really helps to speed the drying.
- Be patient and let the concrete dry completely. Fans will help.
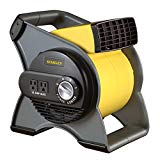
- The floor blower you see here has almost perfect ratings. Electrical outlets on the side: good idea, Stanley.
- Finally, if you have one, a dehumidifier is the best way to dry the slab quickly and to the fullest extent.
Concrete Prep: Special Section on Etching
To etch or not to etch, that is the question… Whether ’tis nobler to GRIND THAT BABY
Despite what other websites say, most concrete floors do not need etching. If the concrete is very smooth (some builders trowel it smooth) then yes, you need to etch either with acid or with a floor grinder. Yow-sa.
Should you grind? It is often recommended as many concrete slabs, especially when trowled smooth have a layer of ‘laitance’. Trowling brings moisture up to the surface. This creates a weaker top layer that should come off. Grinding is the only way.
Test: Use a screwdriver type thingy and try to try to make a divot. If it’s not easy, you don’t need to grind. If a layer/chunk jumps off, you really should. After that, clean (more below) and paint.
To find out if you are one of the lucky ones that need no etching, switch over to the quick read on etching (linked just below). It explains what acid will not do for you as well.
We separated the etching post out for simplicity. Start with the self-test for your concrete. If you need to etch you’ll find the full “how-to” acid wash or grind instructions right there.
Concrete Etching: Grinding or Acid Wash. It’s a 10-minute read.
Just a few key takeaways from that page:
- etching will not remove the oils
- wear a respirator! and other body protection including goggles
- rinse extremely well
- the end result should be a floor with a feel of 100- to 80-grit sandpaper
We don’t rent floor grinders. We prefer an angle grinder used with a diamond edge grinding wheel shown. For nearly the cost of a rental, you get to keep the very useful tool…for when you paint your house: ouch!
Summary
Prepare the concrete very well and you should have no problem. The homeowner who does this alone makes one of two typical mistakes. The slab is left wet or is getting wet in some way, or the slab is dirty/oily. To prepare concrete for painting means it becomes clean and dry. The list at the top of this post are all the key points for adequate concrete preparation for painting or any coating, so please remember them! If we can advise you in your preparations let us know below.
Was this helpful? Any comments? Please feel free. Have you started preparing concrete floors for painting? Any questions?
I want to paint a stencil design on the black concrete bathroom floor. The surface is uneven and poorly done. I can’t change anything, as there are heating coils underneath. My goal is to stencil a simple design to make the floor look a bit better. Any advice? Much appreciated.
I’m not gonna sugarcoat it, Carol. Whatever you put on the floor, whether tile or wood or concrete or anything, is going to rub off in time, especially in the traffic patterns. The best thing you could do would be to stencil it and then coat it with polyurethane or whatever you can make to bond to your existing floor. Concrete is tricky and bonding is tricky too. All floors wear out that’s all there is to it. My best advice is to do it in a corner and see how it stands up to some abuse. Since I can’t really see it, I don’t really know what more to tell you. Good luck!
THanks! 😉
planning to paint floors in 100yo house (Phoenix). slab was floated smooth and sealed (water does not absorb)
will I need to grind the whole thing, or is there a primer that will stick?
thanks,
russ
I’d have to see it. Call a painter, and OLD one and ask. Too much risk to comment, sorry