It can be done, but reading the various websites about using a backpack sprayer to spray stain gives you the wrong idea: these guys have not done the homework. You will quickly ruin a standard sprayer.
Most stains will destroy the seals on the average sprayer.
The good news is that you don’t have to pay that much more to get a backpack sprayer that can do it all…unless you do this for a living. If you intend to spray paint later, I’ve already written a popular review for the best airless paint sprayer for DIY projects.
There are some sprayers designed for acids and resins in stains, but most are not. With a sprayer designed only for garden spraying, you may or may not get through one stain job, but the next time you go for your sprayer, it will not pump nor hold pressure.
You don’t need to spend much for the best backpack sprayer that will really last. I shortened the list to 3 units: and two are very affordable.
Why use a backpack sprayer? Pump up sprayers don’t “atomize” liquids like an airless will. You don’t need to atomize deck stain (but you do for opaque stain). They give a nice uniform application, don’t need to be plugged in and are very easy to use. Not to mention the very a relatively inexpensive purchase price.
1. Backpack sprayers reviewed and recommended
First, the ultra-low budget. Smith Performance Sprayers (company website) makes a bottom-of-the-line 2-gallon unit that cannot handle stains but is fine if you only ever intend to spray a clear water-based sealer. Avoid stains with pigments.
Smith’s Deck and Home Sprayer is going to get you there.
A note about Thomson’s Water Seal. I strongly recommend that you do not use it. My painter buddies discuss the many customers disappointed about the lack of longevity of this product. See my post on the top stains today.
- 2-gallon sprayer for lawn and garden care, watering
- not designed to apply stains
- gunlock for continuous spraying
- “Viton” seals and gaskets
- pump has a high ratio so you need to pump less often
- 4 nozzles included
Chapin’s Two Choices
The Chapin International 30600 2-Gallon Deck Sprayer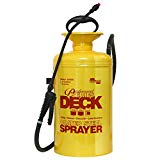 has a steel tank, you can see details here. This is very affordable and with care will really last, but will not handle stains with a lot of solids in the solution. Transparent stains and clear preservatives are fine.
- 2-Gallon tank
- 4-inch wide funnel mouth (lacks filter-see ‘how-to’ below to compensate)
- Compatible with deck cleaners, sealers, and transparent stains
- Comes with 3 tips: fine, medium and coarse patterns
- Reinforced hose
- Reading some of the bad reviews: most seem to be from users not straining with the type of strainer I link to below
- Don’t fill this all the way to the “2-gallon” line. Only fill it about 2/3 full: you need the pressurized air that will be doing the work for you
It seems that the users were not pumping hard enough. The manual seems to be misleading in that is says pump until you feel resistance. It should say ‘until it’s very hard to keep pumping’.
Loser: The Chapin 25020 is designed for stains, but if you take a look at the reviews, you’d never know it. Don’t buy it. Some folks were happy, but many miserable. For a few bucks more you can have the great all-around steel sprayer above.
The professional choice
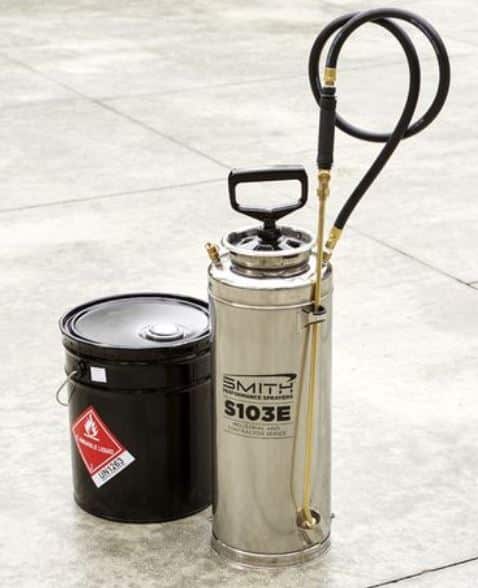
D.B. Smith company’s S-103 or S-103EX: any semi-transparent or transparent stain.
This the way they should all be made.
Professional painters use this to spray decks (not ‘solid’ or ‘opaque’ stains…these are basically paint).
This unit has seals are very different from the normal garden sprayer. They have a patent and call them “Vitonic stream” seals.
In any case, this is the pro level, and something you will put in your Will to give to your grandchildren.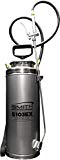
- 3.5-gallon capacity
- Stainless steel tank, pump barrel, tank, and dip tube
- Viton seals: long-term chemical resistance
- Spray sealants, water-based or solvent-based chemicals, oils, and acetone, etc. (wow)
- 2 brass tips (different flow rates)
- 85 p.s.i. with valve to prevent more
- Stainless steel 24-inch wand
- Four prong locking mechanism secures the pump tightly against an internal O-ring
- Cool: the pressure relief valve quickly releases internal pressure before opening lid
- The very strong nylon-core hose (50″) resists kinks and can handle harsher chemicals
- One-piece forged pump handle
- Wand and shut-off are stainless steel
Pricey, but if you want the best, there it is. Read more or buy it here.
They have a great Customer Service team. For a replacement filter, if needed, call 800 311 9903 or email Info at TheFGI dot com
2. How to Stain with a Backpack Sprayer
Remember: Brand new decking (pressure-treated or not) should not be treated for about at least 6-9 months (some say up to a year) after it is installed. It needs time to ‘open’.
One coat of stain only is usually recommended: read the label on the stain. If you can apply 2 coats, do so consecutively as soon as the instructions allow. But you will have to buy more stain obviously, but the protection will last longer. Read below about a great stain I used on my deck. Only needed once PER LIFETIME.
No primer is needed for any type of stain, in general. Some opaque stains may allow a primer coat first: read the info on your stain. You should pressure wash the wood and let it dry very well.
Move vehicles away and mask anything you do not want to get the stain on. We have a page of sprayer accessories that feature maskers, tape, plastic, drop cloths, etc. Check out the 3M hand masker.
Just below this are three sections on straining and masking and brushing when you spray stain.
- Clean the deck or surface to be stained with a pressure washer if you have it, or with a garden hose (which is much slower and uses a lot more water). Do this for even new (but cured) deck/siding/fencing, etc. This removes small particles that will interfere with the penetration.
- Optional: with your garden sprayer, prepare for step 2 by spraying on some wood cleaner. This is helpful if the wood is soiled as the pressure washer cannot get it all. Simple Green Deck and Fence Cleaner.
- Let dry. To the ba-ba-bone, Mr. Thorogood.
- When filling the tank, don’t let particles get inside: strain your stain! See below for that explanation.
- Tighten the lid tightly to make a good seal and pressurize. You’ll quickly learn how much pressure you need by watching the spray fan pattern.
- Test the spray pattern: adjust the tip to get it even. You can adjust the pressure by pumping and using the release valve (if you don’t have a regulator).
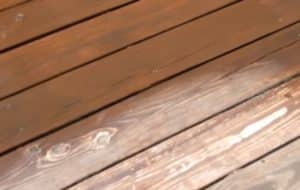
- Keep the sprayer tip about one foot from the surface and try not to ‘arc’ the tip: stay parallel to the surface for even distribution.
- Apply stain a section at a time until the wood is completely saturated, and if you can, ‘backroll’ or ‘backbrush’ (see just below). Some people just spray and walk away. Not as good, but often ok.
How to ‘backroll’ or ‘buckbrush’:
When a professional painter stains a deck with stain, he or she will brush and roll the stain after it’s been sprayed onto the surface. The result is that the stain job is much better and still goes many times faster than just brushing or rolling alone.
A sprayer reaches the nooks & crannies better than a roller, or brush alone. You need mechanical force: it helps absorb better and faster.
This is called “back-brushing: or “back-rolling”. Cool, a new word. So backroll or brush every square inch. Just think of the sprayer as a method of application. This is the professional way.
- Get your roller and brush wet with the stain (and have buckets/trays to keep them wet).
- Spray a section that you can reach and that will not start to dry before you can roll/brush it.
- Start with small sections until you get the hang of it.
What tools?
Here is our list of sprayer accessories and a different list of painting tools like brushes etc.
Choose a 9-inch roller with a 3/8-inch nap for outdoor decking-fencing-siding, etc. to backroll.
I have always used Purdy brushes and they will last the homeowner a lifetime. If you have water-based (acrylic) stain, the best deal is a brush just for latex paints: this can be cleaned so well that it will be like new every time you use it (I use one brush every day for 6 months and it still works as a backup brush after that).
I have all these necessities on our page with the best painting tools at affordable prices (I use these very tools).
Strain the Stain
Some sprayers come with a filter you pour through, but this is not a very fine mesh and allows some clumps and nasty bits through. These are what clog the tip. Get a VERY fine mesh to prevent tip clogs.
- Cover the opening of the lid of the sprayer with a fine mesh strainer. This is a must. Yes, we do this even with a stain that is new. Important: “New” is never new. Paint and stain sit on shelves for months waiting to be delivered and waiting to be bought…and they start to coagulate.
- A lady’s stocking works but is slow. A real paint strainer is on the sprayer accessories page with all the accessories you could need.
- It seems that no other website I could find on spraying stain mentions straining, but ask any painter and they will tell you this is a key to not getting hung up in the middle of the work.
Masking:
Protect areas where the stain will cause damage: use drop cloths (canvas and plastic), tape, paper, etc. Pick up the 3M hand masker that’s very handy for all kinds of painting projects in the future. Here is my short video showing how it works: easy. Also, cardboard works great for masking.
On the same accessories page, look for the Kraft cardboard shield holder: very cool. You can shoot very close to, and protect many things with a shield. For fences that have openings, use cardboard to prevent overspray. Keep changing your wet cardboard. Great idea.
3. Tips on using a backpack sprayer
Basic tips:
- Begin with a test area and adjust the pressure: keep the pressure down on the sprayer to minimize over-spray.
- Never apply the stain in direct sunlight.
- Strain the stain (see above).
- Take a lot of time to mask! Cleaning stain off the house is a real drag. Masking can be ¼ of the work time (or more).
Spraying the deck with the backpack sprayer
Some advanced tips:
- Spraying oil-based stains is just like acrylics, except that you will need a gallon of mineral spirits (paint thinner) to clean it. Read the cleaning tips below.
- Shoot from every angle very lightly to conserve the product. This way you get it all with a full coat.
- Start with small areas and you will quickly see what the size of your sections should be: only spray what you can backroll or back-brush (explained above) before it gets too dry.
- Save money in the long run with a top-quality stain: see our full post on the best stains on the market today. On my own house, I used… and I tell everyone who will listen, about Eco-Wood: a once-in-a-lifetime spray you mix from powder. Eco-friendly an even comes in colors. Buy this great stain here.
4. Cleaning your backpack sprayer: Easy Peasy
You want to clean your backpack sprayer well after each use: don’t let it sit very long with anything inside: you can cause damage. If you simply clean (and it is quick), you’ll keep the unit for many years.
- Oil-based stains: Mineral spirits (paint thinner) is the first wash, then do the water flush below.
- Water-based stains: People will tell you “soap and water”. That’s hogwash. Literally! You just need water and lots of it.
- Soap is really only necessary when you had some sort of oily stain or garden spray and that’s only after a water flush. If you use soap, rinse it more quickly with a warm water flush.
- When done, remove all parts that can be separated and let air dry.
- Any gaskets or seals? Preserve them with a thin coat of petroleum jelly.
5. FAQ about the best backpack sprayer and all types of sprayers
What is the best sprayer for stain? Is a backpack sprayer for all stains? A pump sprayer made for stains does work best for transparent, or semi-transparent stain, not so much for opaque stain. For opaque, read my article on How to Stain a Deck (opaque stain is really just paint). Opaque stain will clog the tip.
Can I use my HLVP? For staining, I don’t strongly recommend HVLP (high-volume, low-pressure) paint sprayer for deck or house stain. These sprayers are good for furniture projects and autobody but are slow going. You have to reload often.
Is the backpack sprayer better than airless? For any kind of stain, yes an airless would be great but are very expensive compared to a backpack sprayer. You can rent an airless for about a hundred bucks per day from Home Depot, but if you don’t clean it well, you get hit with another hundred cleaning fee. Ouch.
If you think you might spray latex paint at some later time, the best deal is to pick up your own quality airless from Graco, the best name in professional sprayers: they make a “project” or DIY line of airless too that are very affordable. If you are spraying opaque stain, yes, airless is necessary. Mostly I would brush and roll if the deck is small, and spray if large.
If you can afford it, an airless sprayer is the way to go (here is our post on the best project sprayer today). The bottom end sprayers are not that much more than the professional garden sprayer above.
Summary
These are the best backpack sprayers for 2020. Whether you want to spray stain on your deck or fertilizers in the garden, just keep your sprayer tip, hose, and reservoir clean after each use and you will have it for many years to come.
Decks take a lot of time if you brush and roll. So even if you have to buy a sprayer just for your small deck, it would probably be worth it for the time you save. Plus at the end, you have a great sprayer for next time.
Let us know in the comments what you think… any questions about any backpack sprayer you have?
Thanks
I have read multiple posts regarding backpack sprayers but couldn’t get what I need.
Thanks, for the informative post
Choosing the best pump sprayer for a deck stain is somewhat tricky if you are not an expert painter. Fortunately, here you are in the right place to get opinions and advice about it!