Be sure to see our other posts: Best Caulking Gun: The Real Top Guns! and the simple task of how to load a gun in How to Load a Caulking Gun. Plus here is a post simplifying the many types of caulk.
My Q: I started as a painter over 40 years ago, so is the “35-year caulk” we applied in 1977 still good? Yes, no!
5 Keys Points on how to work a caulk gun:
- How to use a caulk gun – the basics
- Removal and prep for different types of surfaces
- Tips to make it easier
- Toxicity
- Storing your caulk gun for the long term
First, you need a good caulking gun, we recommend one of those:
1. Technique: how to use a caulk gun
Don’t know how to work a caulk gun? Just watch the videos at the bottom that show how to use a caulk gun.
How to load a caulking gun?
We have a short post just for this frequent question! How to load a caulk gun.
How do you get the bead of caulk so smooth?
We smooth out the bead with a damp (not wet) finger or damp fine cloth for a smooth finish. See the video at the bottom. Some internet ‘experts’ poo-poo this. They read it in a book. We live it! If you want a tool to smooth it, there is the basic rubber low-cost finishing tool and the precision-engineered spatula set (quite pricey).
 Should you push or pull?
It really doesn’t matter, despite what some “experts” say. If you push the gun away from you, you do force the caulk into the crack nicely, but nobody does that in our real world. Try it and you’ll see there is no real difference: you have to push to smooth the caulk anyway in most cases.
Can you paint over caulk?
Some yes, some no. Is your paint beading up on the caulk? Ok, it’s just a non-paint-able silicone caulk, but here is the fix.
To paint over caulk:
- simply clean the existing caulk with rubbing alcohol (if dirty)
- apply a very thin layer of paint-able caulk over the freshly cleaned caulk –I mainly use this caulk
- this second caulk will bond and you can paint!
Why does my paint bead up on the caulk?
See just above!
How to use a caulk gun around a toilet?
Don’t caulk a toilet if you get water on the floor and you don’t know why: caulk will trap water between the toilet and the floor and rot your floor! Do you insist? Use painter’s caulk (non-silicone) since it does not get wet (normally), here is a good one.
How to use a caulking gun in a shower?
- Caution: toxic stuff below: around bleach and silicone caulk, please wear a respirator!
- Slice away any old caulk with a caulk removal tool. Careful!
- Clean the area to be caulked with a safe killer, not bleach, and let dry. ( Bleach is very toxic, and the mold that survives will be stronger and multiply faster.) You can simply spray a safe mold-killer which comes in small bottles or big buckets and let dry. It leaves a mold-blocking film that can be painted. It comes in one and big 5-gallon buckets too. We use a garden sprayer to apply solutions like these. (See that sprayer towards the top of this page).
- Have lots of rags (that silicone caulk will totally ruin) standing by to wipe excess – (tough paper towels work).
- Lay in your bead of caulk and mist it with a spray of alcohol and lightly wipe smooth (no spray bottle? Flick with your fingers).
- Don’t use the shower until it is dry (see the label or wait around 12 hours).

Should you caulk around windows?
Yes, definitely even if just for bugs. For new windows, begin with the large gaps. We like DAP Non-Rigid because joints expand and contract, but you can also use foam filler, a.k.a. Great Stuff (careful—it expands to 4x its original volume and is hell to clean). When that is dry, cut the excess if necessary and caulk the gaps.
If you have stained wood windows/frames, use clear caulk (see Section 7 below), but if you will paint later, use clear painter’s caulk (see Section 7 below).
(Note that painter’s “white” caulk will grab dust and become ugly caulk quickly, so it must be painted.)
How big of a gap can I fill with caulk?
For gaps that keep coming back and for large gaps try this plastic caulking strip. It comes in other colors: just look around from the white linked above.
Don’t try to fill large gaps the first time. If it will take 2 or 3 treatments, apply caulk to each side of the crack and let dry, and keep doing this until filled. Sometimes it’s best to first fill gaps with a strip of wood, drywall rock, or drywall mud or the fillers in the Q&A just above, etc. (Paper would work in a pinch, just to have some backing).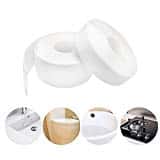
How to use a caulk gun to get a smooth bead of caulk?
- For (non-silicon) caulk, just have a damp rag over your finger or use this e. Sometimes, you can lightly sprinkle water-based caulk with water to get a nice smooth surface. Too much water will dilute it and ruin the work.
- For Silicone Caulk:
– Use alcohol in a spray bottle (alcohol can ruin some spray bottle pumps with plastic inside the pump)
– Lay in the bead of caulk
– Mist it
– Use your finger to smooth it
– Here is a lifetime box of rags that won’t bleed into your caulk/paint
2. Removal and prep for different types of surfaces
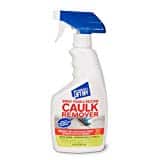
Some removal solutions don’t really “remove” old caulk, but can make it softer and loosen it somewhat. Silicon caulk is the toughest! We like Ole’ Mr. Motsenbocker’s stuff: Lift Off will loosen the caulk. Spray, wait, scrape, wipe.
The EPA has a list of all ways you can remove old caulk. Very old caulk is toxic, even though it has long-cured. The best way to remove old caulk is simple elbow-grease. (But let me know if you do Dry Ice Blasting! I’d love to see that!)
I often use a razor scraper as my caulk removal tool—it’s fast and safe. A decent price. Also good for cleaning glass.
But get most of the old caulk out with our trusty 6-in-1 tool. Don’t rush this: it requires a bit of patience.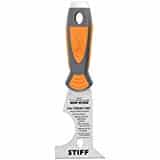
3. Tips to make it easier
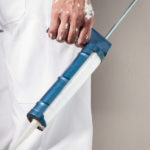 Rags – Have lots of rags ready (not Terri-cloth or other rough stuff), and if water-based caulk, just toss them in a bucket of H2O for a day, and the caulk falls to the bottom of the bucket! Clean rags again!
- Keep the rag moving – switch to a clean section after every wipe.
- Keep it all clean – your puncture tool, the caulking gun piston, your rags (if not silicone).
- Smoothing tool – a fingertip works ok, but you can get splinters! For a clean look, we use a low-cost finishing tool just for smooshing. I said “Smooshing”!
- Masking tape – we don’t use it normally, but for the disgusting silicon shower jobs, it is helpful – when you pull the tape off it can leave a ridge: smooth it as described above (alcohol or water lubricants).
4. Toxicity
PCBs will kill you and you are buying them in silicone caulk. Instead, look for a low-VOC claim on the tube, but if you don’t have low-VOC caulk, please wear a respirator! We have a post to make the crazy world of filters and masks digestible.
Read the US Government’s research: PCBs in building materials such as caulks and sealants are a largely unrecognized source of contamination in the environment.
This respirator mask (size medium fits most) and you need chemical filters Sometimes you just want a simple Hepa dust filter instead of the chemical ones.
The kit you see here is the first thing to get: it has a good basic setup and you can cover the chemical filter with paper to prolong its life. This is what I use: Paint Respirator Supply Kit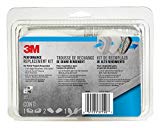
5. Storing for the long term (and just overnight)
Air will dry out an open tube in a day or two. The little cone-shaped caps that some tubes come with don’t work well to seal tubes.
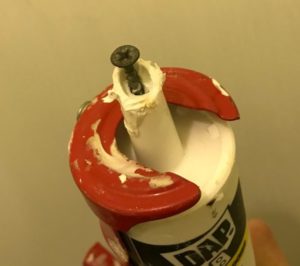
Just want to keep it fresh for a few days? Ok, use the little cone cap, wrap tip with plastic or stick in any old nail or screw. Most will not really start to rust so soon. Rust? The bane of a painter’s life.
Rust in caulk will bleed through paint and then you need a nasty primer. So if you see rusty caulk near the screw or nail plug you used, discard what is discolored.
For long term storage, insert a screw that will not rust such as a brass screw or deck screw (not drywall screw as shown below) and if you like, wrap plastic around that to seal in the moisture.
You cannot keep an opened tube for very long in any case. I store my rarely used tubes (like browns) in large plastic bags with some water inside to slow the loss.
Does caulk expire?
- Yes: don’t buy a lot and think you can keep it for years because it is in a sealed tube: just buy it when you need it. Plastic tubes do breathe! Check for an expiration date. Once you open it, try to use it all or store as in the Q&A just above.
- Painter’s caulk (a.k.a decorator’s caulk) also goes bad but not as quickly. I store mine with a brass/galvanized screw or nail (they do not rust…see why just above). I keep opened tubes in an air-tight plastic bag with some water in there to keep the tube for long periods.
- See my video at the bottom about how to extend the life of all tubes, including glues!
You can use a condom but I have heard people don’t like them! “Don’t be a fool: cover you tool”!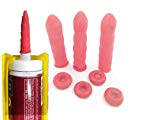
FAQ
In this sub-section, we answer these FAQ:
- Should you use caulk before or after priming?
- Is caulk the same as a sealant?
- What’s the difference between silicone caulk and painter’s (decorator’s) caulk?
- How to use a caulk gun around a bathtub?
- How often should caulk be replaced?
- How do you remove mold from caulking?
- Can you sand caulk?
Should you use caulk before or after priming?
Before is best: basic painter’s caulk (“acrylic latex”) adheres better to primed wood/walls, plus it’s easier to see cracks that need caulking after they are primed…so, yes, but not a necessity.
Is caulk the same as a sealant?
Sealants are made from a flexible material, usually silicone. Caulks fill gaps that don’t move (much). Check out the Goop. Oh, how I love my Goop. Not just automotive.
What’s the difference between silicone caulk and painter’s (decorator’s) caulk?
Elasticity. If you have a nasty wall crack that keeps coming back year after year (due to heat/cold), try filling it with an elastic caulk. Warning: paint on these will crack as the caulk stretches! My solution: live with it. Ah. I’m done.
How do you caulk around a bathtub?
Be sure to purchase waterproof caulk for the bathroom. Also, be sure the surfaces are clean and dry and have rags ready to wipe up the excess. They make colors that somewhat match: almond, gray, etc. See Section 7 below.
How often should caulk be replaced?
Easy one: whenever it cracks, gets ugly, or comes loose!
How do you remove mold from caulking?
Bleach is not the way. This is a deadly poison. Read all about my chemical respirator (good to have around the house at all times). Having killed the bacteria, you can now put fresh caulk over the old and the mold should not grow back. See the safe killers above: better too. Bleach leaves some mold to grow faster and stronger. Ick.
This removal tool can be very useful at only about 5 bucks, and Allway is a known brand in the biz.
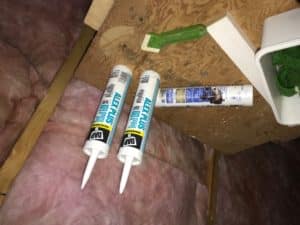
DAP makes a product that softens old brittle caulk for easy removal: Goo-Gone. The tube is shown here, this works on sticky label glue too.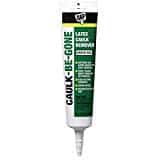
Can you sand caulk?
No. I read some dude on the internet saying that you can, but you cannot. It just scuffs and rolls up into little balls and needs more caulk after you “sand”. Just caulk carefully knowing that you are leaving it the way it will always look, even painted.
An excellent caulk remover softener: click on the image of the tube!
Video on How to use a caulk gun 1 of 2
How to use a caulk gun
Video 2 of 2
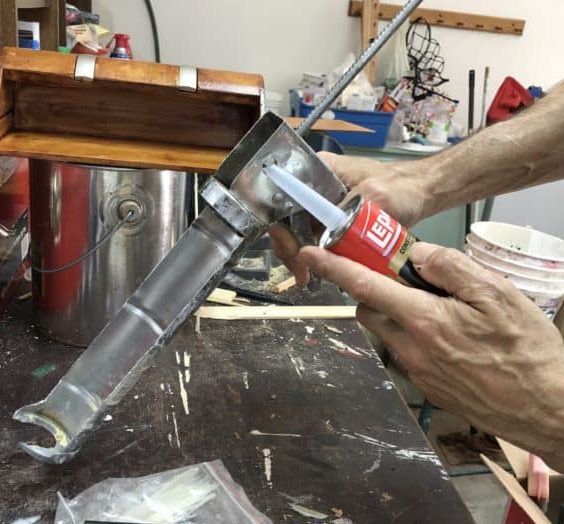
How to use a caulking gun: the actual process of laying a bead of caulk:


I will share this with friends now.
Great Post..!
I removed the caulk tube from the gun, and then discovered that I missed an area. Now, I can’t get the hand grip to work. Is there a secret to making it work?
It’s hard for me to tell, but when this has happened to me, I’ve found dried up caulk in gear and plunger mechanism. Soak in bucket overnight and then try to clean…assuming caulk is latex.
Good luck
How do I remove the caulk tube from the gun? I have only used a small amount of the caulk from a new tube. I borrowed a gun that I need to give back to its owner.
You pull back on the piston which has some sort of release: a tab or maybe you twist the piston’s hook. Pull back and the tube should be free. Some tubes get caught. Ask the owner of the gun too.
GOod luck,
b
Thanks for the idea to not try to fill large gaps the first time you caulk it. We tried caulking our bathroom the other day, and our caulk dried out in the tube. We’re looking for ways to preserve the caulk and prevent that from happening again.
It probably just dried in the nozzle. Cut it shorter. If that is all dry, punch a hole in the side of the tube (start near the plunger..the ‘bottom’) Squeeze and use your finger to finger-paint, or finger-caulk. Trademark on that last term: my invention as of right now! Good luck.