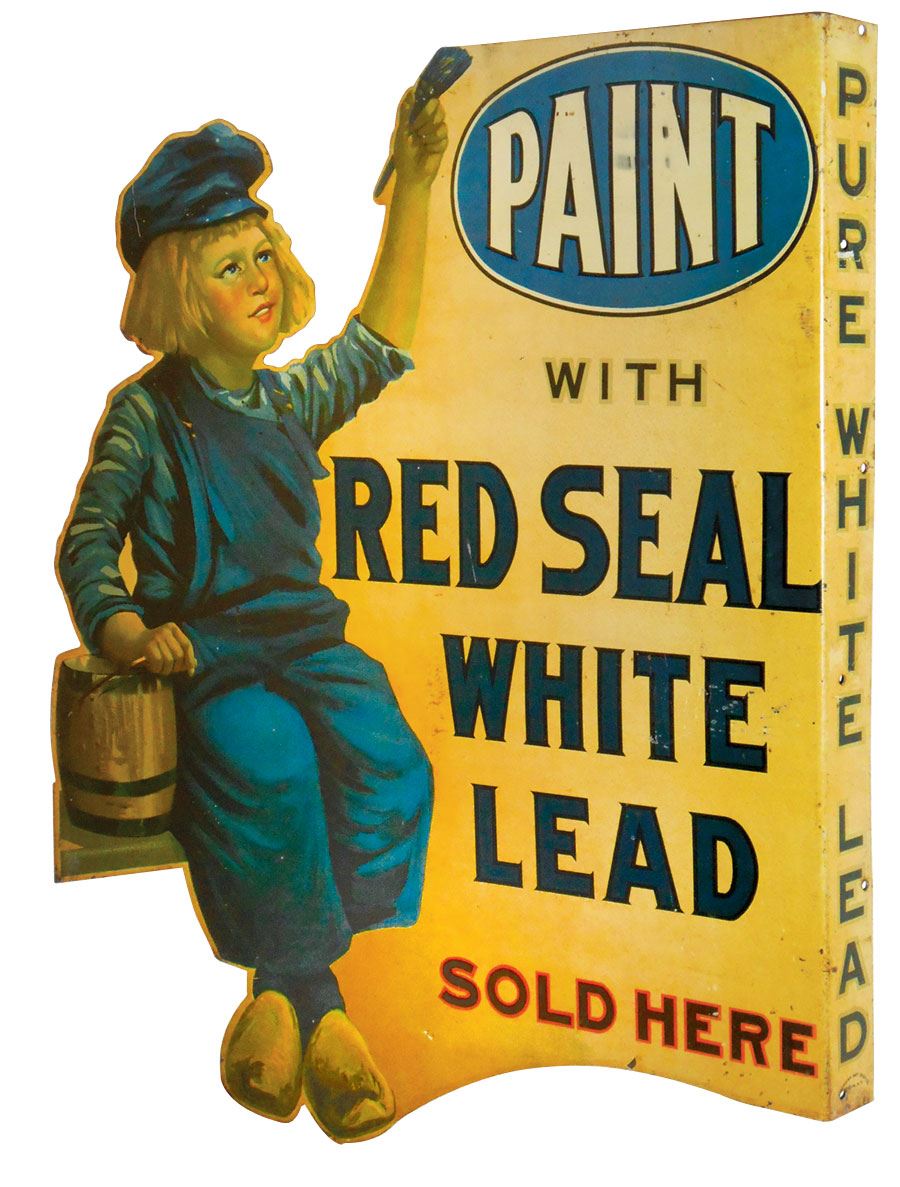
How can you tell if you have lead paint? There are two tests and the one you can do yourself is approved by the EPA, and it’s not expensive.
Here’s another article that discusses painting over lead paint, and lead removal.
Update 2024: The EPA has made a new rule, finally.
In this article:
1. Testing paint for lead (2 ways)
2. How to handle the threat – Jump to these methods.
3. List of lead health risks – Jump to this part.
1. Two Lead Paint Testing Methods: yes you can.
• DIY Lead Testing Kit: LeadCheck by 3M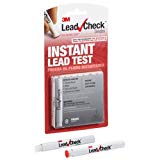
The EPA approves of only one home lead test product on its web page: 3M’s LeadCheck (even approved for red paint colors).
Of the many packages offered by 3M, the best value is the LeadCheck 8-pack. You will want to take several samples per room/structure.
Collect these items:
- The test kit: you need one swab per test and you need to test every paint. Sometimes, the same color paint on the different walls is from a different, perhaps younger, can of paint, even though it is the same color on the trim (trim will often be glossier).
- Respirator with HEPA filters:
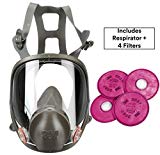 3M has a special lead paint filter also: lead respirator filters 7093 (a HEPA) which works with most 3M masks, such as this one. (In the face masks, the 6200 is medium-sized, the 6300 is large and the 6100 is small—I’m 6 feet tall and use either 6200 or 6300.) Any HEPA filter will not, not just the 7093.
 - Latex or nitrile gloves that you will throw away later: avoid the kind that rips easily.
- Clean tools with rubbing alcohol and a rag handy: clean the blade you use to cut into the paint very well between test areas to avoid false readings.
On respirators: The world of filters is very complicated, and I simplified it all here. But to get the ones that we professional painters use, visit the main tools page. Surprisingly low-priced, and most ship for free.
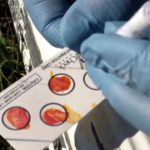
Start the lead test kit:
- Whether it’s drywall or wood, cut through the layers of paint with a very sharp razor knife at a sharp angle.
- Cut well into the wood or drywall, not just the paint.
- Simply squeeze the cardboard tube which covers the plastic and glass tubes, and crush the two glass tubes inside the plastic so the liquids can mix.
- Shake after crushing to mix the chemicals and get the swab tip wet.
- Dab the swab on the layers of paint, but avoid the paper and ‘rock’ of the wall.
- Let sit for about 30 seconds.
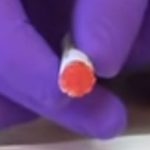
- Red (or pinkish-red) means lead.
- If it does not turn reddish, you may still have lead if the swab was bad: you must test that the swab.
- To do this, put one drop from the swab onto a dot on the test kit testing card: if this does NOT turn read, the swab was bad. The test card should always turn reddish instantly if the test swab was good.
Download the EPA’s evaluation of LeadCheck on the government website.
Here is the EPA’s test results on LeadCheck: (it’s a good thing).
LeadCheck brochure (pdf download).
• Lab testing: more accurate
If LeadCheck gives you any result you have doubts about, do the full test. Forget about the cost! It’s worth it.
Download a list of accredited lead testing labs in the US, or just call the National Information Center at 1-800-424-LEAD. They will give you all the instructions you need and have the latest info. Here is the list for Ontario, which serves all of Canada.
Finally, read the government’s fact sheet on how to select an approved lab.
2. To Remove or Encapsulate?
You’ll see lots of websites explaining how to remove lead paint. Please don’t do it yourself…but if you must, then read on.
To DIY, there are 2 options:
First, encapsulate with special lead-blocking paint. I’ve written all about these lead paint sealers here.
Second, study very well the methods of removal (download the PDF) and buy all the safety equipment you need to do it safely.
The only trustworthy source on this high-risk topic is the EPA, not handy-dude websites, including mine: check it all for yourself and be sure. This is serious business, so I’m providing links to the EPA and CDC, etc.
All the EPA info you need to get started is listed here.
Supplies that I use: You’ll need lots of plastic sheeting, filters, and so on. I have listed the supplies I use all in one place for you.
3. Health risks
Lead paint was outlawed in 1978, so the last of it was applied over the next year.
It can cause:
- irreversible brain damage can impair mental functioning
- retard mental and physical development and reduce attention span
- retard fetal development even at extremely low levels of lead
- can cause irritability, poor muscle coordination, and nerve damage to the sense organs and nerves controlling the body
- reproduction disorders (decreased sperm count, etc.)
- increased blood pressure
- liver and kidney damage/failure
- low attention span
If you tested positive, start with this web page at the EPA. The one website you can trust over all the sales and medical sites with advertising is the epa.gov.
Related post: Lead removal vs. encapsulating with paint
Why they still use lead in paint
Why did they use lead paint in the old days?
Also: Beethoven’s deafness and lead poisoning
Anything we should add? Comments require no account below. Thanks.
After CDC lead paint warning, parents scramble for test kits
https://www.thedenverchannel.com/money/consumer/dont-waste-your-money/after-cdc-lead-paint-warning-parents-scramble-for-test-kits