What is the best paint edger?
There are only two paint edgers worth your money, but there is the traditional option as well…that comes with a trade secret.
Both companies have flooded YouTube with sales videos, which should make you wonder.
In 30+ years of painting, I’ve tried every paint edger that ever came out. Only two are worth talking about.
1. What is the best tool for painting edges?
Paint edger tools do take away the need for experience and cut an okay line: they’re for painters without much skill.
Typical problems: you get paint where you don’t want it (so you may end up masking after all)…and the coverage is not-so-great. But, they will get you there eventually.
Pick one of the two edgers below if you just need to get a job done, and don’t have time to learn the way the pros do it.
Both edger tools on this page are fine for latex or oil, and any gloss.
Faceoff: Accubrush vs Shur-Line
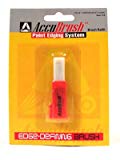
Accubrush: a new idea that has some merit
The Accubrush and other paint edging pads/rollers do make masking tape unnecessary. Before you buy: there is no website where you can buy the XT alone: it always comes with the MX included. Wha? Yep.
Accubrush comes in two models: if you have a low budget, you’ll get by with the MX. But the more expensive XT is probably worth the extra cost.
Both models of the Accubrush make a wide cutting line using a small roller plus a very small paintbrush to make the actual line.
- Comes with 4 reusable rollers and you can buy 4 extra here.
- Comes with 4 mini-brushes (buy extras here).
- 30-day guarantee.
- Requires a paint tray, not necessarily the one they recommend.
MX vs. XT
MX weights a bit less, and cannot be used with a pole like the XT. The nice thing: the MX sells for 30% of the XT, (but they include the MX with an order of the XT! Strange.)
- The XT is more rugged and has a swivel handle, which is very nice.
- The XT was designed for contractors, but pro that I know uses it.
- The XT will last longer if you use your edger a lot: it has a little wheel at the edge, but not the MX.
- The MX just drags the guard against the wall and will wear out after several rooms.
- Both have a very cool quick release lever to remove the roller: a great idea.
- The small rollers are as easy to clean: read my easy method of how to clean a paint roller.
- Both have a nice handle, but you can only add a paint pole (broomstick) to the XT
These sales videos are somewhat true (but not all):
Video comparing the MX and the XT (sales video).
Video showing how to use the MX (sales video).
Video selling the XT…..They say, “Cut your painting time in half”. What? Not hardly, but the video is complete.
How does it work? Following the roller comes a small nylon brush that grabs the paint and puts it in the corner. That mini-brush is somewhat adjustable but for me did not always lay down a thick-enough paint line. It is designed to grab some paint from the roller section and spread it, but it does not always stay wet enough. You need to press more firmly to empty the roller faster when this happens, but still, it remains a problem.
Solution? Extra coats. Fail.
- We pros often only need one coat.
- We cut with a quality brush: the fine nylon-tip bristles find the corner on their own.
- (I use the best paint which saves money in the long run—see below what covers best). Jump to my paint recommendation.
How to use the Accubrush: There’s no learning curve.
- Just flip back the side shield/guard
- Dip the roller in the pan of paint like traditional rollers
- Flip back the guard into place
- Paint your corner by pressing firmly and sliding it along.
- There is a label that tells you where to press so the roller and brush and all wheels will be in balance: not hard to remember
- You can use either your right or left hand
Tips: When you take a break, keep the brush wet by removing and soaking in a cup of water, and lay a wet cloth over the roller part.
See what I really think: the Pros and Cons of this painting edger. Jump to the Faceoff.
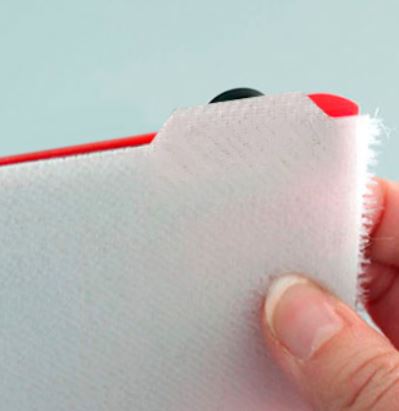
Shur-Line: The Paint Pad, Perfected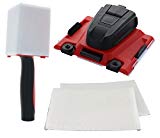
Other pad edgers are poorly designed so the little wheels and guard get paint on them when you dip. Not Shur-line.
Other tools make you stop, wipe the wheels. What? Yes, it’s that slow. Not Shur-line.
My advice, if you go this route, get the combo pack: main tool, corner tool, and replacement pads (linked separately below). Cost? About the same as a lifetime quality paintbrush (linked below).
BIG TIP: Don’t get the Shur-line Edger CLASSIC: the design is faulty…but the Edger Pro is the state of the art in paint edgers.
- Makes a decent line (not quite as nice as a good brush)
- Moves along fairly quickly: don’t expect miracles
- Quick-release button to change/clean pads (buy extra pads here)
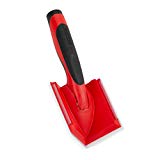
- The pad will not get into a corner where two walls meet a ceiling, so…enter the 4-dollar Corner Painter by the same maker
- No pole attachment on the main tool, but on the Corner Painter has regular broomstick/paint pole threads
- No tray included (any style will work), but a custom-matched thumb hole tray is quite reasonable

If you inspect the edging line carefully, you’ll see the pad’s line is not quite as clean as a good brush. But most folks don’t care and if that’s you, go with Shur-line.
How to use the Shur-line edger
- Flip the wheels/edge guide up
- Dip in your pan of paint
- Flip the wheels down
- Slide along your edge
Next are the Pros and Cons of both painting edgers
2. Faceoff: Accubrush vs Shur-Line
Accubrush: Pros and Cons
- the tiny nylon brush that follows the roller did not spread the paint as well as a normal brush, so you may need one more coat than you would otherwise
- rollers are easy to attach and replace
- a nice rubber handle
- cannot reach into a corner where two walls meet a ceiling or baseboard
- the roller holds more paint than a painting pad which requires more frequent dipping
- when the little brush works well, it does make a sharp, neat line
- costs quite a bit more than both the Purdy brush and the Shur-Line edger
- drip from tool’s shield being the biggest complaint
- little wheels leave a mark in wet paint
Shur-Line: Pros and Cons
Does the paint go all the way into the exact corner? Usually not, but is it close enough for most folks? Yes.
- slightly sloppy edges most reviewers can live with
- needs dipping more often than either a paintbrush or the Accubrush
- does the job with no real training
- not very good results on textured walls
3. My Pick: The Best Edging Tool
What is the overall best tool for painting edges?
If you don’t want to learn how to cut with a brush, either edging tool will work for you, but a quality brush still wins the race.
Remember: you still need some sort of brush to get where two walls meet a ceiling or baseboard: no paint edger can get there!
• And the winner is…
Of all edgers on the market, the Shur-Line Paint Edger Pro beats out the runnerup Accubrush in my comparisons (and some independent reviewers like this one agrees). On cost, speed and finished quality, online shoppers/reviewers also preferred the Shur-line.
But edgers both have merits., but…
Both edgers claim to shave time off your work, but both are actually a bit slower than a good brush: if you have a little experience with a brush.
Of all the edging tools in the world, a quality brush is still the easiest and fastest (and costs the least per job).
Most people hate the painting mess, and I get that…but…below I give away the professional’s methods that make a good brush faster (and cover better).
Of all the brushes, there is only one brand us pros use because they go fast, they last, and they cut a line as well as any pad.
4. My Go-To Brush: (how professionals go so fast)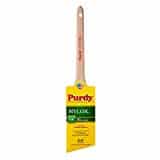
Here it is: there is only one brush I know of that practically does the work for you: the Purdy Nylox. (Choose any width on the product page.)
With it, you will FLY through your work. Purdy is the single most trusted name for pros.
It holds more paint so you dip far less than the edgers above, and the bristles have a unique design described below.
Cost?
- About the same as one Shur-Line Edger (not the combo pack)
- About 35% of the Accubrush MX (the lower-cost one)
- It will last a DIYer a lifetime. Put it in your Last Will.
How it makes a straight line so easily:
Most latex brushes are all polyester, but Purdy (now owned by Sherwin Williams) puts nylon at the tip of the NYLOX bristle and…
wait for it…
you really don’t need a steady hand. Amazing. Watch me do it in this 30-second video.
Oil Brushes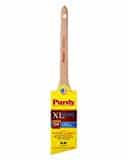
If you might paint oil-based paints (very rare these days, thank goodness), the best brush that can do oil and latex is the Purdy XL Elite.
Beginner? No sweat.
You’ll read websites claiming it’s hard to cut a line with a brush: bunk. Without a lot of skill, you can easily do a great job with a good brush. But not with a dollar store brush. With these lesser brushes, you can’t paint the broadside of a barn. Trust me, Purdy is my baby. You can cut straight lines with very little practice.
What about masking tape?
With a good brush, you really don’t use painter’s masking tape except rarely when brushing in very tight corners such as between two very closely spaced door frames. If you use tape, remember this: the old-fashioned tan tape has glue that will, after only a few hours, pull paint and varnish off. But this older type masking tape sure costs a lot less than…
The newer “painter’s tape” has glue that can stay on for days and not cause a problem. The best deal in masking tape is a 6-roll pack, and you’ll use it all year long.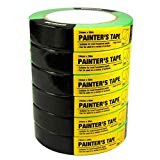
Read more: how to paint a wall
Even the green masking tape is time-consuming to apply, and you need to pull the tape off while the paint is tacky, not wet and not dry. (Wet paint will spit on what you want to protect; dry paint tears the latex coating).
You see why we don’t use it much…and with just a brush and roller, we fly through a room.
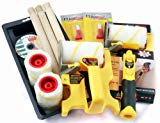
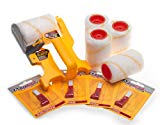
 The roller covers and roller frames that we use do not cost that much, clean easily and last and last. Here is the full list of what I use. For the cost of a nice restaurant dinner, you’ll have a full professional setup for life. That means roller/brush/pole/dropcloths/etc. You can go into business!
5. A Few Professional Tips for Doing Good Work
Should I paint walls or trim first with a paint edging tool?
With an edger, paint the trim, then edges of the wall, then roll the wall. Using a brush, do the trim, then roll walls, then brush edges. It’s just faster, but both ways will look the same in the end if your paint covers well.

What is the best covering paint?
Spending more up front saves time, requires fewer coats and does not fade from sunlight the way budget paints do.
So, you save money in the long run. Read my short post on the best interior paints today.
Final Advice…
Never buy a brush for under 15 dollars! Even some paint stores sell brushes that look like quality, but I’ve tried them all. The bristles are simply inferior to Purdy. It’s no wonder that Sherwin Williams bought the Purdy brand (for 300 million), and then wisely left it alone to continue making quality tools.
• Summary
If you don’t care about perfection a paint edging tool will do the trick, and you don’t have to learn how to use a brush. My advice: go with Shur-Line Edger Pro.
But remember, a Purdy brush can hold more paint (go further) than either the Accubrush or the Shur-Line and costs less and lasts longer, but takes some skill. A dollar-store brush might only cost a few dollars but it cannot paint a straight line if your life depended on it.
Any questions about a cutting-in tool for painting?
Watch how I distribute the paint away from the corner, then return to cut the line. See how fast that was? 34 seconds.
One more thing, do you recommend particular roller / paint set or roller material and pile depth to do a 3 floor stairwell walls (low ceilings but pole req’d).
One account suggested a 14″ roller for speed rather than 18″ though they’re not easy to find. The walls are painted render (not a fine finish).
This is not a large surface area as its only a 6 apartment block.
thanks for the blog
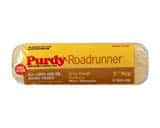
Don’t go cheap. Cheapo rollers shed lint. Get a purdy or wooster wool/poly 50-50. Spend the money and clean it well. I would use one for weeks on end. No on 14″. Just 9″. The big ones are for contractors who roll all day every day.
Good luck!
B
Thanks for this. How do you deal with wall/ceiling edging where a pole is required (stairwell)? The Purdy brush doesn’t attach to a pole, should I just duct tape it to one?
Also, if the stairwell wall is painted render (that’s what it looks like, rough too – certainly not drywall) is the same brush suitable and would you use a deeper pile roller?
thanks
There is a screw on attachment for paint poles like broom stick screw size that has a clamp that you can put the brush in. Then you can be quite low, depending on your pole length. I use mine a lot and it was not expensive. Link is here. I’d have to see the wall surface, but any good brush will work. sounds like it might be slow tho. But so what. What do you have a date? And yes tape would work instead of that clamp, but use a lot of tape so the brush holds still. Careful on ladders, eh?
Great informative page, tried the gadgets, been using cheap brushes just ordered the Purdy one, what a difference