
Smoke soot stain and odor will bleed through NORMAL PAINT AND PRIMER if you don’t seal it right after multi-stage cleaning.
This applies to cigarette smoke-stained walls or from fire.
If there’s no need to replace the smoke damaged wall , sealing up the smoke stains is not that difficult: here is how.
Below you’ll find:
1. How to clean smoke stain and soot off walls in 4 steps: key is to start softly and scrub last
2. How to prime and paint over smoke damage in 2 steps: key is the odor-blocking primer sealer
Paint and smoke like each other: paint absorbs smoke.
In my long career as a painter, I’ve painted over some nasty smoke damage on walls and ceilings.
My method works.
KEY POINT: the odor and stains will bleed through in time ( 1-2 years ).
So do it right the first time: clean all the soot/smoke damage you can, then seal it up forever with a very high-quality primer (below).
Which wall paint really does not matter if you clean the soot fully and use the right primer.
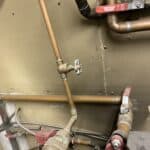
Break out the rags.
1. Cleaning: start softly
Here’s how to properly clean smoke off walls so you don’t grind the tar/resin stains and odor when prepping for painting over smoke damage.
Vacuum to remove the loose soot from the walls
You want to avoid crushing the soot/smoke residue into the wall so start with a shop vac.
Don’t use a regular home carpet vac. Drywall dust and other very fine particles like smoke soot and ash will choke it. Get a shop vac with a filter or you’ll just blow the soot etc all over. And if you are buying one, get a wet-dry for spills and even to pump out a flooded basement.
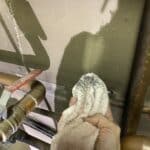
Wipe the soot off the walls gently with dry rags or sponges
Wipe gently in circles. Keep a clean section of the rag for each wipe. Once the sponge or rag gets dirty, change it, don’t wet it. That’s next. Later, wash rags with soap in a separate wash load.
Undamaged adjacent areas should be masked off with painter’s tape and plastic. But are you sure they will not smell later? If they might, just prime and paint when the time comes. You’ll probably do entire rooms including ceilings. Sorry.
Remove tougher soot from walls with a damp rag
Before the damp rag cleaning, know that painted walls will not be damaged by some water, but unpainted drywall certainly will. The paper surface will wrinkle and need repair if it gets wet.
First, lay towels or drop cloths around your floor to make the final clean-up easier. If you are painting later, you can re-use them to catch paint splatter.
Next, with a rag damp with just water, but not soaking wet, wipe it all again at least once.
Latex painted walls do absorb water and your sheetrock will be damaged if you soak it. So wipe, quick dry with a clean dry rag.
Tip: Go in methodical sections: we pros always go in squares/rectangles when cleaning or painting (unlike what other ‘pro painting’ websites will tell you: “go in stripes”. Wha?).
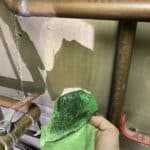
Final cleaning:
Remove the stickiest soot from the walls with a wet cleanser. Probably any kitchen/bath cleaner will work, but here is the best price on Simple Green. A big jug is not expensive for the long time it lasts. More on that just below.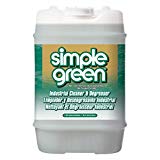
Why do this? Water will not bond to everything. To remove the soot from the smoke walls, you need a bonding agent to grab the sticky.
Ok to skip this: You’ll read DIY sites telling you to use TSP and that’s a good solution, pun intended. But it’s also nasty on the skin and can damage your eyes. Here’s the real cost of TSP: good results but you have to wear rubber gloves, keep it out of your eyes and mouth and wear long sleeves and long pants. So, have at it, but I have a better way.
Save time and use Simple Green, industrial-strength*.
Don’t skip this step: you want your primer and paint to have to cover as little as possible. It has to cover all the odor and the oily stuff is what stinks.
How to: Clean just as in step 3 but wipe off the residue when done.
Dilute for the severity of the mess. Try it straight, then add water and test…keep adding water until you cannot clean much soot on the wall, then you know your strength.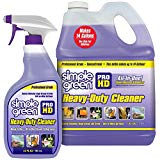
I would start at 3 water: 1 Simple Green HD for visibly blackened smoke-damaged walls.
Change your dirty solution after every 10 x 10 ft. section…or thereabouts.
Last cleaning step:
Now do some elbow grease scrubbing, but don’t soak the walls. It’s ok if they absorb a little solution/water.
Rinse soap residue one last time with water-damp rags and hit with a dry cloth.
* Simple Green is approved by the EPA’s Safer Choice program. Download the safety data PDF here.
2. Special primer: must read
This is the step that blocks the smoke odor from returning in future years.
Even if you cleaned the soot off the walls and painted over the damage the odor will come through without a special primer.
Don’t just any primer, you need the top-level odor blocking primer sealer here.
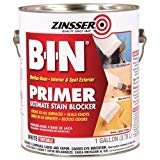
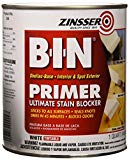
There are many, many types of primers and for smoke walls you must use the very best sealer: BIN shellac-based (not oil-based and not synthetic shellac).
- Here is the gallon of BIN (SKU = 00901)
- Here is the quart of BIN (SKU = 00904)
A gallon covers about 500 sq. ft., more than a gallon of house paint (~400) because it’s very thin.
If you ask a pro: Painters used to think ‘alkyd’ paints seal off odors. Not as effective really. Alkyd mostly means any oil-based paint (today there are water-based alkyds too). You need a shellac to block the smoke odor.
Today, BIN is what pros use to prime and seal out smoke odor and stain on any wall or wood surface.
Be sure to note the list of cautions below.
B-I-N stands for Bulls-I-Namel (“bulls-eye” is one of their registered names). Key component: shellac, a total sealing agent. The shellac has ultra-low permeability, therefore little to no vapor transmission, making B-I-N an excellent odor blocker. Only trust BIN here because you don’t want to have to repeat this step in a year when the smell comes through primer with more permeability.
How to use BIN (it’s tricky if you don’t have experience)
Bin is made in the USA by Zinsser of NJ (now owned by Rust-oleum).
- It’s nasty: wear a respirator with a chemical filter (and ventilate the room well). Read my post on respirators.
- Set up bright lights: check you don’t have skips
- Bin stir very frequently as the solids (that you need) settle to the bottom quickly
- Drips and runs form easily, so apply slowly, methodically
- The solvent for this is rubbing alcohol and the least expensive source is from the pharmacy on Amazon. You can also try to clean your hands and mistakes with acetone (nail polish is usually made with this).
Application of BIN: Roll and brush this primer like any paint, but as you’ll see, it’s tricky because it’s thin, so you just go slow and stir a lot. If in doubt for walls in bad condition use 2 coats of primer. But before you do your 2nd coat, do a test with your finished paint and see the final look.
Buy a quality roller and brush (the budget ones shed lint/bristles and that’s a real pain in the —. You will throw the brush and roller sleeve (not the handle) away. Clean the roller handle with rubbing alcohol. It’s actually a safe and inexpensive solvent.
Download the PDF datasheet for BIN. It has lots of good info.
All the tools I use are here. Because you’re going to throw away the roller cover and brush, don’t go budget!! Budget rollers and brushes shed lint and bristles into your work. Ick. Spend the money. Think of all you are saving by not hiring me (pros get good money here).
For lightly damaged walls, KILZ Restoration Primer is a water-based primer and sealer. This is also an odor blocking primer, but not with the qualities of BIN above.
If you are concerned that you don’t know ‘lightly damaged’ from medium or heavy, go with BIN to be safe.
Think this through well: You must prime the smoke-damaged walls and ceiling to prevent the stains and odor from coming through. This can take years to happen, so you want to use the best primer made.
Doing ceilings: block drips
I make a temporary face shield with tape and layers of Saran wrap. I change when it gets messy. Use a good work light especially through a visor.
It’s easy to make your own face shield. Here is how. And here is a pack of 6 you can buy.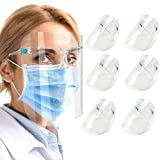
What I do: Just layer disposable clear plastic and the splatter on your face will just seem funny. If you use normal plastic eye protection, great, but you will not be able to clean this off, so try layering clear plastic over it.
♦ Absolutely wear a respirator and gloves and protect every surface well. Remember: room ventilation AND a chemical respirator.
3. Top coat paint like any other paint job
Odor blocking paint is not necessary for smoke-damaged walls if you used that with the BIN primer above.
If this is the case you can just use your favorite paint, which needs two coats, in general.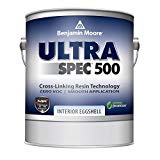
Choose a quality interior latex paint and apply two coats (in most cases).
Smoke painting over these stains on walls is the same as any paint job: I have written how to paint walls here.
Tip: Please don’t believe the advertising about ‘paint and primer in one”, certainly not in the case of painting on smoke walls. You need the primer in Step 2 above.
Conclusion
Still unsure if you should do this? Call a pro. Some smoke-damaged walls should be replaced and not painted over, even with the best materials I use. It’s always smart to get some prices from pros.
But now you know how to clean smoke off walls, and seal them up using the right primer which is the odor-blocking paint is really about: great primer.
Still here? Once I had an apartment to paint that had an old smoker there for decades. We went in, started to paint (they ‘cleaned the nicotine stains and cigarette smoke damage for us) and the paint would not stick! It beaded up like water on a freshly waxed car hood.

I’ve found that young painters often do not know what to do for smoke-damaged walls… they will when they read this.
Other types of smoke damage to walls:
- Candle soot on walls? Read this article from Goodhousekeeping.
- Do smoke and paint bond? Yes. Watch this video. Good painters. In Canada, eh?
I have a post on how I clean my chimney soot: simple tools with a drill saves hundreds each time.
It’s not just how to get soot off walls. If you do Step 2 properly, you’ll be laughing soon.
Thanks
We have a strong perfumey scent in the house we bought. Thought it would dissipate after opening windows and moving in. It has not. Is getting rid of perfume scents on the same level as getting rid of smoke odors? The same process?
A unique question. I think the answer is yes. If the smell is in the walls (test by breaking out a chunk and take it to your car and let it off gas a while…perhaps) then yes you would prime with a odor-blocking paint as in this post above and paint. Really, not much more costly than a paint job except for the primer coat. Make lemonade: you get to pick your own colors!
Ps seriously consider a professional designer. Also, have an old pro painter come over and sniff it out.
Good luck,
B
We are leaning towards using the Kilz Restoration because it’s water based. We’ve read that water based primers off -gas less VOCs than oil-based primers. How does shellac compare to oil based primers and water based primers in terms of off gas? I’m guessing it’s more than oil based primers because you mention that one should use respirators when using the BIN shellac. By any (miraculous) chance, does the BIN shellac off gas less than water based primers? Thanks.
Shellac probably less as it is more volatile: meaning it evaporates much, much faster. It’s all toxic to some degree.
Respirators for both, absolutely. I think water-based anything is less because of the binders etc they need to create the goop. My guess, also based on the stink factor.
b
Sut from a fire?