We’re going to cheat. But relax, it’s ok and it’s not as hard as the pros make it look!
Pros don’t roll the mud, but the result is the same.
For this, I use drywall joint compound, either pre-mixed USG or the type you mix. Either works fine. A one-gallon bucket of drywall compound can skim coat a wall at least 75 sq. ft. Not sure? Read when you should skim coat a wall.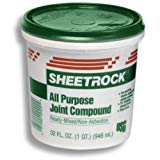
Materials you need
- Drywall compound *
- Primer (which one is discussed below)
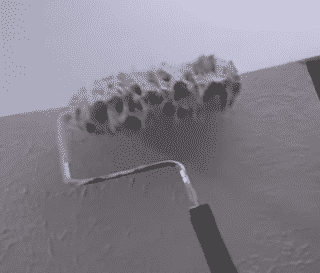
- Paint roller and 1/2 nap cover (tools page)
- Roller pan or bucket with screen (same tools page)
- Wide ‘taping’ knife to smooth after rolling (links below)
- 150 grit sandpaper
- Dropcloths (old sheets work fine)
- If using powder mix, you need drill and mixing bit (below)
* One gallon of drywall compound can skim coat a wall of 75 sq. ft., but always buy more than you think you need!
Don’t miss the amazing video at the end. Wow. Old school drywall. This guy is my hero.
How to Skim Coat a Wall (not for pros)
If you are a skilled worker, you are in the wrong place. You’ll use your trowel and hawk.
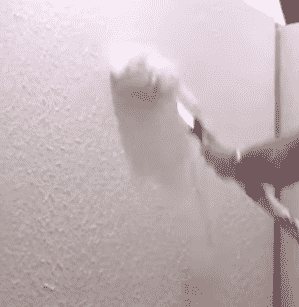
Here, we’ll roll on and flatten with a wide blade, then sand.
You cannot miss with a roller, whereas with a trowel… let’s not go there.
Prep
- Protect the floor and nearby antiquities: this stuff can fly off your knives when you get moving.
- Prime the entire wall, don’t skip this. It’s the bonding. Old wallpaper or walls in bad shape need a primer. Get all the loose stuff off before priming, but don’t go nuts.
- What primer? Use a basic drywall primer. If the wall already has stains, they will bleed through in time (can be days or years) so use a good stain-blocking primer. Otherwise, a simple low-cost drywall primer is the one.
- Let your primer dry well, and use a 1/2″ nap roller for the primer. Then the roller can be quickly cleaned and used to apply the mud. Two jobs, one roller.
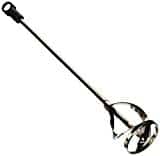
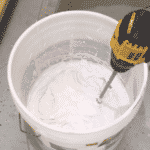
- If you chose the unmixed drywall compound (bags of powder) you’ll need a drill mixing bit. (I made one from a steel rod that I just bent on the end. Works great.) Don’t mix all your powder: keep some dry in reserve in case you go too wet. Mix to a consistency like toothpaste or a bit thinner. You want to apply a thin coat, but it must not leave gaps. Always test in one spot and if too thin, mix more from the container.
Apply
- Try to apply about 1/8 inch of the compound to the wall (that’s how thick it will be after you flatten in the next step).
- Work in squares, not stripes. Do only as much as you can treat in the next step before it dries. A humidifier is helpful here. You can also use a spray bottle to keep the edges moist.
- Pull your wide knife over a few times until it’s smooth. You’ll need to press down slightly. Pros work from the feet to the belt-line, and from above the head to the belt-line. I’ve seen pros do many things like big arcs.
- Keep a mud pan/tray handy to wipe your knife, and carry a wet rag on your belt. The wider the knife the better. Here’s the one I want for my birthday.
- Use a spray bottle to keep the edges wet if you get into drying trouble.
- Finish the wall and let dry. Generally, you need and want 2 coats.
- Knock off any ridges between coats. Don’t sand between coats.
- Finished drying? Now sand with some good 150 grit sandpaper. Tip: the good sandpaper lasts. The ‘overseas’ stuff falls apart.
Clean up
- Water. Duh.
Hope this was good for you. I see comments below right away, most days.
Hello – I know this post was written a couple of years ago but thought I would write with a question I have. I scraped the popcorn ceiling off my living room last summer but then when it came to skim coating, I felt I was in over my head and hired a company to finish the ceiling for me. I had planned on basically doing what you said above except I scraped the popcorn off first. The ceiling is vaulted and the room is quite large. When the contractor came to redo the ceiling he said that I bought the wrong product and b/c of the heat and it being a ceiling, I shouldn’t use dry wall compound but plaster.
Fast forward to this year when I plan on getting rid of the popcorn ceiling for the rest of the downstairs before I renovate the kitchen… I would like to use the process you describe above but want to see if you have any thoughts on drywall compound versus plaster. I don’t feel skilled enough in plaster and was hoping to use drywall compound but don’t want to take on the monumentous task unless I know I’m using the correct product. Have you ever heard anyone say you shouldn’t use drywall compound on ceilings? I probably should have pushed the contractor for more information but didn’t at the time. Any information you can give would be greatly appreciated. Thank you
I wonder where that guy is coming from too. How much heat are we talking about? Do you have a fireplace? Cookouts? Weird.
If you live in the south, like Miami, and your ceiling gets to be 40C, or 100F, and it’s humid, yes, he’s right. When drywall is wet, heat can make it fail.
Otherwise… maybe selling you an expensive product you don’t need.
Go drywall in most cases. Let me know your thoughts?
Thanks so much. I live in Southeastern Virginia. And it does get humid but not like Florida. It is a two-story home where I keep the standard temperature 72 degrees. Thank you so much for your quick response! I will go ahead with what you recommend. I truly appreciate it.