
What we recommend is even weekend painters: you should definitely use the same low-cost, high-quality painting rollers and roller covers that we use. They are made with high-quality metal and plastic and they do not bend when you push them into the wall (as you must during the work.) It is the best paint roller setup made today.
- The roller cage, a.k.a. the frame below will last you a lifetime
- It’s made by 2 companies: Purdy (company website) and Wooster (company website).
- These are best used with a dedicated pole called ‘quick lock’ but can also be used with the screw type pole such as most broomsticks (but not most toilet plunger sticks!)
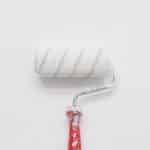
For painting walls, ceilings, trim (we use a brush to tip out the trim paint), and this is our main tool for exterior painting as well (again we use a brush to force the paint into all the little grooves). This is the best roller for any roller application.
See our full post simplifying the world of the best paint roller covers, (and easy cleaning). Use these and the painting accessories below, and you will not be frustrated and dread the next time you have to paint!
The budget option is at the bottom of the post.

The best paint roller: what us pros use, at a reasonable cost
- The best paint roller today is the quick-lock type (also works with screw-type poles) and is made by 2 fine companies: I selected the Wooster as that is what I have used for many years.
- The roller frame itself is only about 9 bucks. See it here.
- The pole below comes with both screw and quick lock fittings.
- Telescoping pole sizes: all we mostly use the 2-to-4 footer and a 4-to-8 footer for the high stuff. Hexagonal shaft prevents bending, and the outer grip is a pleasure to hold. TIP: We don’t use any pole over 12 feet long as they all bend too much: better to get on the ladder and use a shorter pole. A very short pole comes in handy too.
If you clean the brushes and rollers (the easy way as I have written about elsewhere), this tool will last a lifetime for you (it lasts me months and years of daily use).
NOTE: Lesser brand’s paint roller (what you might already have in your garage) will not work with the quick-lock pole, so we recommend that you get the pole that comes with an attachment (converter): you will be able to switch back and forth between your broom and your paint roller.
- For your older roller frame that has no quick lock option, we recommend the thread-type telescoping pole (a trusted brand).


Other accessories needed for all types of painting rollers
With these and the roller frame described below, you only need to buy paint to paint with a roller!
- Basic roller cover for interior walls: the best brand and nap length.
- Good brushes hold a lot of paint and distribute it evenly. A life-long tool and a very good deal (Nylox is the best line of latex-only at Purdy). Go with the 2.5-inch angle cut if you are not very experienced.
- Screen for the bucket: this is like the ‘ramp’ of the pan style, but this is so much better.
- 5-Gallon Bucket: If you need 5 gallons of paint, get t bucket (just remove about 1/2 before starting).
Accessories added together will cost about 40 bucks.
- Roller Pan? We don’t touch them, but we know you might prefer it (see the one we recommend if you go that way). We prefer a bucket and screen explain in the bonus tool section below. But if you do go with the pan, you are in good company, so do many pros. I cannot understand it tho! It’ so much more work!
- For a full professional compliment of tools, read our main post: a list of practical painter tools.
Summary: You get a high-end professional lifetime paint roller set-up, with the accessory list above, for only about 70 bucks. A very good deal.

BONUS FOR TOOL GEEKS: Apartment Painter’s Roller Frame
Large paint roller: 12 – to 18 – inch rollers, a bigger paint roller size. A long nap roller is best used for painting by professional.
Remarks: Just for pros. We knock out two 2-bedroom apartments per day with these bad boys.
Downside:
- This big roller is very heavy when loaded with paint. Must be kept clean after use.
- Requires special bucket and screen. The bucket must be cleaned after every use.
A good product here is the Purdy adjustable. Purchase the roller cover and bucket at the same time. The roller frame you can find it here).
The special bucket is required. Why this has the name Wooster Brush escapes us. You can see the screen here.
The roller has a special hole on each end.
This particular roller frame works with either tradition screw-type pole or quick-lock. We suggest two telescoping painting pole sizes as above: all we mostly use the 2-to-4 footer and a 4-to-8 footer for the high stuff.
How to paint with a roller: (1) Step-by-step and (2) Efficiency tips

Part 1: Step-by-step
- Be square:
You might have read that long strips are best, but we roll in squares or rectangles: we make the square as big as we can with the most paint we can soak up in the roller nap: hence the love of wool in our rollers. Within the rectangle, to get even coverage start with your diagonal or make a ‘W’, and then vertical strips back across it. - Start with minimal pressure, then increase as you go.
Push harder and harder as your roller gets drier and drier. You will leave a build-up of paint at the edges: that’s ok for now: the clock is ticking, so don’t try to make it perfect yet. Distribute paint evenly, then go back and lightly touch the entire rectangle for uniformity. - Keep a “wet edge”:
This means that you start in a corner of the wall and make new squares heading in one direction trying to avoid letting the edge of your square get too dry: it’s a juggling act and very difficult at high altitude like Denver! But this keeps the look even with no ‘seams’ between rectangles. - Backroll to get the most money out of your paint
When you get a few rectangles done, you can go back and ‘backroll’ drying squares before it is too dry. This spreads the drying paint again and results in better coverage. It also removes the last paint streaks (overlaps), but remember that it must be timed just right in the drying process: experiment and you’ll get it quickly. Actually, you can use less pressure on one end of the roller to feather the edges so you don’t have a ‘seam’ in the first place. - Repeat the above steps. Don’t start 2nd coating until 1st coat is bone dry.
- Have a beer while you watch paint dry!
Part 2: Roller Painting Tips – Painting Rolling!
- How to paint with a roller in the corners:
Smoosh paint into corners! By turning your roller cover sideways, drag a foot or 2, then rotate 1/3 turn, and smoosh again: no brushing there! WIth a longer nap roller, you don’t need to turn it sideways: just get close enough to fill the corner. - Professional’s secret how to use a paint roller: roll before brushing.
I explained how much faster this is in another post on how best to paint a wall and you can see me doing it here. - Don’t use tape: tape is for tight spots only.
Minimize the brushwork later on by rolling as close as you can to the surfaces you are not painting such as door trim. (If you will paint that trim later, smoosh into the corner and wipe trim with a rag so it does not build up goopy dry paint: no cutting here later! ) - Don’t dunk the roller!
The paint on the plastic ends of the roller has nowhere to go but down: onto your floor or wall: unseen, and will leave a big gob.
Painting with a Roller: Tips of efficient rolling:
- The best paint roller covers will do most of the work: just practice a bit to get the hang of it.
- Using the 5-gallon bucket or the paint pan (as we have described in a recent post), don’t overfill. Pros might put 3 gallons in a 5-gallon bucket. Homeowners might put 1 gallon in a 2-gallon pan. This is important.
- Don’t use even the best roller covers without a pole: you’ll hurt your wrist tendons.
- Keep bucket/pan covered with a wet cloth when you take a break: paint dries on at the source and chips off into your paint: this ends up on the wall as a lump. Easy to prevent this! Shame to see the best paint roller cover die needlessly!
- Don’t buy more than you need: this cover storage box: we just use plastic grocery bags with a little water. For oil-based rollers we are not ready to throw away, we wrap tightly and put in the freezer. It really works.
- Focus on that cold beer after.
Related:
We recently simplified the slightly complex world of roller covers: the best paint roller are woven, not glued onto the cylinder: this makes cheap roller covers very expensive.

Ultra Low-Cost: the best paint roller kit
Most people with only a room to paint will buy something you will throw away. If you want a quickie-pan*-and-roller-in-one, beware that these rollers shed lint making your walls rough.
These kits come with a roller cover (a.k.a. roller sleeve) that sheds poly fibers and ruins your wall or trim. So substitute the key item: the roller cover.
Tip: you can get a cheap telescoping pole that is low-cost and protects your back (link below).
The basics of cleaning and re-use still apply if you want to change colors or maybe use next year.
I selected Stanley (company website) for the ratings and the brand name, but I would still substitute a wool/poly blend roller cover.
Stanely Kit (way better than the crappy one you used last time!)
Add the roller cover for about 8 bucks. (lasts us pros for months!) – Online here.
Add the low-end pole, (a trusted brand)
*Roller pans are for saps. There, I said it. Pans spill very easily and we don’t like getting our feet wet if you know what I mean. Go with the bucket and screen (above) for an all-around better quality job (much quicker too).
Mini Paint Roller
It is great to have other paint roller sizes for areas where a normal roller size does not work.
- Narrow paint roller (short length) for tight spots: See it here (works with bucket and screen too).
- Mini-roller (narrow diameter) for painting behind the toilet and small spots. See it here. You can read more about painting a bathroom in my other post.
Final word: a new type of painting tool:
I am not recommending Painting Pads because… (if you are curious, see them here). These are nothing like the best paint rollers covers: holds little paint, does not apply evenly (except on TV).
Ask me anything. Use the comments below.
Hello Brad,
I’m a relatively young painter and I’m very interested in your techniques! I’m always excited to find somone with your level of experience.
I’m curious about your cutting and rolling techniques.
How smooth of a finish can you get out of a 3/4 nap roller?
Do you use finer nap rollers for higher-end homes?
Do you get brush marks over the roller stipple since you roll first?
Hi and yes to all that. I have had customers insist on short nap rollers but I resist: they hold less paint. Even the 50-50 wool poly which I prefer above all else. More wool holds more paint. Yes the nap is sort of like lots of little rags flapping paint whereas a short nap is very uniform like an oraange peel. If that discussion happens BEFORE I quote a price, then fine, I’ll just charge more as a short nap means more dipping, more time.
I bid by time. I need 50 per hour and if I can do a room in 3 hours, that’s 150 plus paint for that room.
Anyway, also, yes you see the brushstrokes on the cut and over the roller mark near the trim. My philosophy is, So what? Nobody gets out a magnifying glass to look at nap marks, I mean come on.
If you get a customer who talks about details like that, walk away. Or set your price very high. I had a guy go around with his flashlight: “oh no, it’s a little thin here”. You get all kinds.
Let me know if you start a website. We can support each other.
Good luck!