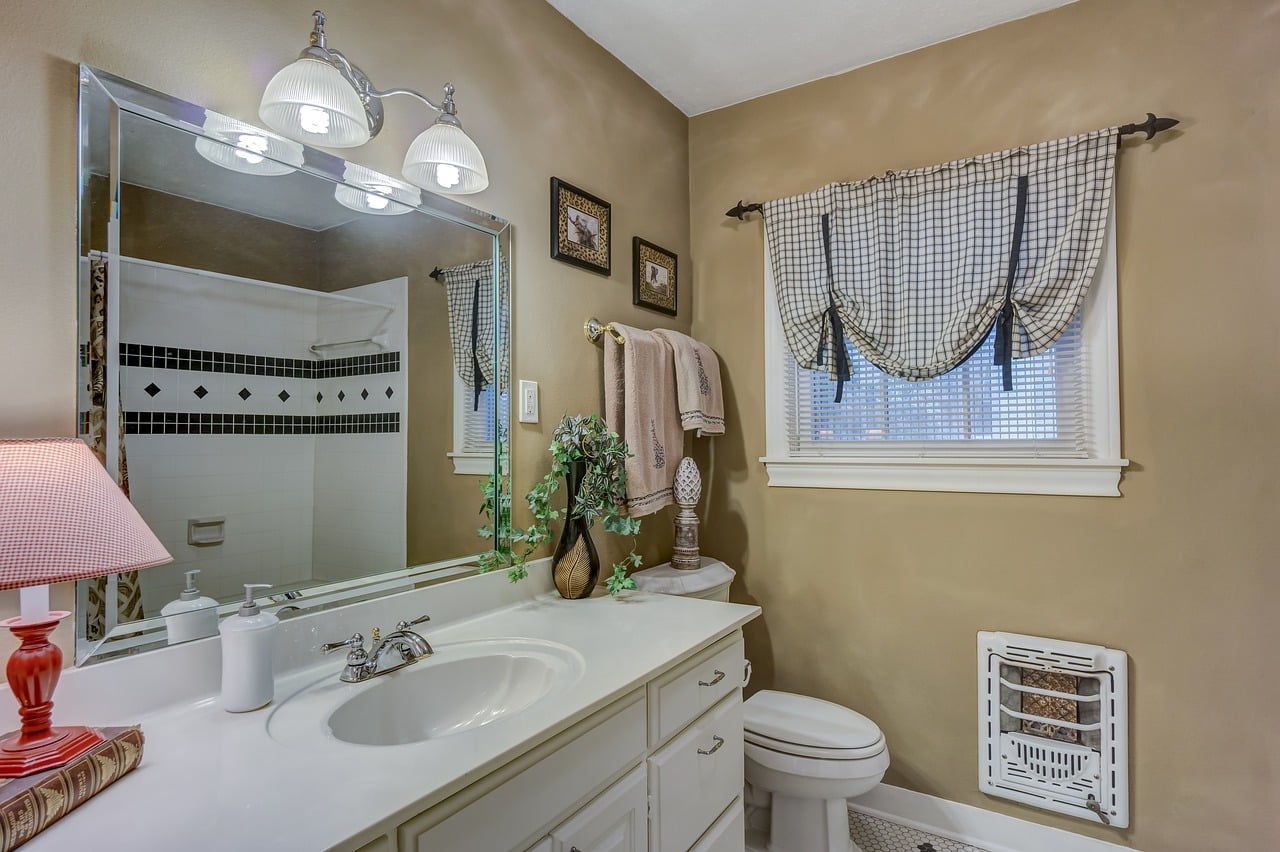
First, Let’s Paint Behind a Toilet
Wait: Is it Easy? Yes, Indeedy.
There are 3 schools of thought when it comes to painting behind the toilet (or the Fountain, as the artist Marcel Duchamp called it). Then we will show you how to paint a bathroom with the best bathroom paint.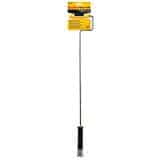
The key tool: we use this everyday behind toilets, radiators, etc. Can’t live without you Mini Me.
How To Paint Behind a Toilet in 6 steps:

- Choose your tool from the ideas below: small paint roller (shown above).
- Remove the lid from the tank: careful they break easily, I happen to know this very well.
- Dip your roller or swiper lightly into the paint.
- Slide the tool behind the tank and leave a light coat: don’t try to be perfect, just don’t miss any spots: this takes less than a minute.
- Put the wet tool in plastic shopping bag while the wall dries.
- When the wall is dry, repeat with another light coat. Check when dry and if you missed a spot… you have to say out loud, “You missed a spot”.

How to paint behind a toilet – 3 methods:
- Method 1 – small paint roller: Our preferred method to paint behind the toilet is a small paint roller, which is used in many ways: in any kind of tight spot. See in the video just below how to use a small paint roller. You may have also seen the “Jimmy Sponge Stix” and that works very well also (see it here). This is really quick and should take you about 2 minutes per coat (you probably need 2 coats).
- Method 2 – paint swipe: the cheapest way to paint behind a toilet is to make a paint swipe: tape a piece of cloth to a cardboard a few inches square, and then tape that to a coat hanger. Dip the cloth lightly in the paint and have a swipe. When you paint behind the toilet with a paint swipe, don’t try to put it on as heavy as you would with a brush: put on several light coats of paint, letting each dry well. Stick the paint swipe in a plastic bag to keep it wet while you wait.
- Method 3 – paint only around the toilet: If you are not that picky and don’t care, here is how to paint behind a toilet: only paint around the toilet! Just take the lid off, use your regular paintbrush and swipe what you can see in normal bathroom use. Bingo. Done. Careful with that lid!
Painting a bathroom with a small paint roller:
Here how to paint the whole bathroom after you painted behind the toilet.
How to paint a bathroom
First a quick checklist, then some very useful tips for painting a bathroom quickly and well. A beginning painter can do this in only about 2-3 hours of labor, counting drying time.
How to paint a bathroom explained in 12 steps:
- Drop cloths, cover sink etc with plastic.
- Ventilation, turn up the heat, (leave the exhaust fan for a day and a night–any fan helps).
- Clean walls well.
- Bleach is very deadly and can make the mold spores retreat deeper within the surface, then come back stronger, and even eat the bleach as food, then multiplying with a vengeance. So we also like a safe spray that leaves a mold-blocking shield. It comes in small spray bottles up to 5-gallon buckets.
- Serious mold? Use a mold killing primer (I like this one).
- Fill holes, prime spots if large, and prime any new (unpainted) walls or wood. If you still have stains after cleaning, read this post about painting over a stain.
- Tape tight corners and tile, but not any trim you will be painting (paint trim first).
- Caulk cracks (remove well any old loose caulk).
- Follow basic room painting procedure: we do trim, then roll walls then cut edges and we are not ashamed!
- Start high and work down. We have written about how to paint a ceiling.
- While the ceiling dries, paint behind the toilet (see above how to paint behind a toilet).
- Trim first or last? We have described why we paint the trim first almost every time: it’s easier to cut in the line when your last brush is on the wall, not the trim.
You will likely need 2 coats even if one seems to be enough (you cannot tell until it is dry: while wet it always looks like it is covering well)
Don’t shower for a day if you can wait: this paint must cure and the humidity slows that
No Brainer Tip Number 1:
When painting a bathroom, use the best bathroom paint on the market
Quality paints look better, hold their color longer (even in the sun), can be washed without staining, and high-quality bathroom paints are designed to resist the growth of mold and mildew. The bottom line is that you buy less and work less in the end. It’s a no-brainer.
I would always recommend Kilz’s Bath paint. They have done the research that shows it is more mildew and mold resistant than competitors. I always say that if you don’t have to repeat the work as often, the best quality paint is worth it, but you have to make that decision.
Tip Number 2:
Pick any shine you like (maybe not flat)
You do not need semi-gloss paint on your bathroom walls! This used to be the standard because the shiny surface can be cleaned easily. Yes, but these days so can eggshell finish: so use what you like and don’t listen to old-fashioned rules. And that goes for bathroom paint color too.
You can use any paint of course, but bathroom walls get a little bit scummy over the years and require cleaning. These days, the better paint manufacturers paint can be scrubbed without leaving a stain. The interior designers I work with use eggshell in all rooms, including large and small bathrooms.
Modern paints from the better makers of paint have gone beyond cleansing limitations of older paints. Today, the interior decorators and those who do staging for a living want eggshell in all rooms including bathrooms and kitchens. It has a slight sheen, not a shine (can be wiped), and looks great.
Tip Number 3:
Choose a lighter bathroom paint color
For the bathroom paint color, these days designers will guide you to warmer, lighter colors whereas in the 90’s they had to have an off-white or white bathroom. The logic is that small rooms look bigger if the walls reflect more light–and that is true. Dark bathrooms have a cramped feeling. Cramps in the bathroom: write your own punchline here.
Tip # 4:
Wash all bathroom walls, not just where you see scummy runs and mold
Before painting a bathroom, wash twice all walls to be painted with a mold killing solution, not bleach, and rinse with plain water. Bleach can make mold that is deeper embedded come back stronger, and it will then use the bleach as food, and greatly multiply. A safe and very powerful killer is Siamons Mold Control.
If you go with any toxic solution, however, you would want to wear a respirator (see my post on respirators here) and open the bathroom windows and use your exhaust fan if you have one. The reason we sterilize all the bathroom walls is that there is mold growing on them that you cannot see. Years of rainforest conditions grow mold, even if you cannot see it.
Tip # 5:
If you have mold or mildew on your bathroom walls, use Kilz
Even scrubbing may not get it all, so seal it out of the picture with a mold killing primer: easy.
Whether you are painting a small bathroom, painting bathroom walls, or painting bathrooms ceilings, use the best bathroom wall paint that has mildew resistance as these rooms stay wet!
Do you know another method? Let me know how you figured out how to paint behind a toilet!

Short money-bathroom-toilet story:
I have had more than one customer tell me that they want to keep the price of a painting a bathroom down and ask me to skip behind the toilet. I explained that with the small paint roller and how to paint behind the toilet. Oh, it’s the same cost? Yep. Ok, paint it.
We use that small paint roller on almost every job: behind radiators, in tight areas where a 9-inch roller cannot go… and the cotton roller is easy to clean and durable. Awesome. It’s our secret weapon when it comes to how to paint behind a toilet.
I think This is simply painting. Splashing is the best way to evade that in latex paints. Most oils straighten out or standardize. Moving first enables you to know precisely how much brushing you should do later. You will brush substantially more than you have to and that is a moderate procedure.
Splashing is the best way? This makes no sense. Do you want to say more?
It’s good to know that a bathroom remodel can be affordable if you properly plan things out. My wife and I want to change a few things in our home to make it more friendly on our older bodies. We’ll be sure to keep your tips in mind as we search for a remodeling service!
Why not just remove the toilet tank?! Just turn the supply off, flush and lift the tank off! Lay on an old towel to catch any drips. Then paint and replace!
Sure, fine. Even better, just a bit more work. Thanks for offering this to us all.
I’m not sure how to cut in the wall where the bathtub is. It has a glass door and it’s a cast iron tub with tile about 2/3 of the way up the wall. I’m 5’1” which is making it even more challenging! I’m not quite tall enough to reach the top of the wall on the only stepladder I have which is narrow enough to fit in the tub.
One thing you can try is a brush extender...if I read your comment right you cannot reach high.
For other tight areas, an artists brush and or use masking tape and paper to cover the iron and glass etc, then just smoosh with a big brush. Let dry before unmasking!
Good luck. Send photos if I’m wrong.
B
Maybe I’ve missed this but how do you paint above the bathroom mirror and lights across the bath cabinets? It’s a difficult reach for me and I have ten foot ceilings. The crown molding has a thin edge which makes it hard to keep a clean line while painting. Should I give up?
Never give up! I cannot really know what you are talking about without seeing it. If it is very narrow, perhaps an artist’s brush (you can make one with your own hair). A ladder is of course helpful. If this was not enough, send me a photo? In any case, large areas of bathrooms must be brushed if the roller will not fit in the small sections. Good luck!
How do you paint the wall over the bathtub? I don’t want to put the step ladder in the tub but can’t think of another way! Thanks!
I cannot see the style tub (you could email pic), but can you lay towels on the rim, and lay your ladder across it, and then some wood planks on that? Be careful, but I have done things like this and I’m 6 feet + and normal build. I have learned to NOT FORGET where I am standing at times like this! Good luck, go slow.
I took a kitchen songe and cut a slit in the middle and slid it ona sturing stick it worked perfectly to get behind the toilet 39 cent stiring stick and a .50 cent sponge is the way to go if you can not aford that extra brush it also works well for tough to reach edges
Awesome idea. Thanks.
Why do you paint the walls first before cutting them in. That leaves larger then intended brush marks and can cause the paint around the edges due to paint goes on thicker with the brush and may run easier
I see your point, but in practice, the speed is the main thing. We never worry about small brush strokes or roller nap marks. This is just painting. Spraying is the only way to avoid that in latex paints. Most oils flatten out or ‘enamalize’. Rolling first allows you to know exactly how much brushing you will need to do later. The other way, you will brush much more than you need to and that is a slow process. With Purdy Nylox brushes (for latex only) we never have drips or runs. I guess that is a learned skill tho. Thanks very much for writing. –Brad