
“The trim” is the answer to the question “Paint walls or trim first?” Why? It’s harder to cut a line on the woodwork. It just is. We (almost) always paint the trim before the walls: it saves us a lot of time. Read on and you’ll see why: baseboards, window/door frames, etc., are easy to touch-up at the end.
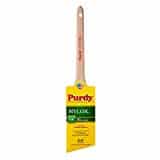
For our technique to work well, you need a very good brush to cut a straight line, see my favorite brush.
Why paint trim first?
The actual steps (and supplies) are just below but here’s the bottom line: it’s harder to cut a line when painting the woodwork: the wall cut is faster. We do this. Walls are last because when you goof and hit the freshly painted trim, it is easy to touch-up at the end! Ray Charles could do it. Would he paint walls or trim first? What’d I Say?
This is latex-only Purdy: the ‘angle cut’: nice for cutting walls, trim, and even window sash. The straight cut brush is below. We use both.
Some painters have a different take on this that I’ll explain at the bottom: they paint trim last and if done carefully is very good too, but that system has a flaw that mine does not.
With crappy tools, you get low quality and slow, frustrating work. Use a roller and brush: I’ll explain below.
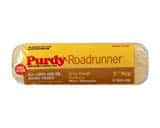
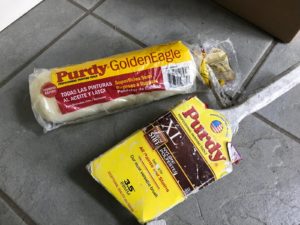
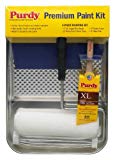
For the roller, roller cover, etc., read our post on good painting tools: we point you to tools that last.

3 Simple Steps—Why Paint Trim First
1. Paint the Trim (completely finish it—it’s ok to get paint on the walls):
- How we paint trim quickly: Pour your trim paint in your tray or bucket (see the bucket/screen combination here: no spilling trays this way.)
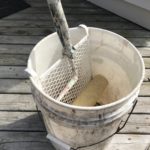
Paint roller bucket and screen set up - With a normal 9-inch roller (details below), roll the big sections of trim, and ‘tip it out’ with your brush. You NEVER need to dip your brush. In the tight corners, your brush will be wet enough. We ‘tip’ the paint to have parallel brush strokes, not roller nap. (Read this about a trim paint that is water-based but evens out like oil: so cool.)
- Paint the wall/trim boundary… overlapping on the walls: do all the number of coats you need on the trim. Don’t fear that you will get wall paint on your new trim later! You will! It’s ok.
- This also fills hairline cracks in the corner…not big ones. (Read about using caulk to fill big ones).
- Tip: use a roller cover with a medium nap (about 3/8 to 3/4-ich is nice). Quality rollers are very quick to clean. If you change from some white wall/ceiling paint to white semi-gloss (this is just for example…any 2 whites really)—scrape with the curve of your 5-in-1 tool, heaven’s gift to painters). So many pros don’t even know this: what are they thinking?
- Let dry well. Then paint walls but don’t go near trim…yet. This is in Step 2 below.
Key point: This requires a quality brush and roller set up. Many budget rollers and brushes SHED LINT and bristles… guess where the lint ends up? Yep.
Brush: We use a ‘latex-only’ Purdy which cuts a straight line almost by itself and which will last the home-owner a lifetime). Needless to say, quality paint is also a big key: better coverage, longer-lasting color, and washable. We recommend Kilz Tribute and it ships for free: wow. Other pages have all kinds of colors but this page is the gray/green palate.
Roller: A low-cost roller leaves lint in your wall and it feels like sandpaper. Ick. But for only a little more, you get a lifetime tool that’s easy to clean (read how to clean a roller easily). What do we use? This roller frame, (a.k.a. roller cage), used with this roller cover, I like ¾-inch for trim, (same or even longer nap for walls). Longer naps hold more paint, and the stipple pattern does not matter: you’ll tip the paint out with your brush. This roller covers really last and they fast!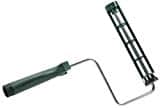
We have a post on how to paint wood trim the way we do: and you thought we used a brush. It has a few tricks.
Optional: You won’t need to use tape with this method, but if you want to, use the green painters’ tape (special glue on tape does not pull off paint later and tape is water-resistant) But as you’ll see it’s not necessary, even for beginners. See tip on tape, below.
2. Paint the Walls (don’t worry about getting a little wall paint on the fresh trim)
ROLL WALLS BEFORE BRUSHING: by rolling first, you leave no doubt about what area you need to brush later. Why is this faster?
If you brush first, you’ll brush a wider surface than you had to the other way around. Roll close and you’ll only have to brush a narrow strip next to the trim.
Rolling walls:
- Start rolling your walls and when you come to the baseboard or window/door frame that you already painted, allow your roller to almost touch (ok to goof and touch) the trim. Don’t worry about the mistakes yet.
- Push your roller into all the corners of the room as well—less cutting there too. (Assumes one-color walls).
- Let the paint wall paint dry.
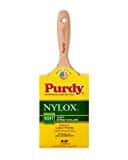
This is the straight-cut (not angle cut) Nylox…for latex-only. - Cut the wall paint at the trim boundary. A latex-only Purdy brush is shown here (choose any size) will cut a straight line even if you wiggle your hand a little. It’s amazing and will last a lifetime for you. This brush goes 6 months of daily use for me. Pays for itself in an hour.
- Later, you will touch up where you hit the trim.
Cutting walls:
- Fully soak up a load of paint in your brush without dripping: Key to this: See my Purdy brush: I use one of these all day every day for 6 months, and it’s still got life. Purdy is a great company (company website). These babies can hold a lot more than dollar-store brushes (with the crappy thick bristles). We mostly only buy “latex-paint-only” brushes for latex paint. We rarely need brushes for oil and brushes that can do both are inferior for latex paint. A Purdy is for life (I do not work for Purdy! My reviews of products are from the love of the tools.)
- Big tip to ‘cut’ the wall paint faster: gently shake the brush low in the can to flick off the excess, then hold the brush over the can. Test this: Dip, shake and lift the brush up and stare at it. How long does it take to drip? That’s how long you have to get it to the trim w/o dripping (don’t shake it hard!) And certainly don’t scrape the brush on the side of the can: you lose your heavy load!
- Spread 80% of the paint that is in the brush over about a yard (a yard? yes). Don’t try to get the paint very close to the new trim just yet.
- When the paint is laid out, push and spread it into the edge/corner onto both the wall and trim. Fast right?
- Let the trim paint dry.
3. Touch up the Trim
- Where you goofed, just hit the spots and make a nice line: Purdy brushes make this easy. We don’t need no stinking painter’s tape!
- Even if we did not paint the trim if we have the old trim color, we touch-up the trim. It sharpens the line for the ‘wow’ factor. Careful, because old trim can be faded.
Why you need a good brush when painting trim
 Quality bristles magically find the corner. You don’t really need a super steady hand using a Purdy. Why “latex only” brushes? They last longer, hold more paint and cut better than bristles that also accept oil paints. If you might use oil later, there are Purdys that do both.
Advanced Professional Painter Tips
People are amazed by how fast we are at painting the trim. Secret: we use a roller everywhere we can. In fact, if I just finished a flat-paint ceiling in white (read about ceiling paint), and now I need to move to semi-gloss white, I won’t even clean the roller—just squeegee with my 5-in-1. Try it and you’ll see!
This is another reason why I answer “trim first” when I’m asked if we paint walls or trim first.
Read our post on what is the quality paint for walls.
Read our Easy Clean-up: best way to clean paintbrush, and how to clean paint rollers.
Last Tip… If You Use Tape:
Peel off the tape if you used it while the paint is still tacky, not fully dried.
Paint is a plastic film! Let it dry enough to firm up or it will ‘spit’ as you pull the tape. Do a test in an out of the way spot. Too wet and the tape spits paint…too dry and it can rip the new soft layer.
Summary of Paint Trim or Walls First:
- Paint the trim first—no need for tape
- Painter’s trick: we use a roller (the same 9-inch medium nap) and roll the paint onto walls to be painted and tip it smooth with a good brush
- Let dry, roll walls very close to trim and let that dry. This is a good time to caulk.
- Cut walls.
- We list all the painting tools you could need.
FAQ: Do You Paint trim or walls first?
— Which has easier clean-up: painting walls or trim first?
Surprise: you don’t have to clean the brush twice depending on color changes. If you do a white ceiling (flat) go right to the gloss with no cleaning (roller too). Just squeeze ’em out.
— What looks better: paint walls or trim first?
Same result. Even if we did not use this method, at the end of every interior room, we always hit the top of the baseboards (at least) with trim paint (whether we painted it or not (assuming it’s white) as it brings out the fresh white-ness and the clean line with the wall. People like it. “Wow”. Meh. Secrets.
Alternate Method: Paint Trim or Walls First? Answer: Walls.
This just bleu your mind, right?
Ask some painters “should I paint walls or trim first?” and they’ll say they will paint all walls first with the roller—no brushing, coming very close to the trim. Then they paint the trim while intentionally getting trim paint in the corners and on the freshly painted walls.
Then they just need to brush (cut) the wall paint at the end.
Works ok, fast. Again, as with my way, it’s faster and easier to cut the wall paint, not the trim. But…
A flaw in this method:
But what if the trim paint splatters on the freshly rolled walls? Will you see all the spots? Our way above is better and we’ve tried both many many times! Good luck!
Let us know in the comments if you are unclear about your situation and whether you think you should paint walls or trim first.
Thanks for the great tips
This is a great tip!
thanks
Thanks
This is great. But, does it still work using BM Advance alkyd on the trim and latex on the walls? I mean using a roller on the trim as mentioned and smooshing a bit of Advance paint on the wall to be covered up later with latex? Will there be an adhesion issue?
Right you are. I would probably not smoosh, but I’d roll darn close and either stop to wipe off the trim or make mental notes of where to touch up… But all the trim needs to be checked anyway in the end. Adhesion not really an issue as far as I know… Not sure about painting latex over Adv. Thanks
Hello, Brad, I am overjoyed to have discovered you. Before I can begin painting the walls of a bedroom, they need to be thoroughly cleaned.
Hi Brad
Just wanted to say thanks very much for this article.
I’ve painted every room in my house at least once and currently have my bathroom to do. It all started with a leaking basin pipe… Long story!
I’ve always cut, then rolled, but when reading this had a huge “a ha” moment. “Take on Me” filled my head!
Seriously though, it just makes so much sense. I spend so long cutting in, I’m sure my painting time will be reduced by about a third having read this.
Thank you 😊
Nice to hear, thanks
Nice to have helped
b
Hi Brad
After rolling the walls, when i use the brush to cut in, how wide do i go? I dont want it to be noticeable with brush strokes if i have to cut in a 2nd time.
Is 1/2″ thick roller thick enough? And is it better to use a 9″ roller or go bigger. Sorry for all the questions. Thanks
We roll first so the amount to cut is defined: just what the roller did not get. I leave a few inches so I don’t bump trim… and my brush is at least 2.5 inches sometimes 4!
Nap is up to you: thicker nap more paint less dipping, but yes some different texture but we never mind the orange peel … not a factor in a good paint job really. I like 3/4 poly-wool blend roller. Never buy the cheap stuff: they shed lint. Good luck
Thanks Brad.
I along time ago I use to use lambskin rollers. I haven’t used them in a long time. Are they still a good option for a smooth finish? The walls have zero texture on them so i need to make sure its a smooth finish.
Is it best to just stick with a 9″ roller instead of doing 12″ or 18″?
Thanks so much
Yes, 9 inch is all I use and I’m a pro… 18 are for apartments doing high production…
If you don’t want any texture, you’d have to spray. The best way to avoid any roller nap stipple (never bothered me or any of my customers) is to use a thin foam roller cover. Very slow…many dips. So compromise maybe witha 1/4 inch. Do some testing: let it dry and see if it’s acceptable.
Good luck,
B
If you roll first then cut you will see the brush strokes from cutting. Your cutting line with flash. Always cut first then you roll!!!!!
Whatever you say sir. After you paint for 30 years let’s see what you say!
🤣
Hi! Great website! I am new to everything house related! We just bought our 3rd house, that happens to be a 1950s Cape Cod with plaster walls and some wallpaper with bare plaster underneath. As I was reading, I came across some terms that I am not clear about. I am not sure what “cutting” , “tipping” etc means. I also had a question about after rolling, do you go over it with a brush or do you leave the rolled part and paint the edges? Thanks!
Hi. Cutting means using the brush to get near the edges where a roller cannot. Tipping means after rolling, smoothing out the roller bimples witha brush so all the lines are parallel.
With trim, yes, go over the rolled paint with a brush, not for walls though.
Let me know if that is not enough.
Brad
Thanks so much! Do you also have a post about what to do with peeling paint on ceilings? We have a bathroom that the paint has chipped and is falling down.
I don’t think I did an article on that. Best to just scrape, sand, spackle and use excellent primer and bathoroom paint. Hope that helps.
B
Hi, Brad you are a live-saver for sure! I actually have started enjoying painting now because of you! I love my Purdy nylox brush too, great tip! I have a question about trim. I am installing new trim around the house and also painting walls and ceilings. Should I pre-paint the trim with two coats, install, caulk, and then do touch ups? Also I am a little confused if I should paint the caulk the trim color or the wall color since you said it’s easier to cut in the wall paint. What would you do in my situation?
That’s what I do when I can: 2 on trim, then a light 3rd after install. SOme spackle may need a spot prime before final coat. The caulk is usally the dividing line: half is trim paint and half is wall…if you know what I mean. I paint trim, getting trim paint on wall without a care then cut carefully on wall because its SO much easier.
Good luck! Thanks for the nice words~!
Hi Brad. Your website is amazing.
Question – We have wood trim painted white. It has 2 or 3 problems.
First latex paint was applied over oil paint in the past and it is peeling off terribly.
Second, the trim is badly beaten up from dogs and kids in some places. So badly, that I am considering have a carpenter replace the trim if we can get a bid we can afford.
Third, I assume if we sand down far enough, under the oil base we will hit lead paint, so I do not want to sand very much.
If I can’t afford to replace the trim, how do I prep this wood trim to take fresh paint without peeling as well fill in the gashes and dings in it for a clean final finish?
Thanks!
Fred
Hi. Do try to replace the wood. You seem sure about lead. I have an article on removing lead paint you might find useful.
https://www.bradthepainter.com/lead-paint-encapsulation/
If you paint:
That latex must come off. No other way. Nothing that goes over it will stay: it will come off with the latex that is not bonded.
My approach might be: sand off the latex and at the same time you will be sanding the old oil.
If lead: do all you must to protect yourselves.
Then you have the oil sanded which is a must (de-glossing) and then you just prime with STIX or a good bonding primer then latex or whatever you like.
Rough surfaces? Use a hard spackle for that. There are many around: something that dries hard.
Good luck,
B
Hi Brad- Hope your surviving the virus. My momma wallpapered the living room, formal dining room and hall way. She passed away a few years ago, and we are finally getting around to fixing the house. We have gotten a good bit of the paper down in the hall and living rm, but it has a substance(glue i guess) on almost all of the area that the paper is gone. What would be the best way to proceed from here? I really dont want to sand, but I have a small palm sander that I think would be ok. Is there a product that would fill in the area where there is no glue and smooth it all out? Some kind of primer? or better yet- and primer and paint together that would do the job? Ive got a few years on me, and will probably be doing alot of this alone. OK, well I will be looking forward to hearing from you. Thank you so very much. I really learn alot reading your information. Next time I will be writing about how to restore and paint a rusty metal kitchen cabinet!!- till next time!!
No don’t sand. Rent a steam wallpaper remover. It’s got a boiler and forces steam thru a plate you hold over the glue/paper. Works great but hot and humid work.
Keep wetting the wall with or without steam and scraping the glue with a wide knife…6-8 inches or bigger. Then wipe and scrape over and over. You’ll know you have it all…or 99.9% when it’s not sticky to the touch when damp.
Then a good primer that promises good bonding… Don’t mess with primer and paint in one. I know they are better than in previous years, but separte coats is the safe way.
ps, any oil-based primer stops rust, then normal paints!
I am getting ready to paint the nursery I have just built for our new daughter, and plan to try this method. I know I am going to be doing two coats in the room, and I am interested in knowing if I need to do the wall roll then cut in for both coats? I have heard you can do a roll only skim coat, then cut in and roll the second coat, and have seen that have great success, but that has a second roll after the cut in you describe here. What are you thoughts on rolling a second coat after your cut in? Should I just have a look after the second coat dries and cut in again if it needs it?
Thanks!
Tom B
You have it right. Roll, cut, roll and check if your one cut looks ok. Look with a bright light.
Depending on the color contrast, you may be ok.
Good luck.
B
Hello Brad,
Do I need to cut-in for each and every coat?
Or is once enough?
(BM Aura- eggshell- very slightly browned white.)
Thanks,
Pete
Well, with a very good brush and a paint that is close to what you are going over, yes, one might do it.
Aura is famous for great coverage: that’s what you paid for! But the proof is in the slightly browned pudding… check it when dry. Don’t try to force it to cover in one as you may lay it on too thick. Always best to do a quick 2nd.
Good luck
B
What does fully soak up a load of paint mean? Just touch the brush to the paint and it will wick into the bristles?
No, not just touch and wick… It means you really dip and even swirl or if you are near the bottom of the can you smoosh. Sorry for the slang, but it’s true.
For the very first time when your paintbrush is dry, really soak it in paint…get the bristles fully wet and each time you dip, it will hold more and you don’t have to dip as often.
This basically simulates a brush you have been using for a while: it’s fully wet. But when it’s dry, it can’t open to the paint and suck it in fast or fully.
You’ll get the hang of it. You’ll know what I mean in your first hour.
Good luck.
Hi Brad. It’s our new house. The sheetrocker is going to spray prime. We’ll be using pre-primed trim (that’ll get a semi-gloss white finish). Should I paint the walls before I hang the trim, or should I trim first and then paint the walls and trim? Thank you in advance.
That trim will probably need 2 coats. Rare are the paints that would make you happy with one. If you put 1 or 2, whichever you like, on your trim and then install, you’ll have almost as much touch up as you would a whole new coat. Here is what I do: I lay out new trim on saw horses or on some lift over a drop cloth. I roll with 9: roller and tip out with wide Purdy brush. I let dry. Then the carpenters install. They have dirty hands! So then I’m putting a 2nd top coat over the first, after I fill nail holes and caulk corners.
So the answer for me is : both. Before one, and after one.
Good luck.
Ps use a quality paint for best coverage. Hdepot claims it’s one coat… sure.
b
Hi Brad. Me again. Finishing up with the primer today (yellow/gold color). Slowly but surely it’s getting done. Another question please. I read somewhere that if ceiling and crown moulding are same color that first coat on moulding can be ceiling paint and second trim paint. What do you think of that? Thank you again for your time and patience.
Hi Brad. I have crown moulding that will be painted Ben Moore advance semi-gloss and ceiling Ben Moore ultra flat. Same color. 8.5ft ceilings. Rooms not very big. Not sure which to paint first. Yup. Crown moulding. Thank you in advance.
I would do the flat first, Then even though it is a slow process, brush the Advance. This is a heavy paint, like the old oils in many ways. You need to go somewhat slow anyway. Do my trick of rolling the flat into the corner of the molding: this way you will not need to brush the long lines of flat: just the corners. Then use a new Purdy latex only brush... or like new. It will easily find the corner of the molding/ceiling and you’ll fly. The first coat will be the one to get a good line, then the 2nd coat, if you do it, you will not need to cut the line again: one coat on the line will do it. The flat paint you rubbed onto the molding will help. You’ll see.
Good luck! Careful on ladder: don’t forget where you are standing!
😄
Hi Brad, I’m not going to remove the popcorn as I have a lot of pictures and bookcases so the wall texture is not a big deal for me. I thought I should wash the walls after I removed some lighting fixtures and the paint underneath was considerably brighter. This is my first time painting so your advice is much appreciated!
Hi Brad, so glad I found you. I need to wash down the walls of a bedroom I’m going to paint. If I use a solution of TSP, do I rinse as I go? And what kind of sponge do I use? It’s a popcorn wall so I don’t want to leave little pieces on the wall. Many thanks.
Yes, you can rinse as you go or do it at the end. If it dries, it may be a little harder to rinse, but not a big deal. Popcorn? Are you removing the texture? that will take more than TSP.. there is a special tool you can get (and sell for at least half what you pay) and it sucks the dust into a bin. Or you could just scrape and then sand. Then TSP may not be needed. In fact unless you have a grime issue, TSP may not be necessary at all. If you write more I could refine what I think now from what you wrote.
To remove popcorn you can moisten it then scrape for a little less mess: use cloth drop cloths and cover everything: it’s a mess.
I noticed you specifically said to let the rolled walls dry before cutting in with a brush. What is the reason for letting it dry? I was previously taught to keep a wet edge.
Thank you,
Carrie
Yes when brushing keep a wet edge and when rolling keep a wet edge. And if you can, brush right after you roll, that would be fine. But if the rolled paint is just tacky, the brush will grab it and sort of leave texture…sort of drag the tacky paint up. Best to let it dry. Not a major point, just refining.
No one has answered this question. I painted my walls before the ceiling. What do I do Now?
HI: no worries. You have 2 ways to go. One is to use the green painter’s tape to hold up plastic up to near the ceiling. Pull tape off gently. This tap should not pull any paint, even paint that is still soft, but go slowly.
The other way is to just paint the ceiling slowly, wipe any drips on walls as you are near them. If some get by you and dry, just touch up with wall paint. Since your wall paint is new, the paint will be an exact match (old paint fades, even the best Sherwin Williams or Benjamin Moore). I’d go the 2nd way if you have no artwork hung on walls yet.
Easy peasy.
Great website!
Question: If the trim is painted first with a semi-gloss latex paint, are there any problems with then painting flat latex wall paint over any semi-gloss that is on the walls around the trim? Will the flat latex stick to the semi-gloss? There wouldn’t be much overlap, but there would be some. Is there no need to sand or de-gloss the semi-gloss that got on the walls?
Thank you
Hi. No problem at all. The only worry is if the paint you go over is oil. Latex will not stick to it unless it’s sanded or otherwise de-glossed. No need to sand latex over latex: they play nice.