I’ve researched the top brands selling driveway paint and here is my buying guide.
Driveway painting is a very basic, relatively easy DIY project. Here are the prodcuts I’ve been using and what I recommnend.
The best driveway paint products that are the ones that are best at standing up to the elements.
(Read also about putting asphalt sealer down. Concrete is another animal: here are my concrete posts.)
I selected paints that can be applied to concrete or black-top.
Selling your house? The driveway is the first thing people see: major “curb-side appeal” – Literally.
- Whether you are doing lines or doing the entire road, driveway paint colors are available online for free shipping, amazingly.
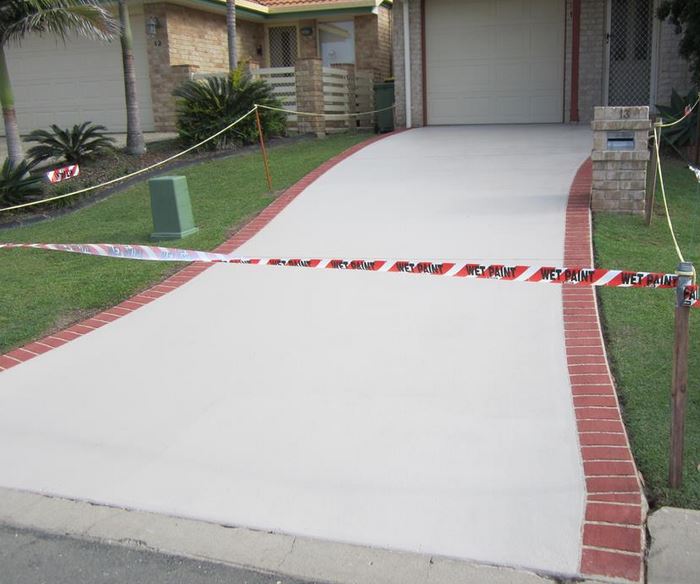
- Concrete driveway paint will last a long time but…. the key is good surface preparation.
This post has info for concrete and for asphalt, already painted or not, including walls and steps as well.
See my fun video at the bottom: amazing black top painters!
Sealing an asphalt coating? My experience on this gives me my opinion: don’t seal it. Read my view, bottom of this page.
Painting basketball or tennis courts, or curbs or handicap parking? Jump down to the section on Traffic Paint.
Not sure if you want to paint? Compare:
- Stain penetrates the top layer (about 1/16 inch) and leaves no residue on top.
- Driveway paint (includes concrete and asphalt paint) bonds to the surface, has some thickness and needs regular maintenance.
Stains can (some must) be clear-coated to keep the water out. I’m against clear coating in general as you end up with a mess when the time comes to re-do.

Costs of Painting a Driveway
My motto: there is never an occasion to buy low-cost paint, even if you want a quick-sale face lift, or if you are a landlady/lord. It is always more expensive in the long run.
And if you are selling: how do you feel about doing a bad job for your fellow citizen?
These all resist “hot tire pick-up”. Even cars that come down a long gravel road in the winter have warm tires. Hot tires on paint? Terrible.
Driveway paint: what are the best concrete driveway paints today?
Two-part epoxy
An all American company you probably never heard of has been making specialty coatings for a long time. It’s well-known in construction, but they do not cater too much to the homeowner. Enter online shopping.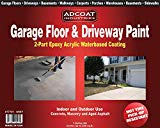
AdCoat makes high-performance coatings like epoxy and so on. Their driveway paint is 2nd to none. Check their price here.
Primer? Not required if the new (but ‘aged’) concrete is clean and dry. Old, pre-painted concrete must be de-glossed, clean and dry (see the ‘prep’ section below). So it’s self-priming which basically means it requires two coats. I contacted Adcoat and they confirmed: yes, most applications need two.
It’s not really a true paint: it’s “100%” epoxy. That means no evaporation and the layer is very thick. If you don’t know the difference between 100% and other types of epoxy, read this. This coating hardens without evaporating. If you don’t use it all, it hardens in the can after you combine the 2 parts. But it has a surprisingly long 6-hour pot life (before it’s unworkable). many have a pot life of less than an hour. Smoke that Willie Nelson.
- Interior/exterior, covers about 250 square feet (2 coats recommended, but not necessary)
- Won’t yellow in the sun
- Use on concrete, aged asphalt, brick, wood, primed metal and previously painted surfaces
- Spray or brush/roll (my advice, don’t spray epoxy as there is no cleaning the hose if any hardens)
- Dries to touch in 2 hours, walk-on in 12
- 7 days for full cure/auto traffic
- Fine for wood, but use on interior wood only
- Only comes gray and light gray, which is what we all want anyway says them
Concrete only: One-part “epoxy”. Wha?
There is no such thing as a good ‘true paint’ for driveways: only epoxies will make you happy.
Enter a newer type of product is one-part (“1-K”) epoxy coatings: paint with added epoxy resins in the solution and they are very tough.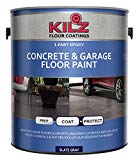
I like Kilz 1-part epoxy interior/exterior garage floor paint for driveway paint. It’s resistant to damage from chemicals, and oil.
The best driveway paints have more total ‘solids’ in the solution and therefore leave a thicker coating. They also bond better.
Primer?
- For previously painted concrete, follow the prep instructions in the TDS* below
- For new untreated concrete: a primer is best. Use this primer, the best concrete primer available. Ignore cost!
Like all good garage/driveway paint, it resists hot tire pickup and can take other heavy activity except for fork-lifts!
- Water-based, but surface must be very dry before applying
- Interior/exterior
- Slate Gray or Silver Gray only
- Only use on uncoated concrete, masonry, brick
- Satin finish (slightly more glossy than ‘matte’ or ‘flat’ finish)
- Dries to touch in 2 hours, recoat in 4 hours
- Apply 2 thin-ish coats
- Satin finish (not much gloss)
- Covers 400-500 sq. ft. per gallon (smooth surfaces) and 300-400 on rough surfaces
- Not for use on vertical walls
- Spray or brush/roll
* Here is the full TDS (technical data sheet) that gives complete instructions.
Asphalt only: Coal tar epoxy, 2-component
Very tough.
Oil-based, black (matte finish) and only available in 5-gallon pale and it’s gonna cost you.
But you do get great paint. Also, Watco has a great product and how-to video, but it’s very expensive. Still, it’s worth it.
In the paint name, “Partial fill” means the pale is 5-gal. capacity but only comes with 4 gallons. You add one gallon of the activator sold here.
Big tip: don’t try to adjust for 2 gal to 1/2 gal. You won’t get it right unless you use a measuring cup and if you miss, you ruin your driveway. That’s the voice of an old, tired, so very tired, painter.
- One gallon of the mix covers only 100 to 130 sq. ft./gal. (1/4 what most normal paints cover).
- Industrial/marine environments
- One hour pot life: this means it hardens in the can in one hour. So have your buddy cut the edges while you roll unless you have a small job. Get a drill paint stirrer to cut your mixing time to nothing. Why waste 5-10 precious minutes?
- Drying time is at least 18 hours in a dry hot climate up to 1.5 days for humid.
- Apply only when the air temp is above 50F and below 100F.
- Protects against severe abrasion, strong chemicals and immersion in water
For some interesting driveway paint ideas, check out this video: this guy is doing a great job.
How to Paint a Driveway
Personally, I love to paint driveways and floors: gravity does most of the work. Cha-ching.
1. Picking the perfect day
- Check the 5-day forecast. You want at least a 2-day window of warm, but not scorching hot weather. Also, try to paint when the sun is low: the direct sun will dry it too fast, as will intense heat. (Today’s 5-day is as accurate as the 1-day was in the 80’s! Computer modelling!)
I like to start early in the morning before the sun beats down. When the surface gets hot, the paint dries too fast and you see all the boundaries of where you rolled. That’s why you want to keep that “wet edge”.
Painting with strong work lights after sundown is a good idea too. I never do that, however!
2. Materials needed

- Brush: a homeowner should buy one for life and keep it well maintained. This one will last you for life. But for epoxy, I say buy a decent one, not too expensive, and toss it when done. They become very hard to clean at the end of the ‘pot-life’ of the epoxy. This is the same kind of brush, but a bit wider.
- Roller handle: avoid the budget ones because when you push them they bend and break. Buy one for life. The cost of this one is really low and it works with any broom/paint pole or with the ‘sher-lock’ type pole.
- Roller cover: almost all floor paints recommend a 3/8 inch nap. Check if your product wants a different one, but this will do. Using epoxy coatings, I use this same roller cover. If you plan to do 2 coats, buy 2 rollers because the one from the first coat will be as hard as a rock when it cures!
- Crack filler (explained below) if you need it.
- De-greasing cleaner (explained below).
- Not much else is needed. Some rags and any paint removal tools like scrapers or wire brush. Gloves are very helpful once you get going.
See my complete tools page for every pro tool I use. They really don’t cost that much. Poor tools cost more in the end.
3. Old sealed/painted vs. new concrete
4. Key Step: prep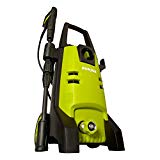
Generally for untreated concrete (aged at least one month), thorough cleaning and drying are usually all it takes. Lucky you.
Clean. This is for all concrete driveway paint jobs. This is yet another reason to buy a pressure washer. They remove paint, clean decks, and wash cars too. I plan to buy the Sun Joe medium-powered unit, but they make bigger ones. I have an old one for now. It. Just. Won’t. Die.
Definitely use a rotating tip on your pressure washer. You’ll want that for all you wash to protect from damage.
The majority of failed coatings are the result of the surface being dirty or too wet: poor prep!
Expansion joints in the concrete should be replaced or repaired before you paint or seal. It’s not so hard to do. Here is a quick list of how-to change your driveway’s expansion joints.
The hard work: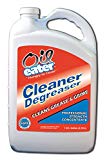
- Oil stains? TSP works fine, but remember it’s a lot nastier than some very good pre-mixed cleaners. Wash TSP off very well. I use Oil Eater which you dilute for a very inexpensive, biodegradable, and effective cleaner. Excellent for kitchens when properly diluted too.
- Don’t use baking soda as it leaves a residue. Whatever you use to clean old concrete, bad oil spots that have years of drips may take a few treatments.
- Final wash. This is done best with a pressure washer (shown above). I use mine to prep any surface for outdoor staining or painting. It’s like a miracle. You can rent them too for almost a hundred per day! Why not buy one for just 20 clams more?
- Dry well. This might be a few days ( so deep in the cracks can dry).

- Last prep: Now that it’s clean, look for any holes or cracks. Fill them with a good driveway concrete crack filler, a gravity-fed choice and thin enough to penetrate. Paintable: just sand and clean with rubbing alcohol to allow a good bond to paint.
Do I need to prime concrete before painting? No, generally, driveway paints made for concrete you do not need a primer. My recommendations above do not need primers if the slab is prepped correctly. But a primer never hurts. The key is good prep!
Actual painting: the easy part
- Cut. Whether you start with primer or paint, begin with the cut along the edges and any expansion joints with a good paintbrush. See the ‘materials’ section above for my recommendations.
- Roll. Work in squares with your roller. Most paints call for a 3/8 inch nap. All the ones I use are on my tools page.
- Recoat? Depending on the paint, you may need a 2nd coat, but probably not a 3rd. If you bought more paint than you need, it keeps for many, many years. Read about old paint here.
Make it reflective 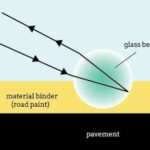
Glass beads, but don’t mix the beads in your pan or bucket! You must “broadcast” or toss them onto the wet paint on the floor as evenly as you can. Paint a section with your roller/sprayer etc, then toss.
How much? You would use 6 pounds of beads per gallon of paint, or 4.5 lbs. for the 3-quart mix in the recommended traffic paint above. No need to be too precise.
The beads that don’t find your paint can be vacuumed and used again (if you use a shop vac that you can open easily).
So if you are doing a few lines, you won’t need more than about 4 pounds. This is the glass bead product that the Department of Transporation uses, and it’s less expensive than competitors. Nice.
Graphic above courtesy St. Louis public radio. Reflection beads in paint is one of the best painting concrete driveway ideas I’ve ever seen.
Make it slip-proof
Slippery when wet? You bet paint is. Ever watch the Indy 500 on a wet day? They hit the paint and wreck. Some driveway paint is non-slip, but you can always add texture.
Use silica: not beach sand! You will read some big-name ‘handyman’ websites (Bob) telling you to add sand. Don’t do it. The grains are uneven and are generally too large. They’ll easily catch and rip, and start your peeling.
What to do? For a big area, you can buy garden sand and strain it with a basic kitchen strainer. Watch me do that here. For small areas, just buy a jar of silica: all uniform grains.
Don’t mix the silica in your paint! After you roll/brush/spray each section, ‘broadcast’ or uniformly toss the silica and let it dry. Presto.
I’ve seen websites telling you to dump into your bucket. Jeez. It sinks to the bottom. Duh Bob. Wow. Hmm, ole Bob.
Flakes?
You can toss these color flakes, but this is something usually done only indoors.
I’ve never seen flakes on an outdoor driveway. You could be first if you’re brave. Nah.
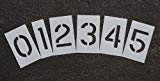
Traffic Paint: curbs, crosswalks, fire zones, etc.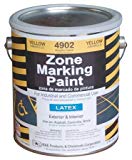
- Coverage for one gallon in a 4-inch wide stripe is about400 linear ft.
- Dry time 10-20 min, let cure overnight before driving in summer
- Interior/exterior
- Apply on asphalt, concrete, brick
- Low VOC
- Brush/roll or spray
Sealing asphalt?
It’s an endless cycle of hurt. Don’t do it.
Opinion: Don’t do it
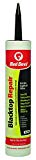
However, do keep on top of the cracks using a specially designed driveway crack filler that comes in a caulk tube. I trust Red Devil. (I wrote about caulk guns and how to use them here.)
The Washington Post agrees: don’t do it!
Ever wonder what the roadway painters use?
Thermoplastic Striping
Thermoplastic striping consists of pigments and glass beads to be highly visible at night. Heated up, it melts and then forms very thick lines and symbols. Its use means there’s no need to shut down your driveway just to paint it.
Plus the video at the bottom: wow.
All you could ever want to know is in this government document on pavement marking.
Any comments, please feel free. I’ll see your comment within a day, usually. Thanks.

tanks
Hi Brad.
Not sure where to begin (lol) I live in New Orleans and currently renting a double (shotgun) style house. The house currently has 2 pebbled cement slabs about 21 inches long. About a year or so ago I added large rocks in the middle between the 2 cement slabs.
Well back in May this year I wanted to widen the driveway with either rocks on or 19×19 cement pavers. I really didn’t want to do the pavers but a friend/amateur convinced me that driving on the rocks was not advisable. FYI….these are the large rocks from Lowes, not the tiny pebble rocks.
So my friend added the pavers (at least 30 or 40) but they were moving once I started driving on them. He then added cement in between. After that dried he filled in the cracks with polyurethane mortar concrete sealant.
I wasn’t happy with the appearance but figured once I painted over it …..it would turn out fine.
Sherwin Williams suggested Armorseal 1K. Did my prep day before made sure it cement was clean and dry. Painted 1st coat. Waited 24 hrs then added second coat. Didn’t walk on it for at least 3 days. Around the 4th day I hosed off some leaves from my neighbors crete myrtle and I couldn’t believe my eyes the paint was literally peeling off. I took pictures and showed Sherwin Williams and I was told that was the wrong paint to use for driveway. The one they recommend is by Heavy Shield water based solid color Concrete & Driveway enamel/stain.
I had to use a pressure washer to get all the paint up.
I’m sorry this was such a long post/question. Do you agree with trying the Heavy Shield paint they suggested?
Since I am not there in person, I can’t really tell you I’m sorry. But it sounds to me like Sherwin-Williams knows what they’re talking about. My advice is always the same with things like this. Do a test spot and wait as long as you can to see how it behaves. That’s always helps.
Hello Brad,
We need to update the color/paint on our paver/brick driveway. We do not know what the previous owners used, but the paint lasted and held up well with no hot tire mark or stains it’s just faded and we would like a more updated look possible a gray color( currently it’s a light brick color). We are in very hot South Florida and our driveway is very active with multiple cars with full sun exposure. We are not looking to strip the color already there. The Home Depot recommends something like the Behr Concrete stain but I get mixed reviews on the durability. Some reviews say it peals right away. Sherwin Willians also recommends a concrete/driveway stain. I read your post and you talk about an epoxy paint for the driveway. Can i use a concrete stain? We don’t want to strip previous paint. Would we need to prime first? What would you put on your paver driveway? the concrete stain or the epoxy paint? If epoxy, would it be 1 part or 2. Any specific brand of either one that I can purchase locally? Pavers are in good shape and we have already pressured cleaned it. Thanks.
OK, big job. Forget what HD says: they know so little. Stain over paint? Please. If you want to see what happens, buy a small amount and do a test in the corner. I think you will see it peel, assuming solid stain, which is … paint. Translucent will not help your color issue. I cannot see it but I’d probably use driveway paint after i’m sure it’s all clean and dry. Epoxy is tricky: it’s great for indoors. Again, if you want, do a test, but unless you mix whole cans, you won’t get the proportions right: can 1 and 2. One step epoxy is a much better choice, but again, do a test. Brands? There are not that many. Go with amazon reviews that are not faked. Hope this helps.
b
Hi Brad , thanks for your great tips and guidance as it’s a huge help as I will be tackling my driveway myself. I am in Florida and have a question. I have seen the different paint speckles added in not to make it a plain color. Just paint not flakes not reflective How do I go about adding the paint speckles in? It almost looks like a when u flick a paint brush marks,, thanks Tony
Hi. Not sure what you mean by speckles. If it’s what I think, have a look here.
Hey Brad I’m having a great time reading your tips. I have a question regarding opaque stain vs paint. I added to my fldriveway and the original driveway is structurally ok. It’s integral red concrete. Brickforn (color and stain supplier) offers a semi-opaque stain which won’t work for me. My question to you is: is a penetrating opaque stain better than paint? I can see how things like a snowplow would be better with stain but if I can’t find opaque I might have to paint. Question 2: when adding silica to achieve grip, why is it “broadcast” and not mixed in with the paint?
In my mind, opaque stain IS paint. Open the can you see paint. So, is penetrating opaque stain better than paint… no.
On a driveway, I would not do it. You don’t want to be scraping paint to re-paint. Ick.
Look for a penetrating stain that leaves no solids on the surface and make sure it’s for exteriors.
Silica sinks to the bottom of the bucket/pan so you don’t get an even spread unless you broadcast.
Good luck! Send me a pic before and after the drive and I’ll make you famous! ha ha
b
I want to paint a colorful mural in my parking area, so I’m hoping to find something that comes in a few different colors. Orange and purple are my main colors, but I’m also looking for navy and turquoise. Do you have any recommendations?
Hi. I stick with my recommendations on the page above. Key is prep. Make sure it’s clean and dry and no rain in the forecast. Colors: well they don’t come in every color. YOu can ask a local paint store if they can tint something you buy online. Sorry I cannot be of more help.
Brad
I am outraged at the job my professional painter did on my driveway and sidewalk. He stained it as it had been stained before about 20 years ago. I waited 48 hours before driving on it. It shows every tire mark from every vehicle that has driven on it. Tried pressuring it to no avail. When I raised the issue with him, he said it was nature of the beast. What can I do about this. Says duplicate comment and I don’t recall ever posting it before.
Thinking further, it seems to me that the stain must have either been the wrong stain (do you have any leftover cans?) or that even tho you waited the recommended time before driving on it, it was not cured and since it is February… even if it’s somewhat warm where you are… that it did not cure in the right amount of time. It could also be… this is just a guess…that the painter did not stir/shake the can long enough and the components were not mixed thoroughly enough… Hard to know. I’d say give it time and story off of it if you can and allow time to cure it. IF that does not work, the error falls onto the painter and he/she should re-do it for free and should pay for the materials. You should get legal advise on that. Good luck.
Can you use asphalt tar on concrete
Hi. I would recommend not, but you should call a company that does asphalt, they would know.
We have a problem with our concrete driveway. We finished our porch construction last month. We have existing concrete slab on driveway. I asked the concrete guys to wash and seal our existing driveway. Once they sealed it the concrete slab turned to dark sand colour and we weren’t happy. The guys offered us that they can wash again using some white colour and the concrete will look like white. We agreed to proceed with this option and now we are in stress as the concrete turns to blue shade after these guys washed with some chemicals.
So we are looking who can help us to remove this blue colour from our concrete driveway. Let me know if you have an idea how to remove it. I can send you a picture if you like to see it Thank you
Depending on the sealer, it may be possible to remove that by grinding then stain the color of your choice. See my post on concrete stains. Very little upkeep, less than paint.
Sorry i can’t help more: i’d need to see it in person. My best advice, call a company that does concrete staining and try to get out of this mess. The guys who don’t know what they are doing should pay…in a perfect world.
GOod luck.
b
In the end I advised that they should hire a 2nd company who competes with the first. Fingers crossed in hope.
Hi Brad: We have a gravel driveway that gets very bright in the summer sunshine. Would it be a bad idea to spray paint the gravel a darker colour to minimize the glare? Any suggestions or advice would be most appreciated. Regards, Susan
That’s a question I have never had! You could try, but the paint will come off in time and it will just be plastic for the earth.
Perhaps a masonry stain? Dark walnut? Get a test can and dunk some rocks. SHould absorb a bit. ??
Good luck.
b
Painted driveways often have unsightly tire marks . How do you avoid this.
Yes. We’ve found no advice from the makers. I think it’s a matter of touching up. I guess in the long run it’s best to just accept it. I don’t know much about hard/soft tire compounds, but they are going to be hard on the ground.
Hi, will the glass beads that you mentioned provide any traction for a driveway? Or do you need to use silica in addition to the glass beads? Also, do the glass beads help with the driveway not getting so hot? A very important question here in Florida!
Hi. No, I don’t recall those beads do anything for traction: just light. I have never used both. Do a sample spot, wait until dark and see if it’s both bright and tight!
For heat, go lighter color. The beads won’t help.
Good luck.
I am redoing my designed driveway which has a layer of acrylic mixed and concrete layer over the original concrere driveway
The company now wants to redo the paint which have fainted and seal the driveway again but this time they want to add glass in the sealant to reflect the sun and keep it nice
If the color fades the shine again do they have to strip the whole driveway or can they repair just the coloring?
Thank you
I did a quick bit of research so this is not definitive.
I find no sealants with ‘glass’.
Can you send me the product info?
My only real advice is to call other companies, anywhere in the country and ask if they do this and how.
My first thought was no, just clean, ie prep properly and repaint.
Why glass in the sealer? I’m very skeptical, but it could be a new thing. Likely tho it’s just to get more money… one never knows.
Brad
We have had new concrete we got coloured concrete but it’s gone blotchy and a dog walked on it and we have dog paws on it so our concreter a few days later used a block to try and get the marks out and in the process it left lots of white scratch areas on a charcoal coloured concrete….our concreter now wants to paint the concrete is this a good idea? We live in Australia so what brand would you recommend for us
Your info on this site is great even I can understand it haha
I have a new driveway, but there is a white spot in the middle and I want to paint it
Based on the photo, to me it looks like it got wet before it dried or cured. I think you’ll be ok to re-coat. Check the can to see if you need to prep it after the curing period. Perhaps you might tape off an area, de-gloss it with this and then give it a light coat, and obviously keep it dry. If it happens again, it must be underneath. Then I would have no advice but to grind it all off. I’d live with it if that were the case.
Good luck,
B
Hey Brad I live at 1 connelly court mudgeeraba and need the driveway repainted as well as the cracks in the concrete fixed. Can you give me a quote please
Sorry, I don’t live anywhere near you.Good luck
I have a driveway of 4000 square feets this driveway has acid water dye and we want to protect it with a clear can you advise me?
I will give you my advice, but you may not like it!! Don’t do it.
When you put a clear coat on, in time it needs to come off or be recoated and when that time comes, you’ll be so sorry. You’ll have layers of different stuff to deal with… what a mess.
Just leave your new acid stain and when the time comes, re-do it.
I guess if you made a fancy design, yes, you should clear coat, but just let it go if not.
YOu asked!! Good luck!
Brad
Hi Brad
I have a 400 sq. ft driveway.
It’s a bare clean concrete surface.
I want someone to stain the driveway for me. I have been told Behr is the best product.
I would not call Behr that. I’d call it good advertising.
Go with this page for starters and always feel free to stop by a real paint store. HD desk people? No so much.
Good luck,
b
Thanks
Thank you for great info 👌