viTwo short posts on this topic. This post is the ‘how-to’.
My recommendation for the best movie projector screen paint is here. It explains the reasons you want this paint.
This is my 30+ years talking. I read other sites on applying this paint. Rookies.
Giving away painter’s secrets
- Straining to avoid lumps
- Chilling your roller
- Additives to aid levelling
- Limiting dust
- Priming: why we do it
1. Straining is absolutely essential for this paint AND the strainer is free*, or you can buy some here. I have bought hundreds of gallons of paint in my career and even BRAND NEW PAINT CAN HAVE CLUMPS. Just from storage! It can be a year old and still be sold as new. In the can, clumps, very small but still visible, can form. For most walls, ok, but not here!
* Use an old lady’s stocking. Or a young lady’s… even better! Don’t pour thru any holes/runs in the fabric.
2. Wrap your roller / wet tools in plastic and chill. If you are going to do the 2nd coat the next day, between coats wrap your roller in plastic and keep it in the fridge. This slows the evaporation and you have fewer paint chips. But you’ll strain between coats anyway. Spraying? Always keep the tip wet.
3. Floetrol slows drying and aids in leveling. Paint On Screen products do have a proprietary additive to help them even out but depending on the environment and surface you might need a little extra something and Floetrol works well. I asked the owner of Paint On Screen paint and he agrees but says it’s not necessary. Maybe only in very dry locations. But it also extends the volume if you might be close and don’t want to buy an extra gallon. Be careful with coverage: test first!
4. Dust control. In this project, lint, dust, dried paint chips on the wall are evil. Below I show how to strain paint and why you don’t buy budget roller covers…but this is about dust/lint in the air. People walking around your wet paint will stir up particles. Bad. So vacuum, mop, dust etc, before you start, and kick out the children. After you finish, wrap your roller and cover your paint and get out for an hour. This limits dust.
Other ‘how to apply movie screen projector paint’ sites don’t tell you this.
5. Always prime it. Which primer? See the shopping list below.
If your paint says you don’t need a primer: wrong. For this paint, use primer – always*.
The paint we recommend, Paint On Screen does call for a primer but if you have a perfectly smooth white wall, you could skip it. But why risk it?
Primer is for
- adhesion
- blockage of absorption into the wall
- true color
- Looks: priming is the least expensive way to up your game. See where it fits in the ‘how-to’ section just below.
* One case you can skip primer: If you have a wall with pristine, white and flat/matte paint, okay, but anything else you really must prime it. Why would you go to Japan and not try the fish?
Thinking the project through
For a pro, this job might take a few hours, with some of that being drying time and clean up. For a semi-experienced homeowner, it’s not going to take much more.
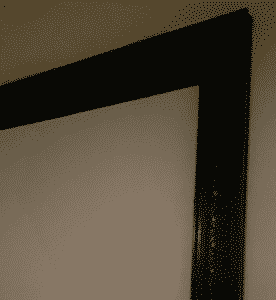
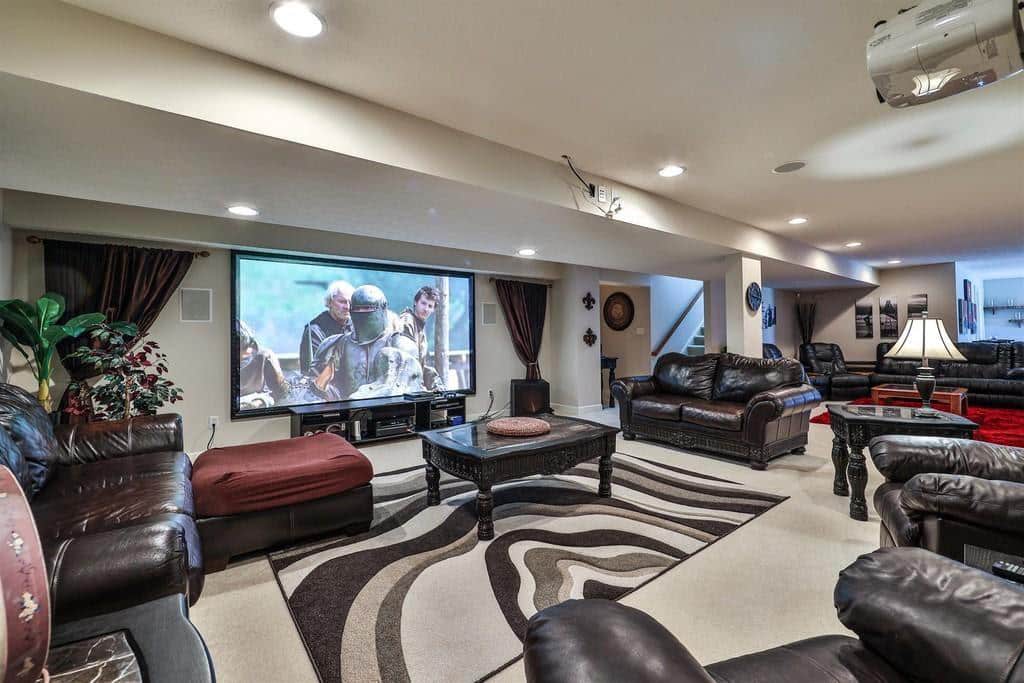
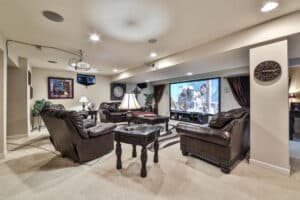
Border? A black frame or felt tape can be used for a more classic look while some opt not to use any border for an invisible look that is more modern. With a border, the screen ‘pops out’ at you. Below is all about this.
Doing other painting? If you have wall area outside the screen area, paint all that first.
Also, if you drip white on the darker areas, you can easily touch up, not the other way around.
Does size matter? Why not make the largest screen size your projector will project and that will fit in your room. But how big? How high? Big tip: sit on your sofa first and make sure your neck/eyes work with your wall location. Check your projector’s specs for the max size.
How much prep? Can I paint on any smooth surface? Meh, it will be… you know… “OK”. But the difference with movie projector screen paint is the wow factor. When my brother-in-law first saw a movie on a wall with movie projector screen paint, he understood why people love projectors.
How to fail: The one thing you DO NOT WANT is imperfections in your wall. Very small ones are ok, but nothing visible. It’s like having a dent in your computer monitor. I HATE that. Follow my steps below and you’ll do fine. More below under ‘sanding’.
Existing color? Are you going over a wall with color, or already white? If color, first prime the wall with a good primer.
Shopping List
How much paint? … primer?
One gallon of Paint On Screen covers to 240″ diagonally FOR ONE COAT, which equals 170 sq. ft.
This link goes to any of the excellent paints they offer. Read this post to know more.
Primers, like wall paint, cover about 400 ft² per gallon. Read below in the How-To section about which primer to choose.
You only need one coat of primer unless you have a bad situation like stains. See below.
Most folks’ screens are about 120″ diagonal. That’s 43 square feet.
So one gallon could give you two coats of a screen that’s 120″ diagonal. Use this calculator for your exact size. Enter the ratio in Part 1, and the diagonal in Part 2 and click ‘calculate’. Check that the width and height are right. Then do the math for the area. If your method if it seems wrong, check it against my math above which is correct: 120″ gives 42.7 ft².
You can stretch the coverage just a bit with additives: see the Giving away a few secrets section below.
Tools: All these are on my tools page. My philosophy for all tools is: buy the best you can afford to save money in the long term. Quality tools last. I wrote about the paint and the border material here.
- Paint tray or bucket/screen
- Roller (no brush needed here unless you are painting the whole wall)
- Roller sleeve/cover (explained below)
- Roller extension pole if desired
- Dropcloth/plastic for floor
- Bright light (my work light is LED)
- Stirring stick or drill mixing tool
- Painter’s tape (explained below)
- Sandpaper (grits explained below)
- Stepladder
- Misc, like rags, water bucket, sharp work knife, tape measure and level, etc.
Roller type matters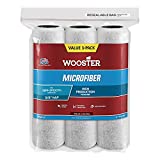
Dollar store roller covers shed lint on the wall. Pros only use Wooster or Purdy. Here is a 3-pack suitable for movie screen projector paint. Teflon coated microfiber roller of 3/8″ nap. This is recommended by the maker. The fibers release the paint very easily for a very smooth surface. The Floetrol will help with keeping it wet. If you let an edge get too dry, the tackiness will ‘pick up’ when you hit it leaving a texture. Floetrol prevents this as well as levels better. Again, Floetrol is not necessary but gives you a margin of safety.
IMPORTANT: Dollar store-type roller sleeves SHED LINT. That’s a disaster here, and a rookie mistake in any wall paint job.
Which Primer?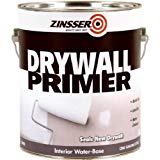
Drywall primer is low cost and leaves a very flat sheen. If you have stains on your wall, you must first spot prime with a stain-killing primer. This sands much easier than wall paint also, as you must sand. See below. If you plan to spray the paint, you must also spray the primer.
If you have water stains or any kind of stain, spot prime it first with a great stain-blocking primer. It’s expensive and toxic, so don’t do the whole wall unless you have to. Buy a throw-away brush as it’s shellac and alcohol-based. There is not cleaning it. I cut off the handle and leave the brush inside for a spot next time. We use this all the time for ‘knots’ in trim boards.
Optional Additive
Add a leveller for water-based paints: Floetrol. This additive slows the drying and allows the paint to become completely flat, not as in glossy vs. flat, but flat as in the earth is not flat. The paint is not flat either unless it dries very slowly. Oil paints and these days some water-based alkyds like Advance by Ben Moore do level without additives. Don’t use that paint for a screen though.
Nothing below is very difficult, but you do need to be precise and take your time.
Clean-up is not that bad: my short post on how to cheat.
How-to apply (like wall paint but more carefully)
I’ve read some other websites about how to apply this and they leave out what I put in the section Giving away a few secrets, above.
Paint Specifications:
If you don’t trust me… you’re not wrong to check with the maker: Here is the PDF of specs for the all 3 paints from this maker, that I recommend.
1. Sanding Prep Key Step
Sand your screen wall. Turn on your projector to find the edges roughly with a pencil mark borders. Sand well with a nice 150 grit, which is what most drywallers finish a wall with, and then, sand again with 220 grit. This fine grit is what is normally used for trim that will get glossy paint.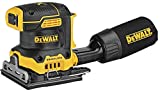
Here is my palm sander: you’ll love having it for life. Don’t use an orbital or belt sander, just the kind that rotates in tiny circles: much safer.
Not flat? Does your wall have visible seams from the drywall builders? Holes? You just fill them with drywall compound or ‘mud’. Sand as above and prime with drywall primer (below).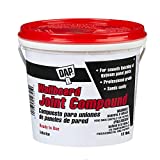
A big hump? You can live with it or even it out, add more ‘mud’ to either side of the seam and sand to flatten it out, or even better skim coat the entire wall. This is not that hard. Read this very short post on how to skim coat a wall. It’s all in the sanding.
Now you wipe to remove the dust with a barely damp cloth and let dry. Clean the floor and move/cover furniture etc.
2. Prep the border
Mark the edges: Turn on your projector to find the edges. Mark out your screen borders with a pencil. A laser level is great here, I love the Dewalt laser level, or just a regular level and plumb bob. Thanks, Bob.
Two border types: black paint or black tape
Using a black border? Black felt tape means you don’t need masking tape at the edges of your screen.
Paint it: I use this paint for a flat black border: you can make a wooden frame or not.
Felt tape, 2 inches wide:
- Roll of 40 feet (diagonal 170-inch screen)
Modern look: no border. Outline the maximum size your projected image can occupy. Mark the borders with tape …but… not the old-style tan-colored masking tape! It will pull the paint off your wall if you leave too long or press too hard.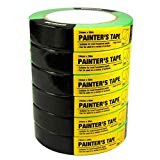
Get the good tape, the green and blue “painter’s” tape has glue that will not pull off existing paint. I keep rolls of this in various drawers. Tip: masking tape can curve: When you pull the tape off the roller, pull slow and straight so you don’t create a curve in the tape. Two people make this easy.
3. Just before you paint
Things to remember:
- Apply two coats after the primer
- Wait about an hour between coats
- Good to do a test spot for drying times and coverage
Paint in vertical strips, not like normal wall paint where squares are best. This way you can easily keep a ‘wet edge’, and try not to overdo it: just cover and leave it. You don’t want it to start getting tacky and roll more.
Overlap each strip by about 50% of the roller (usually 9 inches, so overlap 4). This prevents skips.
Curved screen? Roll in horizontal stripes.
Dome? Spraying is the only way to make it right. See below.
Mix cans very well before opening. Here I demonstrate how to shake a gallon, but maybe the best thing (before you strain) is to use a drill mixer. Actually, the very best is to take it to any paint store and they will shake it for free for several minutes, then go home and apply it without delay. Don’t skip the straining (below)!
Strain all paint!! So important!
BRAND NEW PAINT/PRIMER CAN HAVE CLUMPS. Just from storage. It can be a year old and still be sold as new. In the can, clumps, very small but still visible, can form. Use a professional strainer or an old lady’s stocking. Or a young lady’s…ha ha. You’ll use the strainer again below, so soak it in water to be cleaned later. (Or have a 2nd unused strainer standing by).
4. Painting time
If you won’t use a black border or if your screen goes into a corner cut with a brush first. Don’t buy dollar store brushes or rollers: they shed into your paint. Ick.
Rolling Instructions
Aim your work light from the side to make shadows of any drip or dust particle so you can remove it early. Keep a quality eye on the wall as you go. Don’t rush this.
Type of roller? See above under Shopping List.
TIP: don’t dunk your roller, just touch and grab the edge of the reservoir of paint in the bucket/tray. If you get it too wet it leaves a raised ‘run’. Check for 3-D lumps of paint. They dry high. Prevent these by squshing the edges of the roller before you start rolling. Just hold at an angle and squeeze the paint from the ends of the roller. KEY: keep it moderately wet only.
Runs or drips? Gently roll over any runs as you move on. Keep your eye on the wet paint you just finished for imperfections.
Second coat danger: Between coats, paint on the tray/bucket will dry and form chips: a horror for this job. So after the first coat, wrap the roller in a plastic bag even just for the drying time and empty the paint into a spare (empty) can. Wash the tray/bucket or change the liner. Going to wait overnight? Put the roller bag in the fridge, not the freezer.
When you start your second coat don’t use the paint you used for the first coat. STRAIN MORE PAINT. You can strain the stuff in the pan/bucket from the first coat, yes. It must be re-strained. It may have no particles, but if it does, you’ll see it on the screen. So that’s why we soaked/cleaned the strainer/stocking above.
Before the 2nd coat, hold your work light from different angles and see if any lint was picked up from the air. If so, give the screen a very light rub, perhaps just with your very clean and very dry finger. Then again, limit the traffic and do the final coat. Get out!
Spraying Instructions
If you plan to spray, also spray the primer. Important.
Some Paint On Screen paints call for HVLP, but not any on this page. Here, use any airless, not for the 3 paints I recommend. Pros know: for airless, don’t buy anything but Graco*. Pro tip-tip: never let the airless tip dry out: soak in a bucket when you take a break. Spraying may take 3 coats whereas rolling only 2, but the sprayer is certainly better in theory. How much? Meh. I can’t tell. Spraying wastes paint so if in doubt, buy extra.
Set to the lowest pressure and lowest flow setting and
make a few practice sprays on a test board.
Any airless standard latex sprayer. Typical specs include use of a 415, 417, 515 or 517 tip with approx 2000 – 3000 psi. The dry thickness should be between 3 – 4 mils.
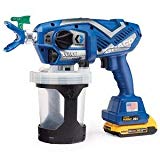
* My fav sprayer for small jobs: Handheld airless
Some people buy a chinese sprayer and throw it away after one job. For just a little more money, get a sprayer that will last a lifetime: a Graco handheld. These only hold about a quart per re-fill, but that’s all you’ll need! The overspray does waste paint: it covers less area, so you may need to buy more paint than if you were rolling.
Full size airless (commercial quality): Graco sells the Magnum line most, because they cost less but have quality parts. I reviewed good airless sprayers here.
6. Apply the border if you want one
Frame your masterpiece: Add the velvet border tape after the paint has fully dried, not just dry to touch. Do this with the projector playing a movie so you can’t miss it. See above under Shopping List for the materials.
Easy Clean up with water.
Warm water is best. Soap helps with whatever oils are in the paint, but mostly I use water only. Read about how easy it is to clean a roller for next time.
Maintenance
Dust the wall with a feather duster when you do any cleaning. Never a cloth as that will drive dust into the paint.
Kids hit the screen with a hockey puck? Take that outside young man!
Just touch up with a careful eye. Could be 2 coats on your marks. Good reason to seal the unused paint well. You can use a glass jar for maximum freshness… keep safe!
Let me know below if you have questions or additions. I cruise the comments daily.
Also, I assume you lightly sand after priming but wanted to check and if you do sand, do you just use the 220 grit on the primer or do the 150 then 220 again?
I know this is an old post so not sure if you’ll respond or not. This may be a dumb question but do you use the thinning/leveling agent in the primer as well or just in the paint?
Terrific. Your advice was what I was hoping to get. Have read your whole article three times and have followed it pretty religiously (except the roller part). will let you know how it finally comes out.
Doug Newton
Connecticut
My experiment
I bought a decent, 3400 ANSI Lumen 4K projector (Optoma UDH50X), set it up on table, pointed it at the wall and turned it on. My apartment complex was built 5 years ago and the construction is very high level including the wall. The wall was a flat very light beige color and the picture looked pretty good. I was surprised.
Then I started looking at reviews of projector screen paints. One of the recommendations was just to use a standard satin wall paint with a Gray tint. I went to Home Depot and bought the Glidden Diamond, tinted ultimate gray, primed the wall and put the Glidden on the wall. Wow, what an improvement. And that was a cheap experiment $50 (paint, primer, roller tools).
However my painting skills needed some improvement. There were many streaks in the wall which were quite visible when watching just about anything that had a bright background. So I decided to put on a second coat and be more careful. Hmm! Better, but still not great. Paint uneven with some streaks. But I am not giving up. The results so far have been very encouraging so I am going all in.
My next step is to purchase some “real” projector screen paint (Paint on Screen S1 Ultimate Contrast) and have a friend of mine, who is a professional painter, put it on the wall for me.
My question is : Can two coats of the “real” projector screen paint be applied over the top of what I have already put out there without priming and sanding?
Thanks for your advice.
You just need to fill the gaps, scratches etc with spackle, apply primer them after sanding, then yes you can put your screen paint right over the paint you already did and the primer. What it looks like before you paint will be what you get after. Paint does not really fill cracks so take a bright light up close and inspect. Look for small shadows of imperfections. I think it will go well if you do this.
Brad
Thanks