We also have specific posts about many aspects of a painter’s life, and we are writing all the time. Here are some room painting tips for you.
Probably the most popular “tips” posts are about making clean up easy. Here you are:
How to Clean Paint Rollers: the Quick, the Neat, and the Lazy Way
The Best Way to Clean Paint Brush
Biggest Money Tip: A painter is going to charge about two-hundred dollars or more to paint an average size bedroom, ( I do) even just changing colors on the walls: that’s 2 coats, and the walls are already painted with just some normal nail holes, etc. (I can do 2 of these rooms in a 4-6 hour day). (This assumes no reds or yellows involved–they are difficult!)
See our professional painting tools list: these are what we use.
Looking around on the internet, I see people giving advice as if they copied it out of some DIY manual (or some fluff site set up for —advertising we will never have any advertising!). I see people using the name ‘handyman” using tape to make lines and using cheap brushes and roller pans. Roller pans? No self-respecting pro uses them. Wow. What to say to these websites? Self-taught much?
Room Painting Tips, Let’s Get Started
What a relief: you don’t need to spend a lot of money, but, and this is key: you don’t want cheap tools. The reason people give up and call me to do the work is that they bought 4 dollar brushes and cheap roller/tray combinations. “Why did the bristles fall out?” “Why is there so much lint from the roller in my new wall paint?” Budget tools. Note for Canadians: your roller size is different: this is for Canadian painters only.
If you can spend just a bit more, you will have excellent professional tools, and if you read my other posts (linked above), you’ll learn how EASY it is to clean them. (Cleaning seems to bring back bad memories for people…If they only know what I knew. Cleaning is fast and easy if you bring your tool quality level up a notch!
We are trying to bring together a complete set of posts on how to paint, (See for example how to choose the Best Ceiling Paint, but this post is just a few key tips for those of you who already know which end of the brush to hold.
Here we go with the procedure, but if you need it, here is some advice on how to pick wall paint colors and more!
Room Painting Tips: Quick Summary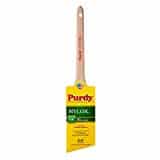
- Clear the room of small items or stack small things on big things and cover with plastic or old bedsheets, and remove light switch/outlet plates and loosen wall lamps (don’t remove). If you want to really save time and are not picky, don’t remove any of these, just have a good brush and a steady hand. (Sometimes we just loosen them to get the bristles under).
- Apply masking tape only to select tight corners, not all areas. A good brush cuts straight lines: no tape needed. All our complete painting tools list. We only pick quality: professionals use these.
- Sand lightly the walls that feel gritty: use medium sandpaper: you only need to do what is from eye-level down to as far as you can reach with your hand (or less). Wrap sandpaper around a block or pick up a nice sanding block online.
- Spread drop cloths over the floor, including the center if you have enough to cover. Plastic works, but is slippery and you can get hurt especially on carpet. Bedsheets on floors are ok, but a big drip of paint will go through the fabric. A good option is plastic, but to have a canvas “runner” (usually 12 x 4 feet) is not a bad idea: they can be used for lots of things.
- Again, these things are all on the painting tool list.
- Apply the primer if you must. Read about how many coats of primer you may need. Also, we discuss paint and primer in one paint.
- Apply two coats of paint: sorry, all those ads for one-coat paints sound good, but we rarely just do one coat (except for ceilings).
- Start your final paint color with a roller, then cut using a brush, (see our post on why that order). See “Do You Paint Walls or Trim First?”
- The direction that you roll and brush is not so important … it should not show in the end. We think in blocks. That is, one-meter-square, or if your roller can hold more paint, 2 or 3 square yards or meters etc. Long strips of paint can show the overlap when dry. The key point is to keep the ‘wet edge’ of the squares/blocks/rectangles as you roll. If it is allowed to dry, it does have a way of standing out later. We cannot prevent some of this without spraying, but as I tell customers: only you and I will see these small imperfections.
- No need to wait a certain amount of time for drying. If the paint is dry to the touch, no longer tacky, you can start the next coat.
- Clean up: it’s not difficult or messy. Read all about it here: The Best Way to Clean Paint Brush!
After reading our room painting tips, you might also be interested in:
Related to Room Painting Tips:
Paint and Primer in One: The Best and When to Use It
Here is our philosophy on primers: start with the least expensive one you need and if any stains or colors bleed through, hit them with the heavy stuff:
I really enjoy your post, Thanks
Hi Brad,
I do love the articles and at this point, pretty sure I’ve read each of them (my grandpa was a painter-wish I would’ve paid more attention). Here’s what I’ve got going; I want to repaint my entire downstairs all one neutral off white color-I’m starting with a light brown foyer-27′ ceilings, living, family and dining rooms a light pumpkin color and a kitchen that is rust-colored red. It all needs to be painted. What I know after reading your articles: -I need Kilz Premium tinted grey (how grey?) for primer, BM Advance for trim, BM ceiling paint and I was thinking about using the Magnolia paint (from Kilz)- thoughts? If not that, then SW. So now I clean the area, cover the area, remove outlet/switch covers….then paint the ceiling, trim, primer, paint, cut in by trim and ceiling, then paint final coat? Fairly certain I’ve screwed up the order of operations. Also, you only recommend the extension pole for the crazy tall ceiling?
Thanks so much!
If you are not going over stains, use a drywall primer. Kilz P is great, but a bit of overKilz. Ha! i love that joke! NEVER gets old. Ba da boom.
But seriously folks, only used stain-blocking primers if you have stains. To cover that rust and red etc, just a basic primer, then do 2 coats of your off white. You won’t be happy unless you prime, as I can tell you already know. But you don’t need gray-tinted primer unless you are painting red and sometimes yellow. Not painting OVER them. Advance is great, but tricky to work. Go with a good semigloss latex maybe? I like Aura thinned a bit or the Ben M. Regal etc. All good.
You got the sequence exactly right. Some things can go in diff. orders…up to the painter and you’re a 3rd. genny.
How high is the ceiling? Maybe a medium pole and stand on a small step ladder? Big poles are expensive but you’ll won’t use for years and years. Maybe rent? Maybe rent a rolling scaffold? Careful up there.
Thanks
Hey Brad thanks for the great tips.
Thanks
I would never have thought that sanding walls prior to painting them was an important step. I wouldn’t feel very confident sanding my walls, or painting them for that matter. It would probably best if I just hired a professional painter to do any projects for me.
Uhh! The cheap tools is such a great point! Falling out bristles and fuzzies in your rolled paint… so annoying! Thanks for all the great tips! : )
Thank you for putting together informative articles.
You have great tips not only for paint beginners but for contractors as well.
Enjoyed reading other linked articles within this one.
Thank you!
Thanks! It’s a nice way to be in retirement… share with others.
–Brad