
Not to fear, the shellac is here.
This is the 2nd of 3 posts guiding you through the smoke remediation process. Post #1 is Smoke Damage Cleaning Before Painting. The last one is how to do the painting work.
Your Problem Is…
…not going to cost you that much, unless you have to hire a builder. But for painting, you have to deal with only two problems in smoke-damaged walls: smell and stain. The primer we use below seals both away.
But you MUST do some nasty cleaning, but use normal cleaners, not TSP. Why not? I don’t know but I was told this by the maker of the primer, Rustoleum. More in step 2a below.
Your Saviour is in This Can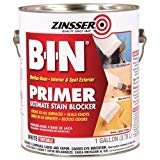
We’re launching the nukes. Don’t think latex primer will do the trick here. The key to sealing the smell and any stain is the (not just any) shellac-based primer. There is a BIN water-based “shellac”.Not here. Do not waste your time. The smell will come through. Learn from my mistake experience just below.
Using Zinsser B-I-N Primer Sealer, for both interior and exterior.
IMPORTANT: There are two kinds of shellac. You want the B-I-N Shellac Base Interior/Exterior Primer/Sealer, not the Synthetic or “Advanced” Shellac which is good for some things, but has ‘low odor’ and is water-based. You want the ORIGINAL, number 00901. The data sheets are here: Saftey Data Sheet and all about the solvents etc in the Tech Data Sheet.
ALSO VERY IMPORTANT: Do not use this without protecting your lungs. Read this post about the respirator system I use.
I keep rubbing alcohol (99%) handy to clean hands and any drips and if the paint gets dry, as it does dry out very fast, you can just keep it wet with the alcohol. You do not need to buy special paint-store-alcohol.
PS, you know those tree knots that bleed through painted wood? It’s pine sap, and it can also be sealed with this BIN. Little else will stop them, as they can take years to bleed through other primers, but then… uh oh. This BIN even seals out cat pee smell.
For spots too small to brush, spray them with Zinsser’s odor-killing primer. Nice.
Plan to throw away all brushes and rollers etc. You cannot clean them quickly enough as the alcohol dries so fast.
For less extreme cases, the water-based primer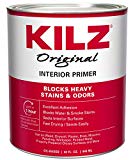
If the tar/solids build-up and stains (after cleaning) are not too intense you can try a less intense primer. Although there are water-based primers that claim they will block the smoke smell, don’t believe it. Go with a very good oil primer here. The how-to steps are the same as for the shellac, as listed below.
Last idea: Get a professional painter to apply the above. Have them test in spots and check that you are satisfied that no stains bleed through.
Learn from my mistake
(skip below to “How-to” if you are in a hurry)
I had an apartment with a tobacco stink and they had popcorn ceilings. The owners washed the walls twice with vinegar and they were ready for the primer, but that ceiling? I rolled it with an oil-based primer/sealer and the smell was not trapped.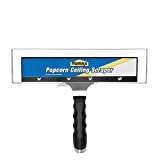
If I did that again? Remove the popcorn (the tool to do this is very cool and has a great resale value if you are patient).
Then I’d do either one or two coats of the above primer depending on the stinky factor.
Fun note: once we were sent to an apartment of a guy that had just moved to a nurse home. The walls had brown goo all over them and the paint beaded up. (Cavitation). We left!
How To: Smoke Damage Painting
It’s not as bad as you might think.
1. Gather Tools
Obviously, I recommend the above primer and nothing else. You’ll need a gallon for every 400 sq. ft., although the can says 500. This is because it can go on thin, but keep stirring as the solids fall out fast. Keep the lid on tight and just pour into a cut bucket or roller bucket/pan just what you can do in maybe 10 minutes. Cover the roller pan with plastic between dips for extra life. Plastic over the full can under the lid is good too.
Apply with a standard roller and brush, but warning, this will be the ONLY time you use those tools. The brush and roller cover are very hard to clean, but please do not buy the dollar store level tools where the bristles fall out and stick on your wall … or the rollers that shed onto your wall.
Buy a good brush and roller and roller handle (link just below). You can clean the roller handle with alcohol, but don’t try to clean the cover or brush. Consider it part of the expense, which for this job is rather low… as painting goes. The maker of the primer says “natural or synthetic (nylon, polyester or blend) bristle brush, roller, or airless sprayer.” I’d never, ever, ever, spray this. It would clog the hoses.
The tools are all on this page.
The respirator is on this page.
Gloves are a very good idea.
Ps, you can cut the handle off the brush while it’s still wet and leave it in the can for future spot priming. It’s a gooey mess but it saves another brush.
2a. Initial Prep
Remove any fire damage, obviously, and try to rub off all the solids from the smoke on the wall. Clean first with a dry rag or even newspaper, then do your wet cleaning with vinegar or your best cleaner. Don’t use TSP (says the primer maker). Cover holes with a good spackle and feather sand the edges with sandpaper, first about 120 grit and maybe finish with 220 depending on how smooth you want it to look. Most commercial painters stop at 120 for walls, 220 for trim.
Finish prepping as with any paint job on your entire wall/room or whatever you are painting. In a kitchen fire, you’ll want to do the whole ceiling, etc. This website has how to do just about everything.
2b. Patch Priming, Sanding, Wipe Dust
Apply two coats in extreme cases, or just to be sure. Let dry and recoat in the window of time that the product you choose recommends. Don’t be too early or late! The BIN above has a window from 20-45 minutes to recoat depending on the weather.
3. Paint Two Finish Coats
Even if the primer is white and your paint is white, you want 3 total coats, one being the primer. Trust the doctor.
4. Clean Up
As I wrote in #1 above, don’t clean roller cover or brush. Toss. But do clean the rest.
Rustoleum says: “Clean up spills and paint drips with acetone, denatured alcohol, ammoniated detergent or 99% isopropyl alcohol.”
I use rubbing alcohol from the drug store. 99%, not the weaker stuff.
Acetone is bad for your skin. Detergent? Nah. Too much scrubbing.
B-I-N Data Tech Sheet highlights: (copied selections)
Do not apply B-I-N if the surface temperature is within 15°F of the dew point Substrate moisture should not exceed 12%. DO NOT THIN. Thoroughly mix to ensure any settled pigment is re-dispersed before using. In most cases, only one coat is necessary to prime most surfaces. If excessive absorption occurs over very porous substrates a second coat may be necessary. Spot priming is recommended only under high-hiding topcoat finishes. For best results, prime the entire surface before painting. Keep the container closed when not in use.
And that smoker that inhaled all that? Go give them a kiss. See how that smells.
informative read for anyone dealing with smoke damage.