When it comes to picking a trim paint, in every case, you save money in the long run by using quality paint: Quality paint looks better, holds its color longer, goes on without spitting…and you can really scrub it clean. Always get the best paint for trim that you can afford.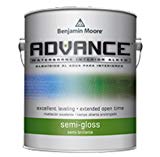
- Choose the brand and line of paint: we describe the two we use most, we love and recommend Advance from Ben Moore: it looks incredible like oil paint…but it takes experience to apply.
- Choose your sheen: most folks like semi-gloss.
- Choose your color: an off-white is standard.
- Latex or oil? Unlike what you might be reading, oil is long dead. RIP. We explain.
- We list the basic tools and refer you to the ‘how-to’ steps.
If you need to block stains, read our post about stain blocking primer.
If you just want the bottom line: there are 2 trim paints that we use over and over, and both are excellent. More follows this summary:
- Benjamin Moore’s Advance shown above; self-levels just like oil paint and looks amazing. This ships pure white unless you email the seller. This is the best seller of this paint: very responsive. Explained more below.
- Regal Semi-Gloss, also from Ben Moore. This is the standard latex trim paint which holds color, is very cleanable but not quite as tough as Advance.
- These are both somewhat pricey and we have other budget choices below, but remember that these paints last much longer.
- You simply email the seller with your color choice.
Want to spray? Read about sprayers. We are production painters: we spray the trim, then mask it, then spray ceilings and walls!
The Best Paint for Trim:
The #1 rule in painting: you save money by using quality. You can really see the quality of good paint, and they are tougher so they last longer and won’t yellow or fade like some budget brands.
Top Two Excellent Choices
— After these: a budget paint choice and a link to basic tools and some primers. —
1. The Very Best Choice
ADVANCE Waterborne Interior Alkyd Paint – Semi-Gloss Finish(793)The best of all the best paint for trim is Benjamin Moore’s Advance this link is the semi-gloss, what people put on trim most of the time. But here is the satin finish. Both are perfectly fine as your trim paint or cabinet paint.
The label says you can use it without a primer, and yes, you can if you are going over an old latex surface or even an old-well-sanded-oil-based paint. But if you have ‘raw’ wood, use a good primer, discussed below.
Read about how to prepare stained wood trim for this paint.
Our customers love the oil-based paint look, without the oily toxins and mess. They did not name it Advance because you need to be an advanced painter, but some experience is helpful.
It behaves like oil in that it is slow drying and that can cause sags and drips. This won’t happen if you apply thin coats: we almost always do more than one. Don’t try to for one-and-done. If you need to be quick, use the Regal. But the Advance look is really, really nice. You’ll quickly get the hang of how to apply it. Do some, wait, check for drips.
 More about this product: Dries to the touch in 5 hours (with normal conditions). This slow ‘open’ time is what lets the paint enamelize, or even out like oil-based paints and look so beautiful. Latex paints don’t do this and so you have brush strokes, which is ok too. Fully let dry then further coats can be applied only after 16-24 hours. Unlike latex, this paint is easy to sand when dry, even though it dries so hard. So if you get some bad spots you want to re-do, just hit with some 220 grit sandpaper and bingo.
Kicker: Another reason this is the best paint for trim is that you can roll this paint on trim: you don’t have to use a brush to ‘tip out’ as you do with latex. Wha?
We always paint trim with a roller, and with a normal latex trim paint, we tip it out so the brush strokes are parallel. With Advance, we don’t do that: it’s going to all even out anyway, so there’s no need.
You do need a brush for where the roller cannot reach.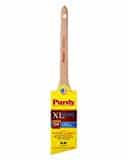
I contacted Purdy, owned by Sherwin Williams (company website) and asked what brush is best for Advance (a Ben Moore product!). They replied that the XL Elite Glide (shown here) would be best, but that the Nylox which is our go-to brush is also fine. Nylox cannot be used for oil, and it’s better than combo brushes for latex. Really, it’s better for Advance in my opinion.
Finally, Advance trim paint, like all paints, takes 30 days to cure, so treat it gently for a month or more. If you took off cabinet doors or any door/drawer etc, to make it easier to paint (always best), wait a while to put them back on.
Kitchen cabinet trim paint takes a beating but Advance is the single best kitchen cabinet paint, as well as the best paint for trim around the house (interior trim).
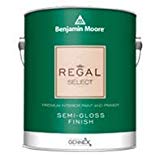
2. Tradition…Tradition!
A very good latex trim paint that we have used literally thousands of times is Benjamin Moore’s Regal and it comes in satin and semi-gloss.
It is available in any color: this seller has a very good price and free shipping: you first choose your color from the Ben Moore website. Get the paint number and name, and email the seller through the product page when you buy.
Just click on the seller’s name in the product page right-hand column under the yellow Add to Cart button.
Tip: For trim or kitchen cabs, try the color “Cloud White” (number = OC130); many of our customers choose it before we ever talk for the first time. A really nice white.

3. Low-Budget Trim Paint Option
Just looking for a basic low-cost trim paint? You could do a lot worse than Zinsser (by Rust-Oleum). It’s nothing like the big boys above, but the price: wow.
Want to use real oil? You’ll have a hard time finding it, and when you do, you probably have to buy it in small cans (quarts, etc).
Oil is on the way out and for good reason (it makes us all sick), and when you have so many water-based acrylics to choose from, it’s for the best. Oil was once considered to be the best paint for trim: no more.
How Shiny?
Sheen: Generally these days, designers put eggshell on all walls (including kitchen/bath) and semi-gloss on all trim.
Trim paint options: People still use semi-gloss on all trim. Rarely, some folks will go with satin (less shiny than semi-gloss), and some like the high gloss. Generally, designers feel that semi-gloss is still the best paint for trim.
Basic tools you need for painting trim
We have combined all the basic painting tools all into one place for you, but the very minimum you need is a brush, roller frame (aka cage), roller cover, drop cloths, tape. You can always write to me in the comments below for questions. Main tip: budget roller covers and brushes shed lint and bristles: guess where that junk ends up? Yep.
We have another post that describes how different painting tools are used.
A quick primer on primer
When do you need a primer for trim?
The two main issues are bonding and blocking.
- If it’s greasy, dirty, etc, you need to clean as best you can (best to wipe with TSP or detergent cleaner. This kind of thing is all on the supplies page under “Painting Prep Tools”
- If stained (by water, wood knots, etc.), use a primer to create a strong bond AND block tannins/resins/tree sap: Prime Lock, by Benjamin Moore is best. Read our post on blocking stains with primer. Prime Lock from Benjamin Moore is oil-based and worth every penny. Buy a throw-away brush…don’t try to clean oily brushes!
- If not stained: go with the water-based Aqua-Lock: it also blocks most stains and is not as messy.
 Big color change? If you are changing colors radically: dark to light or vice versa, use a low-power (inexpensive) primer as a first coat: why paint 3 coats of expensive paint when you can save money on the first coat? What primer here? We use Kilz General Purpose (shown here) if we do not need to block any stains (wood knots, water stains, etc). It just covers all bases and is less expensive than the lowest level primers. With other low-level primers, we cannot be sure will give us the bonding we need on pre-painted walls.
You already have primer? Ok, it in test spots, and do one or two topcoats over it. Then when very dry, see if you can scratch it off easily with your fingernail.
Paint and Primer in One? We don’t love them, but since they broke onto the market they have really improved with tiny particles that form a seal and can take the place of a primer, but not a stain blocker. We like Kilz. Here is the semi-gloss paint-and-primer-in-one for trim.
Use this for unpainted wood, but know that tree knots, sap, etc may bleed through every coat.
The reason I don’t use this unless requested is that very often there will be stains of some sort that will bleed through to the top. Latex paint does not block stains! Only “stain-blocking” primers do that. Stains make me look bad; I have to do coats of touch-ups and that’s a drag.
However, it’s also a fast way to go—landladies and lords love it for that reason. Some folks are selling and are painting trim white, and just “slap this on” with no primer or prep: very bad idea. Bad karma, Buddha say.
FAQ:
How much trim will a gallon of paint cover?
Calculate how much paint you need like this: A gallon of the best trim paint will put 2 coats on 3-4 average rooms (with some shelves, doors, windows, baseboards).
Can I trim without sanding?
Yes, unless you have oil-based paint or varnish. To test, simply rub some acetone (often in nail polish remover) or rubbing alcohol on some paint/varnish. If it gets gooey, it’s latex. No sanding.
What trim paint do you mostly use on kitchen cabinets?
We feel confident saying that the Advance shown above is the best paint finish for kitchen cabinets white, off-white or other. The pure white, or Cloud White, is the most common.
Related posts:
- Pick your primer in our post about the best primer to block stains—Stain Blocking Primer (Cover Any Stained Wood, Walls, etc)
- If you are converting from the wood look to paint, read the essential extra steps you must take to not have a disaster. Painting Stained Trim (Making Stained Wood Look Modern)
- Learn how to paint your trim or cabinets whether you are just repainting or converting from stain.
That’s our view on the best paint for trim. If you have any additions or comments, please let us all know in the comments. Thanks.
Here is a short video discussing the best paint for trim:
thanks
We painted our trim recently with a latex paint (over the original latex paint). We used the same trim paint we have used many many times with great success. But we could tell the paint was not the same as it used to be (we were told at the paint store that they had changed a few things to become more environmentally compliant). We went ahead and painted all the trim – baseboards, window trim and door trim etc. It has been a few months now but the paint has started flaking off in places. So disappointing – this never happened in the past. Can I just sand the flaking parts and use a better trim paint to touch up? We used pure white paint in semigloss finish. I want to try BM Advance or BM Regal semi-gloss…Or will I have to repaint everything? Can I just paint over this not great paint or what do I need to do so it adheres?
Hold everything. DOn’t paint yet. The bonding issue will not go away if you just lay more paint on.
First check that this is not a spotty problem: only in spots. Use your fingernail.
Either your old paint was not latex or the new paint royally sucks.
Find some old paint exposed and do the latex/oil test.
https://www.bradthepainter.com/testing-old-paint-is-it-oil-or-latex/
If latex, then either the old paint was greasy (doubt this) or the new paint is just garbage. What brand was it? This is why spending more is actually spending less, in time and pain too.
Don’t mess with Advance unless you are quite skilled. Stick with latex, pun intended!
Solve the bonding issue before you do anything…. ask an OLD painter to come see it and give price to fix.
B
Ok – I did the fingernail/scratch test – I can scratch paint off with my fingernail in some areas but not in others. I also did the latex/oil paint test and it is latex paint underneath, which we cleaned with a hot wet rag before painting. We used Behr paint – and as I said we have used it to paint three houses and it always went on nicely without issues until last fall. It’s worth it to us to spend more money for better paint, I just hadn’t had any problems with Behr in the past and it had seemed very comparable the Sherwin Williams paints we also used. So what next? As I said, I can’t scratch off paint everywhere so the problem is very inconsistent. And thank you so much for your advice.
I did the fingernail scratch test and it does seem to be a spotty problem. Most places, the paint doesn’t scratch off, but in a few it does. The paint we used was Behr paint – and we have used it to paint three different homes and been happy with it – we found it comparable to Sherwin Williams paint we also used. I also did the oil or latex test and the original paint was latex. We are fine with spending more on paint – we just like the Behr because it worked so well for us. The parts that are flaking off were places we painted last winter using the Behr. So what is the best solution for fixing the flaking areas? Thank you again.
It must be grease or oily in those spots. I can only advise you call a painter..and OLD one to come see and give ideas. Maybe just sand spots and repaint. Seems like not too much work…
Good luck
Do you recommend these primer and paint options for wood windows?
I have 30 year old windows that due to improper care have dark discoloration in the bottom, both sash and window boxes. My plan is to clean and treat for mildew and mold, sand, use wood hardner, then prime and paint.
I am painting everything (sills, sash, aprons, trim, etc the same color. And planning on removing the windows to do the work.
Wondering if I can get away with doing this in a garage with space heaters as the weather is getting cool here in WI? Or is my best bet to wait until late spring/early summer?
Smart to remove the windows. But meanwhile if it rains….? Yes on your procedure. Dig out all rotten wood and yes heat it up for a while to dry totally then exterior wood filler. I’ve even used concrete.
Then check: how is it getting wet? Bad flashing? Just a thought. I would not wait if I were you…just more rot and mold.
Good luck
Hi Brad,
I repainted my kitchen cabinets about 4 years ago using Behr Alkyd and they have held up well. However, I am looking to repaint them because I want a different color. Will likely use the BM paint you recommended or SW.
I am wondering if I need to sand the cabinets again and prime again? Or if I can just clean the cabinets and go over with the new paint color since they have already been painted once. Thanks!
My opinion is Ben Moore’s water based alkyd “Advance” shown at the top of this page.
Now this is probably harder to apply than your previous paint: while being water based, it does run for a long time like oil. So thin coats is the key.
Absolutely sand well, every square mm and use 220 grit or so. Clean well, let dry then you paint without primer. It may be 3 coats. I’d recommend a foam roller to apply and a good Purdy brush to ‘tip out’. In any case this paint self levels. Just don’t apply too thick our your will get runs.
Thank you for prompt reply. Have another question- we are remodeling an old family farmhouse-. Am going to use the Advance paint for trim. We are replacing all the trim with primed wood trim. Just 1×4 boards for baseboard and 1×3 ” for window trim. Since they are not down yet- Would rolling be better option. Do I just put on 1 coat initially- what kind of roller? Then after boards are nailed down- then another coat after nail holes spackled? Thank you!
Absolutely. Here is my method: layout on saw horses or improvise them, roll and ‘tip out’ with a brush, altho Advance will flatten out I tip them anyway.
Then install, touch sanded spackle with ADVANCE again, then do the final coat. With regular latex I’d prime, and put 2 coats on horses, then install then fill nail holes, then touch them up twice (sort of prime and paint but with finish color. So much faster.
Use regular wall roller, maybe short nap like 1/4 to 1/2. See my main tools page: I use 50/50 wool/poly. I use almost nothing else and look at how to clean easily. That is a post on my site too.
b
Very informative article! I do have a couple questions:
1) I just bought some BM Advance in high gloss white to paint my new trim. Most of the trim is factory primed, some is unprimed. Would you go over with a primer before painting with Advance? If so, will any waterbase primer work (I still have a gallon of Zinsser 123 primer) or should I buy the BM advance primer?
2) Do you lightly sand in between coats?
3) any tips on how to prevent sagging when painting vertical trim?
1) Only prime what is not primed. Water based is fine except for knots. Use your stain killing primer on those spots. Otherwise your Kilz is over Kilz. Ha! It never gets old.
2) Definitely sand in between coats
3) Sagging is because you are putting it on too heavy, or thick. Do 2 thin coats and you should be fine. If you need a 3rd… it’s very quick.
Good luck
Have a question about touch-ups with Advance. We had our kitchen cabinets painted with the BM Advance paint about 8 years ago, Has done quite well – no chips, etc. I did try to touch up a small ding on a cabinet door and the small area I touched up was noticeable- like a different sheen almost. ( was same paint). Is there a trick to touch-ups with this paint?
Thank you
I can think of 2 things. Maybe you did not shake the can well? If it’s not rusty, any paint store will shake it for free. If not mixed, you get too much pigment or too much solvents etc…
Other than that I would suggest you repaint the entire door/drawer etc. After a good shaking, the color should be identical, but do a test on the backside first…or some test wood that’s primed. Give it 2 coats of paint after primer and you’ll know.
Finally, sometimes I just take an artist’s brush and just hit the dark spots. It’s not perfect but mostly disappears.
Good luck,
b
The entire back hallway is unpainted and still has blonde stained wood trim. But two bedrooms have the trim painted over with one coat of flat white latex paint. Your comment has me thinking that it just might be easier to remove the paint and redo the woodwork in blonde stain in those bedrooms. Either way, a lot of elbow grease would be involved. Thanks for replying to my comment! It was helpful!
Well, do a sample and you will see that removing paint and restaining is less difficult than putting men on the moon. But not much.
Hi Brad, I am having my trim repainted, it is currently oil based. I am also having wooden plantation shutters made and I am providing the paint. They will only use oil based paint for the shutters. I was wanting to use BM Advance but I don’t know how that would look to have oil based paint on the shutters and Advance everywhere else. Thanks for your help.
You did not distinguish between interior or exterior shutters, but I’ll assume exterior. There is one exterior advance…it’s high gloss. I don’t see others but call a paint store anywhere in the US for more. Oil is smart. Primer is key. Use the best oil primer you can find. I like BM Fresh Start, but you pick for you. I would not worry about one paint on trim and one on shutters: gloss vs semi may look funny, so do gloss on the trim?
Now, here is your main issue. You have oil on the trim now? Did you ask what they plan to do for adhesion? Painting over oil without proper prep will cause all the paint to flake off. Maybe you LIKE headaches.. but…
Have them sand it ALL. Every square inch. Or degloss with toxic waste as I described.
Then, a bonding primer. Then whatever paint.
My advice, use this opportunity to switch to latex, then next time, you just wash, scrape if needed, a little sanding here and there and repaint. Very little fuss.
I hope I understood you correctly.
Brad
Thank you for the quick response. Actually they are interior plantation shutters that have never been painted, oil based paint is the only way the shutter manufacturer will finish them, sorry for the confusion. I was mostly wondering about my existing interior trim paint that I am going to have repainted to match the new plantation shutters which will definitely be painted by the shutter people using the oil based paint. I was considering having my painter use Advance on the existing trim in the house to match the shutters that will be oil based painted. My question is, do I need to be concerned about the appearance of the two paints (Advance and the BM oil based paint) that will be seen side by side in almost every room of my house. Additionally will they age the same as the years go by (yellowing)?
Thanks again.
This level of quality does not yellow like many paint, but of course, all things age.
The only way to know the difference while before it gets old is to do samples.
You have to get hold of the 2 paints and put some on a sample board. Be sure to prime and do 2 coats of each: that’s 3 total for each.
Good luck
Thanks for the wonderful tips! I’m enjoying your website and find it helpful and informative.
I’d like to paint my trim, which is currently painted in white latex. (I used your test, and the paint actually rubbed off a bit.) But the latex paint is over ‘50s blonde-stained wood. I personally like the blonde wood, but the vinyl windows in the room are white. So, I think I have to stick with the white paint and not return the trim to blonde wood stain. (Is this ever done — white windows and blonde trim?)
Question is: What can I do to make sure the new paint sticks? The latex paint has scraped off in several spots, so I don’t think the stained wood was deglossed or sanded before the latex (flat paint) coat was added. Also, there’s only one coat of paint on the trim right now, from what I can tell.
Any advice would be appreciated!
You wrote that you have white latex? But you mention you also have stain/varnished trim?
I am not sure what you are painting over.
If old latex, just give a quick touch sand, wipe dust and repaint.
If stained trim, you have to follow the steps in this post.
If the white comes off with a fingernail, yes, you have a problem. The painter did not prep well: degloss, primer or sand as you suspected.
Yes, you certainly can have wood trim with white plastic windows. I do. I have oak. Looks fine.
I never have to paint either: wink wink. Who likes painting? After the first job that is.
How many coats it has now is not that important. Bonding is the issue.
If necessary, at least at the level where hands and things we carry can scratch off the unbonded paint, you must strip and sand-degloss, prime and paint.
Use STIX for priming from Ben mooore if that is the case, or there are other great bonding primers too.
Good luck
Hi Brad. You rock! Absolutely love this website.
Quick question:
Can you compare C2 Cabinet and Trim paint vs Benjamin Moore Advance?
Which do you think would be better? Differences?
I’m going to tackle painting my cherry bath vanity to a navy blue color.
Thanks!
Hmm. No, this is my first time hearing about this paint. If you use it let me know how it went? I’ll contact them and ask for a sample and do a review! Thanks for the tip! and good luck.
PS I do like Advance, but remember that it does run and drip like oil, but it’s not as toxic, and it dries with no brush marks: amazing.
Brad
Thanks for the excellent website, and the wealth of information. A quick question – I am about to paint trim using BM Advance… have tested current trim with acetone. The acetone removes the paint so I guess it is latex. Do I really not need to sand or de-gloss before painting? The trim is in great condition, only 5 years old, it just needs a color change. Am I correct in thinking I just need to wipe it clean and get going with my roller? Also, can I use a 4 inch roller with a 3/4 inch nap? Thank you in advance! Liz
Yes, you have it right. It does not hurt to give the trim that your hands will touch a sanding…there will be old ‘ticks’ like dust that settled on the wet paint last time and the fibers that fell out of a bad roller or brush. Sanding makes it smooth to start … why keep the old imperfections? But not really necessary if it’s latex and it seems to be.
Probably no need to sand baseboad…just wipe clean and let dry.
Yes, a smaller roller is fine. 3/4 nap is long, but if you ‘tip it out’ with your brush, you’ll have a more even coat. Advance evens out anyway, but I always tip it out.
Finally, don’t use crappy rollers or brushes: they shed and cause all kinds of headaches, plus, the quality you can wash and next time it will be almost like new. Not so with the Chinese knock offs.
Good luck,
Brad
I have noticed others using a 1/4 NAP roller for trim. We have a project coming up that requires trim and cabinet painting. Do you recommend 1/4 for trim and cabinets?
What size roller NAP do you use for interior walls?
For walls, pros use very thick ones because they hold more paint and there’s less re-dipping. But the orange peel look is different and some very uptight clients want it a certain way. So then you would use a shorter nap. But for your cabs, yes, 1/4 or anything really because you should “tip it out” meaning apply with a roller in a large section, then tip of brush to get all brushstrokes even and to eliminate roller nap pattern. For very low rent apartments, you might not do that but I do anyway as it’s so fast and looks way better. You sound like a pro with your upcoming project! Good luck. I’ll post before and after pics if you send them.
Brad
thank you for posting info from an experienced painter. I appreciate it
Thanks so much for the quick reply. I’ll send a photo.
Great informative website.
As a remodeler I have done a lot of painting over the years and by far my go to paints are Benjamin Moore Aura and Benjamin Moore Advance.
I have recently completed three kitchen cabinet paint jobs using Advance and it is the absolute best paint for cabinets and trim. It does not leave brush or roller marks and levels out beautifully.
So worth the extra money!
How many coats of BM Advance do you put on the boxes of the cabinets? I used Styx primer, sanded well & use a purdy 1/4” nap roller applying 4 thin coats each day. About 1/2 way through a medium sized kitchen the finish isn’t quite as smooth. At that point I’ve been painting about 2.5 hours. I switched out my roller, but that didn’t help. The paint almost seems to be drying out. I can send pictures if that would help. Thank you
Yes send a photo if you can.
Adding a splash of water may help slow the drying and allow the Advance to self level.
Do a test.
The roller should be fine but you could brush it out too.
Dust on floor comes up and gets on wet paint too so that could be a problem. Mop the floor and prevent a draft.
Don’t have any other thoughts right now.
Good luck,
B
ps, read this
https://www.quora.com/Will-adding-Flotral-ruin-an-alkyd-paint-like-Benjamin-Moore-Advanced-Gloss
Brad,
I made the mistake of painting new trim under the recommended temp. and the paint did not dry properly. I sanded the paint and repainted inside. Now I have scratch marks on the trim after I applied a new coat. What can I do to fix this? I am using Behr urethane alkyd paint no. 7900. I have a Purdy Nylox brush. Should I try rolling the trim or brushing it?
I wish I could see it. Could you send a photo? Paint generally does not cover scratches. Without seeing it, I’d say more sanding, more coats. Sorry.
B
Incredibly informative website!
The one think I hate worse than painting is ending up with a crappy job after all that prep.
Using the right materials, and the right processes, is worth the trouble.
My question is that age old one:
How can I store partially-used cans of paint for touch-up needs later, or in the case of this amazing Benjamin Moore Advance trim paint you’ve enlightened me about, for use on the next room? Inevitably the pain I store dries out.
Thanks, I should write a post about this. If the rim and lid are in good shape, just hammer gently and you’ll create a very good seal. Don’t let any wet paint stay in the lip of the rim…that can crack and leave an opening for air.
Even if it looks great in X years, still strain it as it’s trim paint and will easily show particles of dried paint etc … consider it ‘dirty’.
Thanks again,
b
Hi Brad,
Thank you for creating a website that is very informative. I am preparing to paint my house and am thankful I came across your website! I am using BM Regal Flat for the ceiling; BM Regal Matte for the walls; and BM Advance for the trim, baseboards, doors, cabinets and moulding. All the same color, White Dove. You mentioned that there is a 30 day cure time for BM Advance. If I paint the trim and baseboards first like you advised, and if I plan on using tape to protect the trim and baseboards for when I paint the walls, will I have to wait 30 days before I can start taping? If I tape before it fully cures, my concern is that the tape will create smudge marks and/or damage the trim in some other way.
Hi. Thanks for that very clever question: I”ll add this info to the site in various places.
While the Advance has a long cure time…esp in winter depending on where you live, if you use painter’s tape it when it’s been dry a day or two, you’ll be fine. Then ‘new’ painter’s tape is not like the old tan masking tape. The old stuff has glue that leaves a film after only a few hours and certainly will pull off uncured paint.\\
Just an advanced tip…no pun inteneded, but well, sure, pun intended… I would not tape it. But I have a great brush with experienced hands. The Purdy nylox is designed for latex and the bristles are the best in the biz and they find the corner on thier own…like a seeing eye dog.
You’ll see it in action: the small group of bristles fall into the corner and roll out paint. Like magic. But don’t close your eyes.
Good luck and thanks again.
B
PS I just added the “Nylox” brush link above near the image of the other brush, which is also excellent.
Please give advice on the best process for painting latex over oil based. All the trim in my home has Benjamin Moore impervo oil based paint. I want to change to latex..
This is the one thing that you have to be very careful or the paint will come off with a fingernail later.
I wrote the entire procedure on this post.
It’s about latex over stain, but most stain has a gloss varnish of some sort that must be de-glossed. Oil is the same, even if it’s not gloss: you must sand or hit with liquid sandpaper.
Please read that article and when you read ‘varnish’, think ‘oil based paint’.
Remember the key points: degloss every square inch, and use a very good bonding primer like Stix, or if you have water stains or wood knot stains, use PrimeLock, which also is a great bonding primer.
But these primers cannot make promises if you don’t de-gloss!
B
Thank you for all of your advice! At your recommendation, I am using Benjamin Moore Advance semi gloss to do all the trim in my house. It is working great with a trim brush, but when I use a roller (Purdy 1/4″) to do doors, I’m getting a lot of tiny bubbles that are annoying to deal with… I have been either going over the rollered paint with a brush (tedious) or waiting a few minutes and popping the bubbles by rolling again, lightly with a pretty dry roller (also tedious). Do you have any ideas for me? Thank you!
Yes, depending on your roller composition, it will leave different patterns and bubbles. I can’t tell from what you wrote if you are saying the bubbles are not popping. They do for me. There is, of course, no harm at all in smoothing the rolled paint out with a brush. But the final look should not be different: the paint (if shaken well and new…nothiing wrong with it) will smooth out to leave a look just like oil paints would.
So roll back and forth to get your coverage, brush in the corners and watch for it to flatten out.
Did I understand? If not, please reply here. Good luck,
Brad
Thank you for your thoughts. The bubbles are not popping on their own. I either have to go over them with a brush or a dry roller after waiting a few minutes. The paint I’m using is about 5 years old…. maybe that is the culprit?!
Could be. Any paint store will shake a can for you for free, as long as the can is not rusty (which could explode in the shaker).
Many solids settle, not just pigments, so you are likely not getting the full coat you want. Stir well or do what I do here.
Question 3…
How would you paint over a stained lacquered door? How much sanding is needed and do you need to prime? Once again per your post I intended to use BM Advanced.
The steps are all listed in this post. the door is ‘trim’. Sand well, use bonding primer, STIX is my favorite. Advance is very good here but apply thin coats.
Good luck
Hi Brad, we are getting ready to install new trim in an existing house with already painted walls. I am so glad to have found this post. I have two questions…
1. How do you feel about painting trim before install with only final touch up coat after install?
2. What is the best caulk to use for joints and nail holes when using BM Advanced?
Hi. I always try to get all but the last coat on trim before it goes up. Best to do a full coat after going up, but you could just touch up. Problem is that it gets handprints and scuffs during install, not just small touch-ups.
Use Dap Painter’s caulk without silicone for joints, but for nail holes use spackle. Just use fingertip for spackle, not a knife and try to leave no spackle outside hole. Then touch up is quick. Another reason to do a final coat. Spackle will ‘flash’ if it does not get the same number of coats as the rest of the trim. 2 coats is usually good enough if the hole is very small.
Advance or any other trim paint: this all applies for all paints.
b
Thanks for your article! I just began a project painting the trim in my house. I’m using BM Advance and a 2.5″ Nylox Glide brush per your recommendation. I spent 3 hours today painting trim. At first, it was great! After about 2 hours, though, the brush really began to lose its stiffness. Instead of a nice chisel shape like it had at the beginning, it took on more of a ‘sweep’ shape. Therefore it wasn’t getting into the trim detail well because the bristles were laying down. It became very hard to work with. I have a photo of the brush I can send you if you like. Any idea why this might be happening? Thank you!
Thanks and great question.
Yes a Purdy will indeed get soft as will any and every brush after a few hours.
I would always do all the rolling I could (I roll before cut almost always) then dip the dry brush for the first time.
If I had to brush all day long, I’d pull out a 2nd brush after lunch or when the first one got soggy.
The great thing about Purdy I would never notice in lower quality brushes is that when clean and dry (I’d put near a furnace in winter to make sure it would get bone dry overnight), the Purdy would be as stiff and controllable as new, every day, day in and out for years of use. Actually, if you do this every day for about 6 months, it’s usually so worn out and has accumulated a daily small amount of dried paint in the heel, that the brush becomes a duster, or an emergency priming brush.
Thanks very much for this question: I should have mentioned this somewhere on this site. I will now!
b
Thank you, Brad.
Can you explain a little how you roll the trim? I rolled some wider parts of trim, such as window sill/frame and the baseboard (I have 8″ baseboard). But I don’t see how a roller would help or even be possible with chair rail or crown. I’m using a 4 1/2″ mini roller.
If it matters: I’m not painting the wall – only trim, so I’m cutting the trim in against the wall (which I know is more difficult than going the other way around, but it is what it is).
Yes, it matters that you don’t want to paint on the walls. When you are painting the walls, you just blast away with any size roller, getting all the chair rail or crown or whatever, not worrying about the wall. Later you paint over that on the wall being careful not to splatter on your new trim.
In your case, maybe just brush. It has worked for decades! YOu might get away with some rolling slowly in the fat parts away from the wall…just to quickly get the paint onto the trim…then tip with the brush. It’s way faster.
Even if you had a 9-inch roller you could roll a chair rail if the roller has a short nap. YOu’d just be very careful not to hit the wall…carry a damp rag or be ready to touch up the wall after your mistakes dry. It’s worth the saved time to clean a roller…usually. For us, it almost always is, but if you are doing one room, maybe just brush it.
Good luck.
Hi Brad,
Do you have any experience with BM Advance yellowing?
My contractor just did a beautiful job painting our doors and trim (pre-move-in-spraying) with BM Advance in Chantilly Lace (very bright white). I am worried about yellowing.
Thanks!
Rick
It’s an interesting question. Oil-based paints yellow and latex does not. But Advance is both a water-based and alkyd. It’s like a combination of the two. I’ll check with my BM rep about this and if there is any question, add to this reply. If I don’t add to it, you can be sure there is no yellowing issue with Advance. Thanks for the good Q.
B
Hi Rick, checking to see if your trim has yellowed over time? We’re doing the same with using BM Advance in Chantilly Lace paint. Thank you!
I have read some info on fusion mineral paints have you heard anything about them compared with other hard wear paints?
It’s supposed to be a formula that does not crack or yellow/discolor. If true, it’s definitely better…but I have not used them yet. I’ll look into it and write here again. The best I can do for you is to encourage you to learn all you can. Always good to buy a test product and really test it: how hard is it? What does it take to crack it? I wish I could be of more help. Good luck!
I am repainting the doors in my house they were painted it with water-based paint don’t know what type of primer came on doors from factory the doors were painted with a water base paint there are 19 years old when I used a water-based paint with primer it took the original primer from factory all the way down to the door was told to sand it down and use a primer the primer I was told to use was a oil based primer The primer was fresh start enamel under body can I use a paint and primer for finish coat Thanks
Painting over oil PRIMER is fine. Over oil paint is no-go with latex. Or oil without much sanding of the old oil. YOu see set to paint. Do a test section let dry, and see if you can scratch it off in a couple of days…blow dry to harden for faster testing.
Good luck.
b
I’m painting my wall a red/burgundy color, do I need to tint the primer?
Usually Reds are an ultra deep base. If just doing a singular wall (ascent) I wouldn’t waste money on a primer as you’ll have enough paint to finish coat twice with a gallon.
I had a lady who had put 3 coats of a fire engine red on a wall. She called me because she could not make it cover. I told her I could do it in 3 coats: gray primer, then 2 reds.
She did what you said and did not start with a primer and she could not get it to cover.
So I say always put a gray primer under red. Reds are notorious for not covering well and being streaky.
Brad