
If you have stained or varnished wood trim or cabinets in your house, your realtor has probably suggested (very strongly) that you should paint any stained wood, including doors. Good economic choice. Smart realtors. Luckily, painting stained trim is not brain surgery, and we have some time-saving tips below.
The main tool you’ll want to power through a lot of trim/cabinets is a DeWalt orbital shown here. This is really fast and works with any hook-n-loop paper (really low-priced here).
I gathered any and all tools you may need for any paint job into one page: I use these and they are not that expensive.
The 4 basic steps to painting over stained wood are:
- De-gloss even satin finishes by sanding and/or chemical wipe. Big timesaving tip: painting over stained wood without sanding is an option (see “Deglossing” below)
- Apply only a top-notch primer that will block stains
- Apply two coats of a trim/cabinet paint (harder than other paints)
- See our quick way to clean up: it’s really not that bad
These are expanded below.
The key step in this process is using a primer that creates a bond between the old and the new…and not any old primer will do. Wow, poetry. In poetry school, they called me a fool. 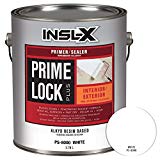
Use the very best primer for this key step, Prime Lock Plus by Benjamin Moore. Read carefully our explanation of the process below. Did you ever see paint flake off with a just a nudge from a fingernail? Bad painter! Bad boy! No bonding was created.
There are three basic steps, that all take time, but we give some tips and some power options: painting stained trim is not rocket science.
Painting stained trim with varnish or without:
Painters get a lot of money painting oak trim white, or any wood trim for that matter. But they charge a lot because it’s time-consuming: not because it’s hard. Here is how to paint over stained wood.
1. Degloss any sealer — I want you to Bond, Mr. Bond.
Prep here means two things: blocking any stain and de-glossing any varnish (even satin, etc). We are asked how to remove paint from wood trim, and we have a post on removing paint, but still, if you want to paint after that, you have to go down to step #2 here.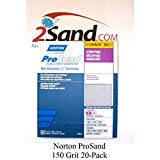
Deglossing can mean wiping or sanding, sanding, and more sanding (painting over stained wood without sanding is below). The main weapon for this is sandpaper, and you’ll need a ‘contractor sleeve’ if you’re doing a house (best deals linked below).
One sheet of sandpaper will get you through about one door and a few window frames. We use 150 grit paper (shown here) but even 220 grit (much finer) will scratch the shine off well enough. These links are really good prices for 20-25 sheet sleeves. Sanding for smoothness? Use 150 then repeat with 220.
Power through a lot of trim/cabinets with a DeWalt orbital pictured here. Save your wrists for guitar practice. It works with any round hook and loop’ paper. Nice.
Big Shortcut: Liquid Sandpaper: Wipe it on and take the gloss off. It’s really quite nasty—very toxic—but has the great advantage of no dust from sanding, less labor and very fast. You can paint right away after using it. This is how to paint over oil-based paint without sanding. painting over stained wood without sanding. Excellent when you cannot make dust in a house. But the tradeoff is the stink.
More on this: There is a ‘green’ competing product called Krud Kutter, but I have not used it and the reviews are mixed. I use Liquid Sandpaper. The nastiest of nasties, Liquid Sandpaper (company website) is great but do not let it … it cannot … touch your skin! You really need to wear chemical gloves these are good ones, and not expensive and a respirator (we simplified the complex system of filters here). Liquid de-glossers are so very toxic: you need very good ventilation and you really must wear a respirator even outdoors!
2. Block stains like wood knots — Only the very best primer should touch your wood.
The main event: you need to use the top-level primer on the market: this assures that the stain will not bleed through your paint (which it will with non-stain-blocking primers). When painting over varnish you need bonding and when painting stained trim, you need stain blocking power.
Tree knots and stains like water stains will bleed through every coat of normal paint and low-powered primer.
You cannot afford to miss this point. As we mentioned above, Prime Lock Plus by Benjamin Moore is necessary (mentioned above too). It’s oil-based but dries fast. If you use a primer without all the power you need, you’ll have stains bleeding through. Grab a brush you will not clean when done: it’s a mess. All you could possibly need are grouped on this page.
The best and first choice to paint wood trim should always be an oil-based stain blocking primer. Yes, we put latex paint on top of this later.
Why not go with the stuff on sale or the less-expensive stuff? Again, bonding. If you use a primer that cannot bond your prepped wood with your top-coat, you’ll have paint chipping off easily and will have to remove all that and start over. Ouch. Big.
This is our Prime Directive: using the best quality products saves money in the end.
* Let’s be sure to avoid a catastrophe: we must block stains by using a strong stain blocking primer, not just any old can called “primer”. If you do not have enough stain-blocking power in the primer, the stain will bleed through every coat of paint you put over it. We have a complete explanation on stain blocking primers, with our #1 pick at the top of that post.
3. At last…the fun part (with our biggest time-saving tip).
People rave: “You’re so fast”. Meh. We have a secret. It’s rollers. But first, pick your paint: head over to my post great options, by one of the top 2 paint makers today: you do not want to skimp on the paint.
We also have a whole post just on how to paint trim: you would do this after your prep is done here. (Do you paint trim or walls first? Trim).
What Trim Paint Does a Professional Recommend?
• Top Choice: No brainer: Benjamin Moore’s Advance. A water-based “alkyd”, once only available in oils. This looks and behaves just like an oil-based paint. The look is smoother than the next choice below because it takes longer to dry. Wha? The slow drying lets it even out (or ‘enamel-ize’) just like oil (no brushstroke marks). Gorgeous. The best paint trim paint, period.
You can see the difference from across the room. Advance has been around about 10 years and is all contractors tend to use now to paint wood trim and cabinets. It has unique qualities we wrote in detail in the trim paint post. We love it.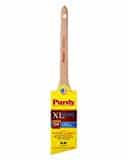
I contacted the best, well, really the only brush company worth your money, and asked what brush is best for Advance. They replied that the XL Elite Glide would be best, but that the Nylox a latex-only brush, is also fine. I prefer the Nylox because the bristles are made for water-based and are simply better for that. But if you will ever do oil, go with the XL Elite.
One good brush will last your lifetime: it lasts me 6 months of DAILY use, and still works ok after that. I can’t recommend this highly enough: you’ll go faster, it will look better. Read about how easy it is to clean a brush: not what you remember!
Last cool point: you can paint with a roller only. The paint evens out so you don’t even need to brush it (unless you cannot get your roller into nooks and crannies). Buy a short nap (about 3/8 inch). See the tools page for a selection.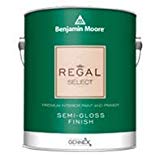
• Second Choice: Also from Ben Moore, the go-to latex trim paint: Regal Semi-Gloss. Oh, to have a nickel for every gallon of this I have applied. It’s tough, holds it’s color, cleans well, and goes on without drips/spits. Comes in satin sheen for trim or walls, also and flat, etc., for walls.
Disappointed to hear about brushmarks in latex? There is a way to use traditional latex paint but achieve a more even look. Simply mix with the additive Floetrol to your water-based latex paint: it slows down the drying so it can give the brushmarks a chance to disappear somewhat. It does not thin the paint, but it does expand the volume of the paint.
This is a good choice for painting oak trim white, including oak doors with white trim, or stained doors with painted trim.
How to apply:
We explain the simple steps in our post on how to paint trim. How fast this job can be will surprise you: so many self-taught painters just use a brush: Ha! Rookies.
Painting stained trim after the prep is done is the same as new trim: roll and brush. For Advance paint, you just need a brush for the nooks and crannies.
4. Clean up is not as bad as it used to be
Here are the highlights from our full posts showing how easy it is to clean roller covers and one just for cleaning brushes.
Cleaning rollers covers:
- Squeeze out what you can with your hands or even better with the curve in your multi-tool or an old stir stick…whatever you have.
Use a roller to paint stained trim or any wall/ceiling…then give it a quick spin in a bucket: so fast and easy. - Fill a large bucket with water and drop the cover in and soak it overnight! Most of the paint will fall to the bottom of the bucket. This won’t hurt a good roller at all. Good covers can soak for weeks and not suffer.
- Either repeat again for another night or now that it’s nearly done, rinse and squeeze under water and repeat until you get most of the color out.
- But…
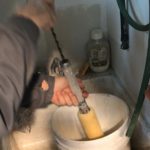
The faster way is to spin it. Watch me do it (on YouTube). There’s also a video on the product page (no sound needed). Here is the spinner: worth having in my view if you do annual painting or more.
We really clean our brushes quickly
- Wire brush off any dried paint from the heel of the brush. We recommend the one shown as many budget tools easily lose wire bristles that go down your sink drain: not good.
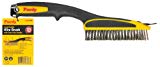
- Submerge the brush in water or solvent and pound the bristles about 20 times. Change your solvent and repeat. With a Purdy brush, you only need to get about 95% of the paint out. I repeat the rinse 3-4 times to get 99%.
- To dry, comb the bristles with even a regular hair comb so they are good to go next time. Best to use the cover also (or wrap with paper and tape).
Watch me do it. (YouTube)
For oil-based stain or paint, even white wood stain, I have to confess, we don’t clean brushes. After even brushes designed for oil-based products get wet, they don’t ever rebound to be like new. We buy very good brushes to go fast and do a good job, then… sorry… we throw them away. To recycle, do a quick cleaning and use it as a dust brush. I have plenty of them.
Opinion
 Natural wood trim seems to be less acceptable in a modern home. Painting stained trim will look better in the eyes of a buyer, it’s true. We personally disagree about the look, but for selling a house, we’d have to agree with the realtors. So, very often, you’ll find us painting stained trim: maybe once every couple of months. We painters charge a lot for this, but the how-to go-to paint from wood stain is exactly as we have described above.
If you don’t want to go all out, it’s easier just to paint the doors instead of painting stained trim as well. White doors with wood trim is a nice modern look also. Follow the same steps for the result of stained doors with painted trim.
My biggest tip on how to paint woodwork trim: Remember the Prime Directive, Captian Kirk—top quality paints cost less in the long run (even if you are selling, the rooms will simply look classier). Plus “Admiral”, stop disturbing the aliens on those planets. What was that about?
Stained doors with painted trim, has less white by surface area, but still uplifts an all-wood home to a more modern look.
Finally, a caution. If you are painting over stained wood without sanding (using the liquid deglosser), please wear that respirator and ventilate with open windows even in the dead of winter.

With this procedure, you can go over white wood stain, or any kind of stain and varnish and have a long-lasting painted-from-the-get-go look. Any comments? Please do.
———————————————————–
That’s our look at painting stained trim
Painting stained trim is straightforward: follow these steps repainting trim with or without varnish. Do you have any questions or comments: please let us know below.
Related posts:
- Pick your primer in our post on primers that block stains
- Pick the best trim paint, and the best paint for wood in general, including your cabinets
- Learn how to paint woodwork trim whether you are just repainting trim or converting from stain.
We have been asked many times if it’s hard painting oak trim white and now you see it’s not that complicated. The hardest part of painting stained trim is the prep. For trim in any condition, how to paint woodwork trim is the same as painting stained woodwork above: once it’s done, use the roller and brush method. You’ll rock-n-roll.
Here is what a professional set up looks like for painting wood trim:
I have stained wood trim that I am going to paint following your methods. The test that I have done looked great. The only question I have is that none of the trim work has been caulked and should this be done before priming or after. Thanks
I assume you mean inside trim. Caulk after primer before finish coat if you do not intend to sand after the two top coats. Caulk after the last sanding. (you can’t sand caulk). Have your wall paint for the final line cut: easier than cutting line with trim paint.
Hey Brad, thanks for the info!
I see from reading several of your trim paint articles that you say not to bother cleaning the brushes used for PrimeLock and throw them away. And that for actual paint, use the good Purdy that’s listed on your recommended tools page.
What would you recommend for a throwaway brush?
Well, yes and no. Throw away dollar store types shed bristles, but if you will sand after it dries, yes. If not, then no. For those brushes I beat the hell out of them before I get them wet to remove loose bristles. Get what you pay for! But on a high end paint job, I’ll spend 15 for a good brush and throw way (or save in freezer! ha)
Thanks for all the great info. What about going from pine wood with poly only to a darker stain color? What process there?
Generally going to a darker color presents no issue. You just clean, perhaps sanding first and apply and repeat until you get what you want.
If you have a varnish, of course, that must be removed as it will prevent the stain from touching the wood. Hope this helps. Not sure what you meant by poly only.
b
Brad,
I’ve spent two days scouring the internet for how to redo the wood doors and trim white (as my wife desires). Your site doesn’t have pop ups, includes links, and seems very comprehensive. I just wanted to thank you for your effort and assistance.
I’ll use every point you’ve given on the trim and doors. I’m hopeful the doors will still close without rubbing after I put paint on them, if I sand well. The colonial styling (lots of little edges) was concerning when I thought about sanding those areas but using the liquid you recommend sounds like a plan!
Our 3 kids are under 6 so I’ll wait to do the walls but will caulk all the edges. We have a very nice home and I’m shocked the builders (1997) didn’t caulk them at the beginning.
As a reference, we were quoted $28,000, $13,000 and $8,000 for a pro (to semi-pro with visible hand shaking) to do the trim and doors. That’s just more $ than we have to spare.
Anyway, just wanted to thank you and let you know your efforts are appreciated. Time to start. I should be done when our 1 year old is 4 🙂
That liquid sandpaper is very toxic: protect yourself.
Thanks for the nice words. If doors stick, just sand off paint then reapply in the same sticking spots but with just one thin coat, or 2.
Good luck
House built in 90s with lots of stained trim in great room including beam and double Chair rail. Question is if I want to leave the trim stained but paint the baseboards is that kosher ? We are replacing the carpet with laminate and the baseboard stain throws everything off when choosing flooring. Below our chair rail is a red color that we love. It is rich with the stain. Would it be ok to paint the baseboard that same red color or do I break down and paint all the trim. I am not worried about what’s in style. I want what I like and for it to look good.
I would say to paint the chair rail is a good idea, but to do just the base without doing the rest of the trim would look funny.
You know, a professional decorator will charge you about $75 per hour with probably a minimum of 2 hours and that might be the best painting money you ever spend.
They really know what works.
When changing trim, follow well the steps on this page above. Key is deglossing and good primer.
Good luck,
Brad
Great info, but it came too late! Wish this site popped up when I was googling a month ago. Nevertheless, I have the awful honey oak trim and we’ve decided to paint. Using regal on the walls (Matte over SW prep rite over old latex satin paint). For the honey oak, its MN winter, -0 degrees, and could not sand. I repainted my snowblower and used deglosser (M1 I think?) so I wish I saw this first! Alas, I did not, so did not think to use the deglosser. My choice was to test two primers I have used on some scrap honey oak left around from the builder. I applied SW prep rite on one and my SW Extreme Bond on another. Waited 24 hours and did a fingernail test. The prep rite mostly clung, but ultimately did not adhere enough. The extreme bond held up very well to the scrape test. So I went with that. I haven’t yet painted the trim, but just wrapping up the caulking of all the ridiculous gaps between the ceiling and crown the carpenter had to deal with due to poor framing/rocking/mudding. What do you do on those? Do you paint the caulk the ceiling white or do you paint the caulk the trim color? I think I might paint the ceiling white because irregularly shaped crown in spots would look dumb and be super noticeable. To top it all off (pun…), the ceiling is popcorned. Caulking that wasn’t too bad, better than expected, using Dap 230. The ceiling is unpainted, you know popcorn. I noticed that Kilz complete is pretty close to the same color when I primed a small rust stain on the popcorn ceiling, close enough that I don’t see it. So to avoid painting the popcorn ceiling, which is a pain, I am sure you know, I sprayed the junction of the crown and popcorn ceiling, which has been caulked, with the Kilz Complete to “dissipate” the caulk appearance.
Hi. On the gaps, you can fill with paper then several layers of caulk, if the gap is really big. The caulk should be right in the corner, so it would ideally be half ceiling paint and half wall paint. Not a big deal.
I’d scrape the popcorn off now unless you like it. It’s really out of fashion. Generally, we don’t use Kilz as a final paint as it will gray or fade quickly and it picks up dust where paints don’t. But it seems like you are happy as it is.
For the trim that you did not degloss, I guess just live with it. You’ll find it flakes off when bumped, so keep a glass jar of paint in the fridge (air tight jar) and just dab your finger when you see a spot. That’s what I do.
Good luck,
B
Yah, popcorn 1994 mn styles. The room doesn’t get much use and no kids so not too concerned about the trim paint except at window sills where the cat will jump. Those I will sand when the weather warms. They need to be seriously be treated as a prior owners cat did a scratch act on them. I’ll epoxy fill those. As for the ceiling, I am biting the bullet and painting it. I already have the paint so what’s another day. Don’t have the tolerance to scrape and remud the ceiling so it’ll have to do. I think if we sold the property one day new owners would tear it all down and start fresh, but life’s too short for me to worry about dated ceiling style! Thanks for the tips.
Hi Brad! LOVE your website and very appreciative for the help you give to we DIY’ers. I’m soon to begin the job of painting my bedroom. I tested (as per your directions) and we have oil base paint on our trim and baseboard. The walls seem to be latex. Also, we have hard wood floors (finished) that I would also love to tackle. Please tell me if I have the process down correctly in order to obtain a nice finish on everything…
1. Sand using 150 (on trim, baseboard, and floors) Liquid Sandpaper in corners & tight spots.
2. Prime Lock on trim, baseboards, & floors.
3. BIN on any stains that remain.
4. Advance by Benjamin Moore on all trim & baseboard.
5. The bedroom is currently yellow so I’m thinking two coats of good BM wall paint?
Lastly I will use Tough Shield on the floor.
I’m most concerned about the primer. I don’t see a lot of staining on either the trim or baseboard, but a few spots on the windows. But I believe I MUST use oil base primer over oil base paint if I’m repainting with latex, is this correct? Thank you so much!
Let’s take the floor and the rest separately. You would sand a shiny floor very very well, unlike any oil trim paint which just needs scratching for adhesion.
Floors: I’d rent a big floor sander or get a hand held and LOTS of paper and take off the gloss entirely if not taking off all the finish. Your primer and paint may not bond if you don’t get to the wood. Do a test spot. Let dry well and really scratch the dry test to see how the bonding is. YOu do not want to miss so do many tests until you are sure.
But yes Prime Lock would be my choice. Yes Bin also if knots bleed thru. Tough Shield is only as good as your prep, but if you prep is good, it’s the best floor paint.
Trim: yes you have it all right. Stix could work too. If the trim paint is latex you don’t need much sanding. If oil, you MUST degloss all the old paint or the primer will just flake off, even STIX etc will not really bond.
Walls, always 2 coats if changing colors even slightly.
Good luck!
One more question. Do you ever recommend 2 coats of primer, with a light sanding in between for baseboards? Or is it not necessary with the Prime Lock Plus? Thanks!
Ususally not necessary. Sometimes if there are wood knots or water stains etc bleeding thru the paint, the painter failed to use a stain-blocking primer or one with enough stain blocking resins etc. With Primelock… you should not have a problem. If you do, and stains come thru (may take a year), just spot prime with BIN, the shellac alcohol based one, not the water based one…and then touch up with your topcoat paint. Hope that was clear. Crystal clear to me in my bubble!
b
I have stained oak baseboards and trim that I’m planning to paint white. Is the purpose of sanding to get all the varnish off or to just rough it up a bit? Just wondering if I have to get it all perfectly sanded. Some of my trim has a lot of grooves. I plan to use the Prime Lock Plus for my primer. Thanks!!
To rough up. To remove would be overkill. Just for bonding, not for looks. Also it removes the little dust ticks that landed on the varnish when it was wet, so that’s good.
Primelock is what I would use too. You’re on fire!
Good luck.
We are about to paint the trim in our house and I’ve been reading your posts about how to do it. One thing that I don’t understand fully is how to use a full sized roller to paint floor trim? Won’t it be too big and get all over the carpet or wood flooring?
By floor trim, I think you mean what we call baseboard and yes, you are right, it’s not easy. You could still use a roller, but just roll savfely above the floor and slide cardboard along as a shield. Then tip out with brush.
Thanks for asking this. I should include it above!
I will!
B
I have judges paneling that is stained wood and it feels very grainy at the touch. I really need to avoid sanding if at all possible. I followed all steps (deglosser, the Benjamin Moore primer you recommended and the Advance in semi-gloss (so far just one thin coat). Right now (6 hours after Advance application), I see a lot of the wood grain texture coming through. Is sanding the only way to smooth things down? Or would more coats of primer/Advance reduce these fine lines? Thanks!
Yes, sorry to say, you will need to sand the roughness out, or accept that the look will have that texture.
I would use a power sander that has a small vacuum and bag to collect the dust, and you can use a cross-ventilation with an open window to reduce dust.
It sounds like you have a health concern, so maybe have pros do it while you are out. Find an old semi-retired painter like me!
More coats of anything will not really smooth things out.
Good luck!
This is so helpful! Thanks! Question: how do you protect carpet? Do you tape along the base?
Also, do you use the same method to apply primer as paint itself?
How long do you wait between steps?
I don’t use tape on carpet: just bunch up the canvas around the edges. When it comes time to paint next to the carpet, slide along some cardboard that also has your paint bucket etc.
Yes, primer and paint same roller. If paint is white, no need to fully clean when switching to paint: just squeeze as much as you can, and get painting!
Wait just long enough so that the primer or last wet coat is so dry that you cannont wipe any off. Test in out of the way corner.
Good luck!
Brad,
So I forgot to order the Klean Strip Easy Liquid Deglosser from your Amazon link. Local box stores or Ace Hardware stores did not have it. I did pick up Klean Stip Liquid Sandpaper because Amazon could not get the deglosser to me before Saturday (starting project Friday after work).
Will the Liquid Sandpaper do the job that I need it to do for primer adhesion?
Yes, as far as I know, they are the same or very similar. Always do a test spot to make sure.
Brad, Thanks for the quick response.
Just a couple of other notes:
I ordered the Prime Lock from Amazon from your link. I was wondering why you don’t recommend the Insl-X Cabinet Coat for the final paint step? Not that it makes any difference to me I just happened upon it looking thru Amazon. I assume that the Advance hides brush strokes better, but that’s just a guess. It is also half the price of Advance but it sounds like by paying more up front will get me the best and longest lasting results.
Also, as far as sanding goes. I am really trying to minimize sanding by hand. I am hoping to achieve about the same results with Liquid sandpaper.
Thanks again for the help.
Yes, CabinetCoat is a good product. I had a talk with my local Ben Moore rep and he said that almost all contractors have left CC for Advance because of the finish, like you said: brushmarks.
Both are very hard finishes.
Good luck
b
After getting quotes from several painters to paint white our circa 1985 house interior dark stained trim I am tackling the job myself over the winter. Now that summer is over and there is more time being spent indoors I have ‘primed’ (pun intended) myself to get this job done. This website is a treasure trove of info and exactly what I have been looking for.
I just want to make sure I have this right. Please correct me where I am wrong.
Step 1 – Liquid deglosser. Nasty but saves a step in hand sanding.
Step 2 – Insl-X Prime Lock Plus. THIS IS AN OIL BASED PRIMER, CORRECT?
Step 3 – Benjamin Moore Advance Interior Semi Gloss Paint. WATER BASED, CORRECT?
The most important step here is the prep. My biggest fear that with a family of 5 that I will begin to see chips in the paint over time. I will spend the extra time upfront with prep and great products if this will achieve this end goal.
This will take me several months. I am starting this weekend and want to make sure I have everything that I need.
You da man!!!
Wise to DIY… You can certainly do this.
1. I’d add that the big open areas are better to sand and hit the skinny spots and tight spots with the deglosser.
2. Prime Lock is great for bonding and blocking stains. If you think you might have stains, use it. If not, STIX is fine. Stix does not block stains as well, but the bonding is tops.
3. I prefer Advance for the no-brush strokes look. Regal or other semigloss will go on faster, but won’t look like oil which Advance can do.
A family of apes will not be able to pull off the paint if you go with this method. But here is my biggest point to you:
Do a test. Take one sill or frame etc, prep, paint and then test bonding at each coat. Now, each coat takes time to cure…months really, but you’ll know if it’s bonding. If that test fails, let me know.
Thanks for the kind words. You’ll do fine.
B
ps, get the Purdy brush I discussed: this is key. I also have a post on cleaning brushes and rollers. You’ll need that info. I used to not clean a brush overnight: just wrap in plastic…but this is not really right. However, the roller, if wrapped well or kept under the surface of paint or water, never needs cleaning until the end. Keep an eye on how they dry out when not in use.