It’s complicated: so many products and even categories of products. So here is our shortlist of the best concrete paint based on all our experience and research into today’s concrete floor paint chemistry. We also have a post dedicated to garage floor paint.
If you just want the bottom line:
TOP PICKS in each of the 3 categories (more below)
-
-
- Two-Part Epoxy (2-K)
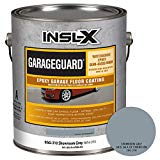
Not really a ‘paint’ and not just for garage floors, great for basement floors. Benjamin Moore’s INSL-X Garage Guard. You need to mix, stir, and apply before it hardens in the can, but unlike the “100% solids”, you have plenty of time. See more below.
- Two-Part Epoxy (2-K)
-
- One-Part Epoxy
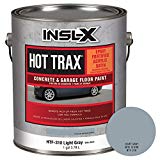
Hot-Trax is a true paint with added epoxy resin: better than the normal cement floor paints if you need more toughness. Fine for basements and so on too. An excellent concrete patio paint More detail below - Traditional Concrete Paint
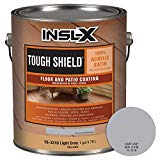
Good ole acrylic – not for garages, but it is a great concrete foundation paint or concrete wall paint. I have used and I recommend Tough Shield by INSL-X (Benjamin Moore). More details below
- One-Part Epoxy
-
I don’t work for Ben, but it’s a company that is making the best cement paint on the market today. There are some other lesser-priced good options below too.
But as we always say, don’t skimp on painting supplies. Why? In the long run, the best for your budget is also the highest quality concrete paint you can afford even though the up-front cost may be more in the short term.
This is not as hard as you may think: floors are the easiest thing we painters do.
After you pick your product, we link you to the ‘how-to’ steps whether you have new or old unpainted or previously painted concrete, including the testing you need to do first (+ some finishing touches).
Not sure of the state of your concrete floor? You can jump to our list of key points to consider to help you decide what you need.
Best concrete paint: and the winner is…
Nope, sorry, can’t do it this time. We cannot award one product the label “best concrete paint”. Why?
Because concrete coatings come in 3 very different types. Both 2 and 3 go on like paint and we’ll link you to the “how-to” below.
- The true champ, 2-part, “2-K”, epoxy paint (not really paint).
- One-part epoxy paint (not really epoxy). Jump right to it.
- Traditional concrete paint. Jump right to this.
1. Two-part epoxy (2-K): Not just for garage floors
Short answer, it’s the best concrete paint (not really ‘paint’) for the money. The products we recommend here are not difficult to apply like the “100% solids” epoxy that is all the rage today.
TOP PICK, Best Concrete Paint: INSL-X Garage Guard Cement Floor Paint
See my favorite floor paint product here, from Benjamin Moore
- Fine for basements as well
- A mix ratio of about 3:1 (cans are pre-measured, don’t try to use partial cans: combine all and if you have leftover paint you did not need, it will be trash)
- Comes in 2 colors, gray and sand, but can be tinted in a paint store
- Covers about 250-300 sq. ft. per gallon (kit is about one gallon—mix of 2 cans—the big can has space for it)
- Interior only (will fade in direct sunlight outside)
- Long exposure to brake fluid will fade the color (but not affect coating)
- Use ¼ to ½-inch roller cover (see our supplies page)
- Primer not required
- Tack free in 2 hours
- Re-coat within 24 hours
- Drive on it in 3 days (we’d wait a week if possible)
- Re-coat in 8 hrs. (not 24—seller page got this wrong)
- If topcoat is not applied within 48 hours, lightly sand the surface to ensure proper inter-coat adhesion (mop up dust)
- Fine for garage floors (vehicle traffic must wait 5-7 days for hot tires, 3 for cool)
- Gloss level is semi-gloss
- Shipping is almost free!
- Pot life is 4 hours at room temperature (unlike the 100% epoxy floor coatings which can be as short as ½ hr)
- Clean up: soap/water
Read more in the Benjamin Moore (INSL-X) TDS…Tech Data Sheet. Also, read the safety sheet: it’s a moderate health concern, but you will wear protective clothing, goggles, respirator, etc.
Hands-down, the best concrete paint for basements, garages, etc., but some advanced skill is required: after mixing the two cans, the product will become too hard to work in 4 hours, so you need to get it done right away.
We plan on 2 coats in most cases. Just below, we explain why 2 coats of this “50% solids” epoxy is better than one coat of the “100% solids” which are so fashionable these days.
Cost? Way less in the long run. It does cost a bit more than the hardware store kits you will see on TV and in the big home stores (more on why Rustoleum concrete paint is not as good, just below). It’s really not much more expensive than Ben Moore’s best interior paint, which we find amazing.
This INSL-X (Benjamin Moore) is professional epoxy floor paint: it uses amine adduct epoxy as its resin, whereas other DIY brands (Rust-oleum) use a blend they call “polycuramine” which is a blend of epoxy, urethane, and polyurea. We are not saying that they are all bad: they are certainly a good lower budget option. See below.
A short discussion on 2-K:
Of the many 2-part products out there nowadays, there are 2 main types:
- The “100% solids” that have a very short ‘pot-life”, (the time you can work with it before it hardens). Nothing evaporates so if you apply a 4-mil thick coat, you get 4-mils. Great, but best left to the pros. Even we do not use it. We put 2 coats of…
- The “50% “solids: if you put on 4-mil thick coat, you are left with 2-mils, but the pot life is very long compared to the 100%. Pot-life is around 4 hours for most.
- Pot-life of Willie Nelson? Crazy for lovin’ you!
Isn’t 100% solids better? Not particularly. Remember, if you don’t get it just right, you can turn your floor into a mess that you will have to grind off and start over.
Why do we prefer “50% solids”? Because 2 coats of “50%” is easier and the same result, but the 100% has a mere ½-hour pot life.
Thickness? The 50% solids epoxy floor paint applied at 4-mils wet, will evaporate down to 2-mils. The “100%” does not evaporate: applied at 4-mils wet, it stays like that..like Kunta Kinte’s Kizzy. (a Roots reference. I’m an old toubob).
Spray? No, you should just brush and roll epoxy floor paint. If you really want to spray, you need to study well. Here is your start: my post on airless sprayers.
We have collected what you need to know about 2-K epoxy floor paint in a 15-minute read on the basics of epoxy floor paint for garage floors or any concrete floor, and what other websites are getting wrong.
Painter Chat Room Digest: “GarageGuard is better than Rust-Oleum”.
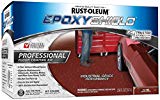
Rustoleum has kits designed for the homeowner, (two lines of product: one for the garage and one for basement floors). These are 2-K, and we have not personally used any of them, but we wanted to mention them because they are so popular.
We read quite a lot of reviews and don’t trust the 5-stars very much although some are probably not paid for. The one-star reviews are mostly from people having done poor preparation.
Chatting with other painters, there is a lot of negativity about it: but these people (painters) are biased toward products they know. The kit product may work out fine for you as it has for many others.
Go with the most trusted companies, always.
There is good reason to trust this brand: most folks have had good experiences, and the EpoxyShield seems to be the best that Rust-Oleum has to offer.
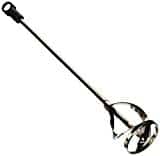
Necessary Accessory:
Mix epoxy with a drill: use the mixer attachment on LOW speed.
 This is not like mixing two colors: this is a chemical reaction and the 2 kinks of molecules must all find a partner or the coating will not cure.
Use your drill to mix the two parts: you are burning daylight as soon as you combine the two cans. Thre is an awesome drill attachment for very little money or if you think you might use it later for drywall mud, paint, concrete, etc.
Why low speed? To avoid trapping bubbles that may not pop before it cures.
Mix for the length of time as instructed on your product: don’t fall short!
2. One-part epoxy—a good balance between easy to apply and good durability
This is really not an epoxy. This is a new advent to the paint world: acrylic paint with epoxy resins for toughness. I’d recommend that you don’t put this type on your garage floor, but it’s not a bad way to go if you do. Easy to apply because unlike the short working time after mixing the 2-K above, there is no ‘pot life’, Bob Marley. No painter no cry.
We have 3 good products here:
Our Top Pick for good reason – KILZ 1-Part Epoxy Acrylic Floor Paint
- Comes in 2 fabulous gray colors
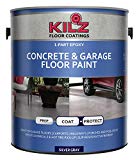
- Covers about 300-400 sq. ft. per gallon on smooth surfaces less on rough
- Interior or exterior (a very good concrete patio paint)
- Tack-free in 2 hrs, recoat after 4 hrs.
- No traffic (even feet) for 48 hrs.
- Do not use on walls
- Primer not required, ok for new or old concrete
- Ok for previously coated concrete (prep well)
- Fine for garage floors (we prefer 2-K, not this)
- Gloss level is satin
- Apply in 2 thin coats
- Shipping is free
- For concrete, stone, brick, all masonry
- Cleans up with water
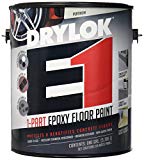 Epoxy floor paint Drylok E-1, UGL’s one step.
- Comes in 2 ready-mixed shades of gray, light and dark
- Covers about 300-400 sq. ft. per gallon on average surfaces
- Interior or exterior
- Do not put on top of 2-K epoxy
- Recoat after 4 hrs.
- Garage: no traffic for 7 days
- Very low VOC (50 g/L)
- Primer not required after proper prep
- Gloss level is semi-gloss
- Apply in 2 thin coats: 2 maximum
- Shipping is free
- For concrete only
- Cleans up with water
Hot-Trax from Benjamin Moore is a water-based acrylic/epoxy resin blend sold for garage floors, but a suitable, tough coating concrete floor paint. Pricy, but best in its class. For a garage, it’s ok, but GarageGuard above is better and not that much harder to apply.
-
- Comes in 2 shades of gray, but is tintable
- Covers about 300-400 sq. ft. per gallon on average surfaces
- Interior or exterior
- Recoat after 24 hrs.
- No traffic (even feet) for 48 hrs.
- Vehicle traffic: wait 5-7 days (we prefer 2-K for garages)
- Low VOC
- Don’t apply in direct sunlight
- Primer not required, ok for new or old concrete
- Gloss level is satin
- Apply in 2 thin coats
- Shipping is free if you buy 2 gallons
- For concrete, stone, brick, cinder block, stucco, all masonry
- Cleans up with water
3. Traditional concrete paint (acrylic resin) – easier to apply than epoxies
Of the 3 types of concrete paint, basic acrylic resin paint is the least durable, but easiest to apply.
The best in this class is Tough Shield from INSL-X (Benjamin Moore) and comes in several colors. For concrete foundation paint and concrete wall paint, this works great.
- Covers about 350-450 sq. ft. per gallon
- Interior or exterior
- Not for garage floors
- Comes in several colors, depending on availability
- Gloss level is satin
- Shipping is free
- Cleanup: Soap and water
- Interior/exterior
- Concrete, masonry, wood, concrete patio paint, porch paint
From Kilz comes, Over Armor, a paste-like paint to hide imperfections and cracks. Like Skippy, it comes in smooth or a with slip-resistant textured finish. Several colors too.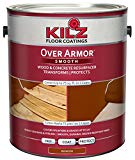
Made very thick to bridge gaps in floor up to ¼ inch wide: sounds too good to be true. The instructions say that to fill large cracks, use a brush to work the paint into the crack and let dry before painting. Use a bit of force on the roller and brush when applying. Not for sprayers!
- 3 colors (gray, brown, redwood)
- Goes on very thick to hide cracks up to 3mm, according to Kilz
- Very low coverage: only 75 sq.ft. per gallon (very thick paint)
- Use ¼ to ½inch roller cover (see our supplies page)
- Interior or exterior (a very good porch paint and patio paint)
- 2 coats required
- Re-coat in 4-6 hours (full cure in 72 hrs.)de
- Not for garage floors
- Very low VOC
- Gloss level is not specified? Assume satin /flat
- Shipping is free
- A wood, concrete, composite, concrete foundation paint, concrete wall paint
We have never used this product, so we cannot claim that this is a concrete paint review.
Valspar Porch Paint, excellent porch and concrete floor paint for all floors.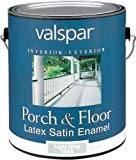
We like white (link above), but of course, it means cleaning frequently. The gray is in photo link.
It’s rare these days to find a concrete floor paint product that offers white. Most folks want a neutral floor color.
- Covers about 400 sq. ft. per gallon
- Cures in 7 days (normal conditions)
- Interior or exterior
- Said to be ‘self-priming’ (after concrete etching)
- Unpainted or smoothly worn concrete should be etch
- Not for garage floors
- Comes in 3 colors (2 grays and white)
- Gloss level is satin
- Shipping is free
- Also a metal (primed), wood, concrete foundation paint, concrete wall paint
We have been asked about Granite Grip, the Behr concrete paint, containing no epoxy resins. Painters, in general, avoid home-owner lines of paint (all Behr) and so should you. Please don’t trust the reviews: Home Depot exterior paint or Home Depot concrete paint is not as good of a value as the best concrete paint we recommend here. Not to mention your time in the maintenance. We asked other painters about home depot cement floor paint and the replies were not pretty.
The Behr concrete sealer and the Behr concrete primer, and the Behr masonry primer are all out-classed by the products above, for about the same money. The only difference is that you know where the Home Depot garage floor paint is and you are used to it. We are surprised by how many folks ship paint these days, either to their home or to a pick-up point (Video on delivery locker pickups: cool). Sure you already know where to get the Home Depot porch paint, but please think about the long term effect of using a better quality concrete paint.
Think it through first: Key planning considerations before applying cement paint

1-Color?
Many interior and exterior concrete paints come in your choice of gray or other-gray. Really? 1955 called: they want their hair goop back. But there is one that you can have in any color: and it’s the best of its class (called Tough Shield-see below). The Valspar below comes in white. Nice.
2- Price?
Please remember our motto: if you spend more on quality upfront, you actually save money in the long run (less labor, prep time, and future paint costs).
3- “Am I rough enough?”
Keith yes, Mick no.
The roughness of concrete is important. It must have a surface ‘profile’ that has the tactile feel of about 100 to 80-grit sandpaper. This ensures that the paint can adhere properly without flaking off. If yours does not feel like this, read about acid wash and concrete etching). It’s not what other DIY ‘painting’ sites tell you.
We have read some other ‘garage floor’ websites and posts. They are saying all concrete needs to be ‘profiled’ i.e. roughed up before applying cement paint. Yes and no.

Many floors are born feeling like 100 to 80 grit sandpaper. All they need is the complete cleaning and rinsing and drying. If your floor was trowled very smooth, ok, yes, you need to etch it. Read what you need.
4- Ever been sealed?
To test if your concrete floor is sealed, do the water drop test: pour some water (¼ cup) onto the dry slab. If it darkens and the water absorbs quickly, the cement slab has probably never been sealed, so if it is not very smooth it will not need etching, either acid or mechanical. Lucky you. (Most cement floors are like this).
You can also drip some muriatic acid on the floor and if it bubbles, the floor is reacting with the lime and has never been sealed.
5- What’s my sign? Slippery when wet.
With some of these concrete floor paints, slip-resistance is their selling point. Good enough for you? Meh. Many times we have made a truly non-slip floor by adding silica: but don’t use ‘sand’ from your garden store: it’s too large. For painting most floors, the particles need to be uniform and quite small. You can make it yourself, ( see our video below) or buy sand that is already the right size.
To prime or not to prime? About alkalinity.
For the best concrete paints, a concrete primer is not always required. But it is necessary for bonding if the slab is too alkaline. Check the paint can’s label of your chosen product and learn about alkalinity. Bottom line: most old, clean floors are fine to paint with no primer (as long as they have a semi-rough profile, like 80-grit sandpaper).
New floors have not had time to age (react with the air), and may be very alkaline: it depends on the builder’s concrete mix. You can test for alkalinity (link above), or just use the concrete primer to be safe. Most paint company reps will tell you their product does not need a primer, except in the case of high alkalinity.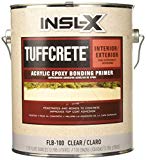
Concrete floors really get beat up so we use a concrete primer designed for high bonding power. Once again, our old friend Ben comes through. No, he gives us no money for saying this, but we do think TuffCrete Concrete primer is the best. Water-based and it locks down any loose particles. Interior/exterior, acrylic, and unlike most water-based primers contains some epoxy resin with concrete floors in mind. The price is surprisingly low.
But repeating again: before you use a primer, check your paint or epoxy’s label for alkalinity tolerance or “resistance”. You might be able to leave this step out.
Industry pros don’t like this method, but it gives you an idea of your pH. This video shows how you scrape down just a little, then use distilled water and pH strips. Again, this may not be very accurate, but gives you an idea of your floor’s alkalinity.
Testing pH: Remember high school? Seven is neutral, below is acid, above is alkaline: thank you, chemistry teacher, from 1978.) It’s always best to call in a flooring pro to avoid a disaster.
I spoke with a big paint store rep who thinks this method is not so accurate. If you have big doubts and it’s make-or-break your job, consult a concrete pro.
Got cracks?
 Some of the concrete or cement paint products below are not made to hide very large cracks in the floor. Small, normal cracks can be filled with concrete patching or caulking compound. Normal caulk won’t stand up to auto traffic.
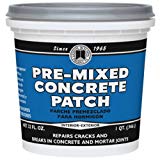
Also, the color chip method can help to hide them. See the ‘texturing’ section below.
You can go the concrete caulk route. We have a series of posts all about caulk and caulk guns.
You can also use a concrete patch. If you use any primer, use the patching after the primer is dry.
Will I clear coat later?
Many good painters do, but we don’t highly recommend clear coating.
Before we discuss faults, if you do want to clear coat your floor, we provide what seems to us to be the best product at the end of the products section.
What’s the beef? Firstly, modern concrete floor paint products are tough enough to stand alone.
We think about the future: we like having one product that you can re-apply in future years. Sure the clear coat looks great and lengthens the life of the coating beneath it, but think a minute.
When it comes time to re-do the floor, probably in your lifetime or maybe for the future owner, you have to prep the clear coat, then find the right bonding primer or coating, then apply that and another clear coat? Now you have 4 layers of 2 different types.
This is not in keeping our philosophy which is that lazy is good.
Unless this is a showroom, we say keep it simple and keep the prep down. Use just one type of paint or epoxy etc. Stick to one product for life. This is just our opinion.
Before we published this, we needed to make sure we had this right. We wrote the folks at Benjamin Moore. They wrote, “A clear coat isn’t typically something that we recommend on residential garage floors. This will make touching up in the future more difficult as you will now have to work on making sure enough of the clear coat is removed for uniformity.” I had a dog and his name was Bingo.
However, we will now contradict ourselves and say that a clear coat can be very good to cover over the color flakes if you spread them on your new floor. (See ‘Texturing” below).
Some like it wet? No, no they don’t.
We have explained all you need to know, including how to test the slab in a post on moisture tests.
Definitely test for moisture before starting this project. A concrete floor must not be wet. Moisture is your real enemy.
There are 2 things to know: the concrete must take in moisture well and it must be relatively dry.
Will the rock grab the new coating? If it has been sealed, you have work to do. How do you know? Easy. Just drop a ¼ or so, of water. If the slab absorbs the water in under a minute, you have no sealant and you can paint/coat if the ‘profile’ is rough enough. If it’s been sealed, you have to etch. Woe is you.
Overcoming an old sealer is not that bad really. Just follow the mechanical (not acid wash) etching technique described here. We link to the big rental company plus we suggest a DIY tool if you want to have the tool as your trophy when the war is over.
Next, is it too wet? All concrete is always somewhat wet, but there’s a limit as to what you can paint/coat. Instead of copying the entire procedure here, we link you to it. At the very least, do the plastic test at least. Sort of fun to do.
Garage floor paint on a basement?
Yes, it works in the laundry room too. Here is our full look at garage floor paint.
Clear topcoat for floors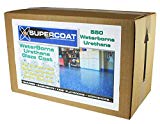
One clear coat that we do like this high gloss urethane. The price is reasonable for this type of product. It is water-based and it should hold up to brake fluid, battery acid, gas, etc. Should add years of life to your floor.
We created a list of all prep and paint steps and placed it below.
Before you go to the how-to lists, first please read some helpful tips just below.
How to Paint your Concrete Floor
Tips from 35+years of experience
Measure the floor/wall area exactly and look at the product’s coverage specs. Key Point: A properly prepared floor is slightly rough so the first coat will not go as far as the second. You could run short if your calculations are close. It’s better to buy a little too much than too little. We donate extra paint to local charities (and sometimes apply it!)
Most coatings’ failures come from painting a damp surface (it might look dry). We use fans, heaters, blowers overnight or for longer. Wintertime interior or exterior concrete painting is tricky: get the rock warm!
2-K tips:
Don’t shake the 2-K! Mix with a drill attachment mixer on low speed: too fast and air bubbles will be introduced and will not pop: they are forever in your floor. The can label will tell you how long to hold keep the drill on. You really must keep mixing for the amount of time called for by the instructions: this is, of course, pivotal to the epoxy curing.
Also, take the warning about the temperature of the application seriously.
Final advice: only mix one gallon at a time, even if you have a very large job. You have 4 hours, but the reaction starts immediately. Why not play it safe?
Texturing and Color Flakes
Sand to prevent slipping:
Below in our video, we show how to take ordinary beach sand or garden store sand and sift it to create a fine, uniform sand that you can spread in your paint for a true non-slip floor (excellent for stairs). No more ‘slippery when wet’. Downside: you can’t sing Bob Seger songs in your underwear. Lookin’ at you Tom Cruise.
We love saving money!
If you don’t want to go through all that sifting, there are 2 options. I prefer real silica: but not sand. A pound will spread over a 2-car garage or so…mabye 4-5 gallons of paint, or less if you want it the floor to be like sandpaper. The other is fine rubber particles. We use these really anywhere: on steps, in basement floor paint, in porch paint and floor paint and even on a trailer ramp door.
Tip: Do not mix into the paint can/tray (silica sinks, rubber floats). First roll/spray/brush your paint, then ‘broadcast’ or toss it. Start slowly until you get the hang. Toss up for more even spreading. Then roll/brush again. This brings particles into the solution (covers them). It’s simple and works great and does not shorten the life of the floor, If anything, it lengthens life (surface is thicker).
How we do it: Roll a square, toss and then roll it again to cover the particles.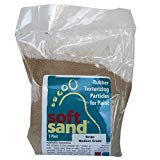
Yes, it ruins the roller cover for future wall work etc. There go the 9 bucks you saved on sifting sand!
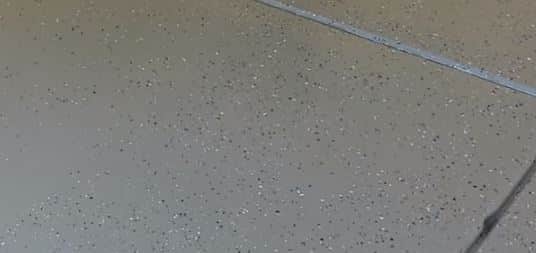
Color Flakes:
These flakes are somewhat retro-looking but people still love it.
To get the flakes to spread evenly, throw small handfuls up in the air and really whip your wrist to make it spread.
Some people like a clear coating over the flakes but we don’t recommend too many products in layers for easy prep in the future. Rarely we have seen the “point of refusal” method (when you toss chips until no more stick). Below our recommendations, we explain the problem with this.
We recommend the chips made of epoxy but the acrylic will be fine too unless you are doing the above ‘refusal’ method.
- 5 lbs. of epoxy chips (much tougher than the acrylic)
- Very large box of epoxy chips
- Rust-Oleum Decorative Color Chips: comes in various colors
- If you used INSL-X paints, they have their own matching flake colors (3 colors to choose from).
One word of caution: avoid the so-called ‘point of refusal’ method. This is when you coat the floor with your choice, then saturate the wet floor with the above chips to the point that no more will stick. It takes a lot of chips obviously, but that is not what painters complain about. The problem is that the half-glued chips stick up and are always breaking off. If you think you’ll clear coat after the chips are down, you will have to sand down all the edges sticking up in the air (more dust and cleanup). We like the sparse flake look. It’s nice. It’s LOW MAINTENANCE, man.
Finally, how to remove paint from concrete.
If the concrete already has paint on it or has been sealed, your new paint will not be absorbed into the pores. We would first suggest the obvious: paint thinner, lacquer thinner, acetone, even TSP. But there is a paint remover for concrete. Begin with a wire brush to get what you can, or try creating a paste out from TSP and something absorbent like flour, plus water. That product comes in a big drum too.
Next, try a pressure washer. This Sun Joe will go forever, and they have a bigger one too. This is a tool you want to have for all kinds of things too. We have had a small electric for about a decade: we cannot kill it.
To scrub, use a tough brush (this scrub brush has a screw hole… for a normal paint or broomstick).
Video: Concrete Floor Paint: Texturing Sand
Summary
We have been asked what’s the best concrete paint to use on foundation, and cement paint in general and for painting concrete walls in particular.
For some, you will want the longest-lasting, toughest cement paint you can get but for others, you just want to concrete paint to look good enough to sell your house. Whether or not the concrete paint will take a beating, it’s always a good idea to use the best concrete paint on the market, or at least the best concrete paint you can afford.
If you have ever had to remove loose cement paint you know that you want it to last this time. Even if you are selling, you can let the buyers know that you used the best concrete paint on the market and leave them the can. We cannot stress enough that good prep and quality concrete paint will save you time and money whether you are painting cinder block, painting cement floors, painting concrete patio floors or just painting concrete anything. Remember that outdoor concrete patio paint will not last if the slab gets wet from underneath.
As we said above, a concrete primer is not always necessary, but never hurts. Using it before painting cement floors or putting cement paint on any surface is a smart bet.
We hope we have covered concrete floor paint well, but if not let us know in the comments if you have any questions.
Hi Brad, I am so happy I found this post. I was about to go buy the granite grip from home depot but now I know better so thank you. I want to ask you would you recommend I use INSL-X Sure Step for the concrete front porch floor and steps of a 3 family property I manage? I am always concern about tenants safety and I have read reviews that this is a very good anti slip paint. What are your thoughts?
Actually, if you want to protect yourself legally, call a lawyer. They give the first consultation free. You might be a long-term customer… I cannot be specific unless I see it and that’s not possible…so…
What do you need to protect yourself and the tenants? You certainly will need to do all you can. Salt when it’s icy and someone to shovel right away.
Paint can be slippery even the really good nonslip paints. I would use Sure Step PLUS the silica method on my stairs. Be sure to read how it’s applied: you don’t add the sand to the paint! You spread it then back roll or brush after. If you use this paint and this extra step, you’ll have good traction.
Read this about the silica.
Don’t use beach sand, use very fine-grain particles you can make yourself. It’s the video at the bottom of my text above.
But hiring a service to shovel snow within X hours is going to be best.
Good luck
b
Hi Brad. We need to apply Drylock to garage/basement walls. We did it when we first moved in (>20 years) so we’re way overdue. Walls in garage are somewhat mildewed so what would you suggest as prep? Also is Drylock still the very best product? Ease of use would be great but if it must be oil thats ok. We want the best.
Thank you!!
Good ole Drylock is still around, so that means something good. They have a new upgraded product I’d recommend called Drylock Extreme.
The difference is that the newer formula can withstand more water pressure coming from your walls.
Of course, the absolute key is to do the surface prep VERY well. This means all the usual: removing old paint, cleaning.
Feather sand any boundaries where paint has come off and where it remains.
For your mold, you want to kill it all and not have it come back, at least not from under the paint.
Don’t use bleach. I recently was informed that bleach, while killing 99%, does not get it all and what is left multiplies more rapidly.
Use the Siamons’s. It leaves a paintable surface and it’s claimed that it kills all the mold.
I think this is a topic I’ll look into more. Paint geek here. But it’s important. I just found some in my basement as well when tearing out an old wall to renovate.
Key point is to keep the air moving and as dry as possible: mold will always be around looking for a place to stay. Like your cheap uncle.
You’ve inspired me to write about these great products: other people must have this problem, of course. Coming soon!
Good luck!
b
If you have a wet spot, you can apply a plug, even when wet, also from Dylock. I have never had the need for it…yet… but I think you can trust it.
Hi Brad,
Thanks for all this great, detailed advice. We will be painting a concrete floor in an art studio where there are skylights—so a lot of light. We would like to use the Benjamin Moore Garage Guard or their Floor and Patio paint (a waterbourne acrylic urethane), either which, I think, we can get get tinted white. My main concern though is about yellowing of the white paint from the sun exposure. My understanding is the epoxy is affected by light. After all the effort, I would hate to have our new white floors yellow. What do you recommend?
Thanks,
Shelly
You are smart to be concerned. Some do yellow over the long term even through window glass which filters much UV. Some just yellow while drying in UV.
The Garage Guard data sheet has no info, but they should.
Benjamin Moore Garage Guard epoxy is not known to yellow from UV, but will yellow due to coming in contact with certain chemicals. Cleaners using bleach and ammonia can discolor epoxy. Lighter color epoxies may discolor just from exposure and oxidation.
It is best to use cleaners that do not have harsh chemicals and try to clean up spills as soon as possible.
B
Ok—Thank you so much. I really appreciate your quick reply on this!