Paint for a basement floor needs to have a lot of ‘solids’ in the solution, and that does cost a little more, but it’s very much worth it. Using the best basement floor paint is a no-brainer and a big thank you to gravity for making a painter’s life great, for today.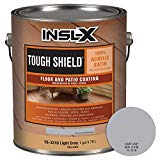
We love Benjamin Moore’s basement floor paint Tough Shield as it covers a lot and when we want durable anti-slip floor paint, we go with the excellent Sure Step (see more below). We will also talk about the best budget choice and the best decorative concrete paint. In another post, we go into detail about concrete paint.
Other topics to read: on painting floors in general and on painting plywood floors. Fun read: so many cool basement remodel ideas.
Which basement floor paint is best?
Basement floor paint must be tough, but please do not use exterior paint inside your home (read about the danger).
Got Tools? and other supplies you might need are collected all in one place.
Best basement floor paint: 4 quality choices
Below these 4, we link to the roller cover etc. we use for basement floor painting.
Benjamin Moore’s INSL-X Sure Step (comes in 6 colors)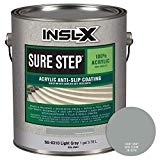
- A very durable, high-quality floor paint with non-slip properties.
- Great price for that quality: we use a lot of this.
- Interior or exterior.
- Water-based.
- Fine for floors made of wood, concrete, or metal.
- Anti-slip: cannot play hockey wearing socks in the basement.
- Only covers about 100 square feet per gallon (lower than normal: it’s thick).
- Not for automobile garages.
- 6 colors, a lot for floor paint and it ships for free.
KILZ Porch & Patio Latex Floor Paint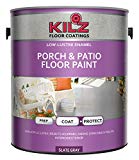
- Best budget floor paint, has great reviews and ships free.
- Only 2 colors to choose from—gray and a different gray—but we all like gray, right? Luke, you like gray.
- Not for garage floors or concrete.
- Mildew resistant, and since so many basements are damp, this is a strong contender for best basement floor paint.
- 200-300 sq. ft. per gallon.
- Fine for wood and concrete floors.
- Low-lustre.
- Interior and exterior.
The floor must have a primer or be previously painted – we use this concrete floor primer: Ultra-Spec, my go-to concrete primer for floors and everything.
KILZ Slip-Resistant Decorative Concrete Paint 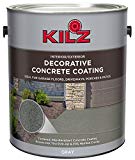
- Kilz concrete paint, also slip-resistant, and ships free
- An attractive, non-solid pattern in 2 colors: tan, gray
- For concrete floors only but also ok for garage floors, water-based
- Covers 100 sq. ft. per gallon but recommends two coats (so 50)
- Interior and exterior
- Fills very small cracks, which other paints do not do
- 2 colors, gray and tan, but has a multi-color effect: for looks, this would have to be the best basement floor paint on the market
- Non-slip surface so no playing hockey in your socks (looking at you too, Tom Cruise)

Saving the best for last: INSL-X Tough Shield Acrylic Floor/Patio Coating
- A Benjamin Moore product: always trustworthy
- Excellent paint, ships for free
- 5 colors, satin finish (most typical look)
- Concrete, brick or wood: not for garage floors
- Water-based, interior or exterior
- Surprisingly large coverage per gallon: about 350-450 sq. ft.
- Benjamin Moore’s best basement floor paint
On priming, INSL-X wrote in a comment: “Concrete Floors – Thin the first coat of Tough Shield Floor & Patio Coating with one pint of water per gallon. Allow 24 hours dry time then apply one or two coats as it comes from the can. ” For wood, prime with Aqua Lock Plus and wait for 24 hrs before painting. Metal: prime with metal primer.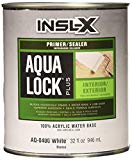
Read the can label or read the product page if you are buying online, about the VOC content. We wear respirators anytime we are not sure what we are breathing. I simplified the crazy world of respirators for you in a short post. For almost all painting projects you’ll get by with the half-mask which comes without filters (model 6100=small, 6200=M,6300=L), and then the filter kit which has both dust and chemical filters that you can use together or separately.
Painting basement floors: How-To, summary in 5 basic steps:
When your prep is all done:
- Cut. Go all around the edges and posts etc first.

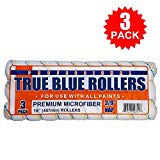
- Roll. Just pour the paint on the floor! Make a puddle and use it as your ‘bucket’. All painters use an adjustable pole and “do it standing up”. It’s so easy. Biggest tip: don’t use cheap roller covers: they shed lint and will totally ruin your work. Apply evenly and fully.
- Let it dry a few hours according to the label, then test if dry (wear socks, no shoes).
- Second coat? Probably not necessary if you are using the best basement floor paint. Use a bright light to see up close. Often the answer depends on your color choice: grays are great and reds you’re dead. The cut may not need 2 if the rolled section needs 2. The paint can instructions tell you how long to wait between coats but don’t wait too long or you will not have good bonding between coats!
- Is it really dry? Use your fingernail to test how soft it is If it is not dry, wait!
Let’s look at the whole thing in detail:
I detail all steps including prep and primer in the section below on How to paint basement floor.
Before painting basement floor:
- Do not try to paint a basement floor that gets wet from any direction including from below: it’s a world of hurt. See the concrete moisture test below.
- Paint on concrete does not cover as much area as wall paint (little grooves swallow paint). You need to buy the best basement floor paint and calculate the quantity carefully (rough surfaces swallow up paint).
- Cannot stress it enough: the best basement floor paint prevents future labor and headaches! Floors get abused. Why repaint after only a handful of years? Uff.
- Painting a garage floor? You need garage floor paint. See the bottom of this post.
 Be happy: painting basement floor goes very fast. Even very big areas (after prep) will take only an hour or so. Plan carefully but be aware that many photos you will see around the internet are taken right after the floor was painted so, of course, it looks great. How about 5 years later? So buy the best.
Check for moisture coming through the floor: using very sticky tape, fix a 2-3 foot square of plastic wrap down tightly—no air gaps (floor must be clean and not visibly damp). One day or two later, if you have moisture trapped inside the film, you cannot paint that floor. Contact a builder to see if you can rectify this problem. There are some specialized sealants, but you must find what the source of H2O is. I put all the concrete tests in one post: read about the moisture and alkalinity of concrete floors.
How to paint basement floor: detailed steps
Prep: most of the work is here
- Read through this list noting what tools/supplies you will need.
- Think it through before painting basement floor. We have listed all of the tools you may not have, such as scrapers, rollers, brushes, etc. Think clean-up will be hard? Nope. We have great posts on how easy clean-up can be. Check it out in the Tips section.
- Plan the locations where you will put the furniture if you cannot easily move it into another room. You may get paint on these things, so think about covering nice things with plastic drop cloths. Use tape to keep in it place with tape that will not leave a glue mark: green painter’s tape. If you have old cloth (even cardboard or padding). Lay furniture on sides or top not legs (less pressure) to keep objects from sticking.
- Remember: the final look is only as good as your prep job. After you are done your prep: paint cannot really hide any sins! Sand (or as mentioned below for concrete, wire brush) old paint that won’t scrape off (feather the edges), and sand any wooden floors (use assorted grits: on this page select some coarse and some medium grit.
- Priming? Unpainted wood yes. Modern concrete paint generally needs no primer. New concrete may be very high in alkalinity: it has not had time to react with the air. (Always wait at least 30 days for new concrete before painting). For new concrete use a primer that can handle the high alkalinity (even some of the best floor paints cannot). Use a quality primer: Ultra-Spec shown above is our go-to masonry primer.
* Read the label on your choice of paint: some do not require a primer. - Concrete floors: already painted? Remove loose paint with a scraper and/or wire brush: get a good wire brush because the wires fall right out of the low-budget ones. Wash the bare spots well (see unpainted concrete below). A bad peeling problem is probably due to poor prep last time or moisture getting in the rock, which is probably unpaintable. Consult a flooring expert.
- Uneven floor in spots? Use floor leveler. DAP is your friend: this size bucket covers perhaps up to 10 square feet if spread not-too-thick (not for garage floors). Measure before you buy. Does the leveler you will use need a primer? Good to check now. The Dap above does not specify: so we prep it like new concrete (below).
- Lots of furniture to move? Maybe do the job in sections: over a longer time period so you don’t have to move everything out. Here is how.
- To begin, prep and then clean the section you will paint LAST. When you clean you will spread dust so only clean once when the prep etc is done. Prep and clean your staging area (with paint buckets etc) and furniture holding areas; move things onto that section. Cover them and the floor you cleaned, then clean the area you will start painting first. Whew. Easier than it sounds here!
- Nearby your storage section, place soft (old) blankets you will later use on the freshly painted sections (for when you paint your staging/holding areas.) These cloths/pads will go under your furniture and above the just painted sections, protecting the soft basement floor paint.
- Before you coat a concrete floor, it should have the ‘profile’ or roughness of medium-grit sandpaper (110 to 80-grit).
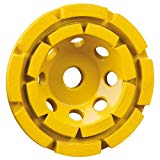
- Unpainted concrete floors need not be acid washed first despite what other websites say. If the concrete is very smooth then yes, you need to etch either with acid or with a floor sander. We don’t rent the big boys’ floor grinders. We use an: angle grinder
 (shown) combined with a diamond grinding wheel (shown below). For about the cost of a floor grinder rental, you get to keep the tool in the end. Go slow at first (test in spots) until you get the even motion: just take off only the concrete that you must, and try not to leave gouges. Read about prepping concrete floors for paint or stain.
 - Acid is easier in a way, but more dangerous. Wear goggles and a respirator! You can use the toxic muriatic acid which is nasty. (See the State of Calif. warning at the bottom). The standard non-muriatic choice from Rust-Oleum eco-friendly to plants, which gives the same result as the acid concrete floor etcher. One gallon does 500 sq. ft. See warning on muriatic acid below*.
- If you go with real acid, remember, never add water to a large amount of acid, only add acid to water (prevent acid splash). Ventilate the room and wear that respirator!
- Pour and push the solution around the floor with a scrub brush that fits on a broom screw pole to stay off your knees.
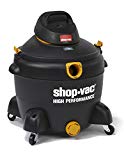
- Rinse either the acid or eco-friendly solution three times with water to deactivate the acid (and this actually removes the impurities). A wet/dry shop vac is good for this, or use rags (with rubber/nitrile gloves!) A drain in your basement floor will be helpful here or you have to use a mop and bucket. Test that your drain is not blocked first!
- Let the concrete dry completely. Fans will help.
- Unpainted concrete may need a masonry primer depending on the specs of the paint you want to use: As mentioned above, my go-to masonry primer is the best: Ultra-Spec is the contractor line of paint from Ben Moore and is intended for garage and concrete floor priming.
- Do your cleaning in this order: vacuum, mop, then use a damp cloth for the edges. Flood with a hose and squeeze down a drain is fine, just make sure the drain is not clogged first!
- A wet/dry shop vac really helps to speed the drying. Really sucks up water.
- Try to get all the small bits of dirt: if it gets on your painted floor, it will lead to paint chipping in time. Let the concrete dry completely. High powered fans will help. Also, the floor blower shown has almost perfect ratings and the best price. Two electrical outlets on the side. Nice.
- After cleaning and priming, caulk/fill cracks. Large gaps should not be caulked but filled with special water-tight concrete crack filler, or go for 6 tubes of cement caulk. Caulk needs no priming but crack fillers might. A caulk tube can be used up fast for large cracks. Read my posts on caulk guns etc.
Start painting: the easy part
- Remember that “exterior only” paints should not be used indoors they are very toxic and harmful as they off-gas for months. Read more.
- Open some windows or somehow set up proper ventilation, unless you have VOC-free paint (tints added to VOC free paints make it into non-VOC-free!) Here is our look at VOCs.
- Check your exact product label, but most floor paints specify a 3/8 inch nap roller cover.
- Plan your painting direction: know your final way out (add your own joke on being painted into a corner).
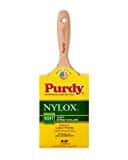
- Cut. Go all around the edges and polls, etc first. On walls, we ALWAYS roll before we brush (cut), but here we never do that. Which brush? Purdy makes a latex-only brush that will last a homeowner a lifetime. At the least, get a wide brush that will not shed bristles (or you will be picking them off the floor while it dries: ick). Don’t spend less than 10 bucks as a rule. How to clean your brush easily.
- Roll: usually we say roller pans suck-use a bucket. Here we say, don’t even use a bucket! Just pour the paint on the floor! Ah, The Dude Abides. Make a puddle and use it as your bucket/pan. It’s so easy.
- In a few hours, the paint will probably be ok to walk on (check can label), but still quite soft so wear socks or check your shoes for little pebbles, etc.)
- Biggest tip: don’t use low-budget roller covers…they shed lint and will totally ruin your work. This shows how trying to save money is very expensive! Keep your paint from making puddles, but apply evenly and fully. The small Purdy roller shown here is an excellent low-cost choice, but a little slow if you don’t care about speed. Great for walls behind toilets and radiators.
- Don’t clean your roller/brush now. Wrap in plastic and only clean after any touch-ups are done. We have written a post on how to easily clean a brush.
- Does it need a 2nd coat? Maybe yes even if you are using the best basement floor paint. Use a bright light to see up close. Often the answer depends on your color choice: grays are great and reds you’re dead. Is there a difference between coverage in the brushing and the rolling? The cut may not need 2 if the rolled section needs two. The paint can instructions tell you how long to wait between coats but don’t wait too long or you will not have good bonding between coats! There are minimum and maximum times for re-coating.
- Is it really dry? Use your fingernail to test how soft it is If it is not dry, wait!
- Lay your blankets out (from the top of this list) and on that carefully place your furniture (maybe lay furniture on flat edges rather than legs to spread out the weight).
- The next day, check that no blanket/padding is sticking. If anything pulls up the fresh paint, you have to touch up.
- More furniture, cut, roll unpainted sections, as above. Don’t be afraid of cleaning roller covers: it’s easy. Summer curing times can be weeks and in wintertime a few months! Treat it gently for a while!

Garage floor paint: good news and bad news. Which one do you want first?
Bad? Why do they always say bad?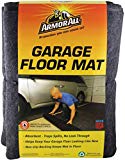
The bad news is that rubber tires will pull up even the best basement floor paint.
A long-lasting choice is, of course, epoxy paint, but you have other options for garage floors like Armor All mats, and the 2-part epoxy (just below) is one.
Epoxy: In paints and coatings, these days you do not have to use a 2-part product, but they are best. The so-called “100% solids” epoxy paint (no evaporation) has a very short working time. I don’t use or recommend “100%-ers”. I like using 2 coats of 50% solids which is the very same result, but the paint has a long working life (“pot-life”, like Willie Nelson) before it cures. 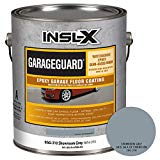 Two-part epoxy “paints” are not true paints. They are coatings, and Garage Guard by Ben Moore is tops in the field. (The image above shows one of 2 cans.)
There is a new product Kilz Concrete Garage Floor Paint—a one-part epoxy, which is a true paint with some epoxy resin for toughness. Sliver-Gray or Slate Gray only. There are other “1-K” epoxies on my main post about garage floor coatings.
Epoxy paint tip: if you use epoxy paint, obviously, follow directions… but they may not tell you: keep your brush and roller strokes in the same direction. … and wear that chemical respirator!
Another 1-K Epoxy: Drylok from UGL is a one-step concrete and/or garage floor paint. It does not need a primer in most cases. Read about alkalinity and primers above. Dryloc is fine going over painted surfaces so you will have fine adhesion. 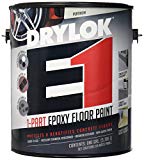 The Dover gray linked here is the most popular color. It’s water-based and covers about 400 sq ft, but with all concrete, expect less for rough surfaces (and/or unprimed slabs).
Most painters and paint store reps generally don’t like the idea of clear coating floor paints as most paints do just fine alone. If you use a clear-coat then the next time you do the floor, you are going over layers of unlike things. It’s ok, but we all hate scraping and would expect more prep with more layers.
Bonus garage idea:
Floor mats that park you in the same spot everytime. Take off the ping-pong ball hanging from the ceiling: if you know what I mean.
The video below by a painter a.k.a. ‘tradie’ from down under knows what he’s doing. I would have spot primed between coats, but he’s bloody ripper…ta, mate.
* Warning for muriatic acid: “This product can expose you to chemicals which is [are] known to the State of California to cause cancer and birth defects or other reproductive harm. For more information go to www.P65Warnings.ca.gov.”
Related:
Best Floor Paint: Only 1 Coat!
Painting Plywood: Supplies, and How-To in 5 Steps
Video: painting with the best basement floor paint:

My concrete basement floor was painted by the previous owner. I believe it is a dry-lok kind of paint. It’s a very flat, gritty (not satin or semi-gloss) finish and not washable at all. I want to repaint the floor with a paint that will be easy to wash and won’t show the dirt tracks. What paint would you recommend and what color is best to show the least amount of foot tracks?
I’d use some sort of 2-color project like you see in this post: stencils work great (see the bottom of that post) and so does decorative flakes on this page. The flakes are mostly used in epoxy for garages and some basement concrete. It’s very tough.
Or, just keep touching up, which is what most people do.
Good luck!
B
Why do you say the INSL-X products are a Benjamin Moore product? From what I can see they are two completely different products.
Insl-x is owned by BM. Here is the link from 2007. I don’t know why they don’t call it B Moore… seems that that is an older trademark, therefore, better?… maybe it’s more for contractors? It’s all very top quality.
B
I read your post about chemical floor prep. I’m painting a concrete basement floor that’s never been touched (30 yrs). It in very good shape, no abuse. Is it necessary to acid etch the floor or just give it a really good cleaning (wash and dry)?
I cannot tell unless I see it. If it has the texture of 80 grit sandpaper or so, I’d guess not. You should really call a pro for an estimate and he’ll know. We get calls all the time when people are really doing it themselves…but that’s ok because eventually people doing this call us in for something else. Find an older painter 50+ or over 40 at least.
Good luck!
What paint?
The safe best is ToughShield from Ben Moore. Free ship. Good luck.
Do you have a suggestion for painting a concrete gym floor?
Yes, it’s easy if your floor is in good shape. If you read the post on how to Paint a Garage Floor, it explains the process.
After you read, let me know if anything is not clear. IT’s a new post and I think I nailed it, but I’ll count on your feedback and answer any questions!
Good luck.
Ps the paints I’d use are in the Garage Floor Paint post.
I’m waiting to paint my concrete floor in the basement but I also want to paint some stencils over the top because it’s going to be a functional room. Once I’ve used a good concrete paint would you say I could paint over the top with standard floor paint? I want to use a few different colours and I already have a couple from a different project.
Concrete is tricky to paint: the surface must be properly prepared, and then you would want a very durable paint as to re-paint it later can be a big mess if it starts flaking. Generally though, if it is done right, it will last for many years of use. In the post above are the steps to ‘etch’ the concrete if it is smooth or new: this creates a non-smooth surface and removes the calcium sulfate… you have to rinse the acid well ( a few times). I like the Benjamin Moore 2-part epoxy paint for garages, GarageGuard, but it does not come in many colors…but it does come with color flakes you toss in the air over it while it’s wet. Very nice idea. Perfectly suitable for indoors, but there is a stronger smell than some modern paints…but you won’t be repainting anytime soon. With your existing paints, we cannot say how long it will last. To me, color takes a back seat to long life. Also, have a look at Sure Step by B.Moore as is Tough Shield… both will really last. I don’t have experience with many other floor paints as I’ve heard too many horror stories! Good luck.
–b
Brad, thank you so much for the advice! When you sand it, do you mean sand off the entire paint job or sand lightly to buff the lint? Also, my particular site is concrete slab. Would you recommend a microfiber roller or simply a quality roller?
Hi again. Microfiber holds less paint per dip, but it would be fine. I know you’ll choose a quality one!
I’d sand a section, re-paint, and see if I can live with it. If not, do another section,sanding more. If it is fresh, it may be too soft to sand. You might have to let it harden…Warmer weather coming will help. Thanks for the photo!

Brad
So, after researching tons I didn’t come across the tip about the roller cover quality until now, when I’m researching how to fix the lint in my paint job. Any suggestions on how to fix it? Porch and floor poly eurothane gloss.
Hi. Those companies suck. Why make crappy tools that hurt others? Anyway, you have to sand it off…so sorry to tell you.
If you send a pic to my email address, I’ll post here –I’ll block personal info, faces— I’d like to show people what can happen with budget rollers… if you can…
So… my advice:
Rent a floor sander from Home Depot or some place..or just go on hands and knees. Look at the tool list post here for good knee pads: for cleaning the house too… I use mine all the time even now in retirement.
So after sanding, if wood use oil primer then Ben Moore deck paint. your paint store will have suggestions too… I hope you have BM or Sherwin W store nearby…others… meh, lower quality. Don’t trust Home Depot paint dept: but the products they have are generally ok.
ps, get a 2nd roller cover if you do oil primer: we don’t clean oil rollers…ick